...
We start with a simple overview of the migration path. With the Column Order Gadget Migration it is possible to migrate the configured gadgets one-by-one:
...
⬇
...
Steps
...
| title | Migration Path Description Video |
|---|
This video will show you all the steps necessary to migrate your Column Order Gadgets to your Cloud instance. All steps shown in the video are also documented below.
...
| Expand |
|---|
| title | Migration Path Description |
|---|
|
Go to the Server gadget and open the configuration view. Starting with Version 8.3.4 of the Column Order Gadget Plugin, you can now see the “Export config” button (highlighted with the red border). 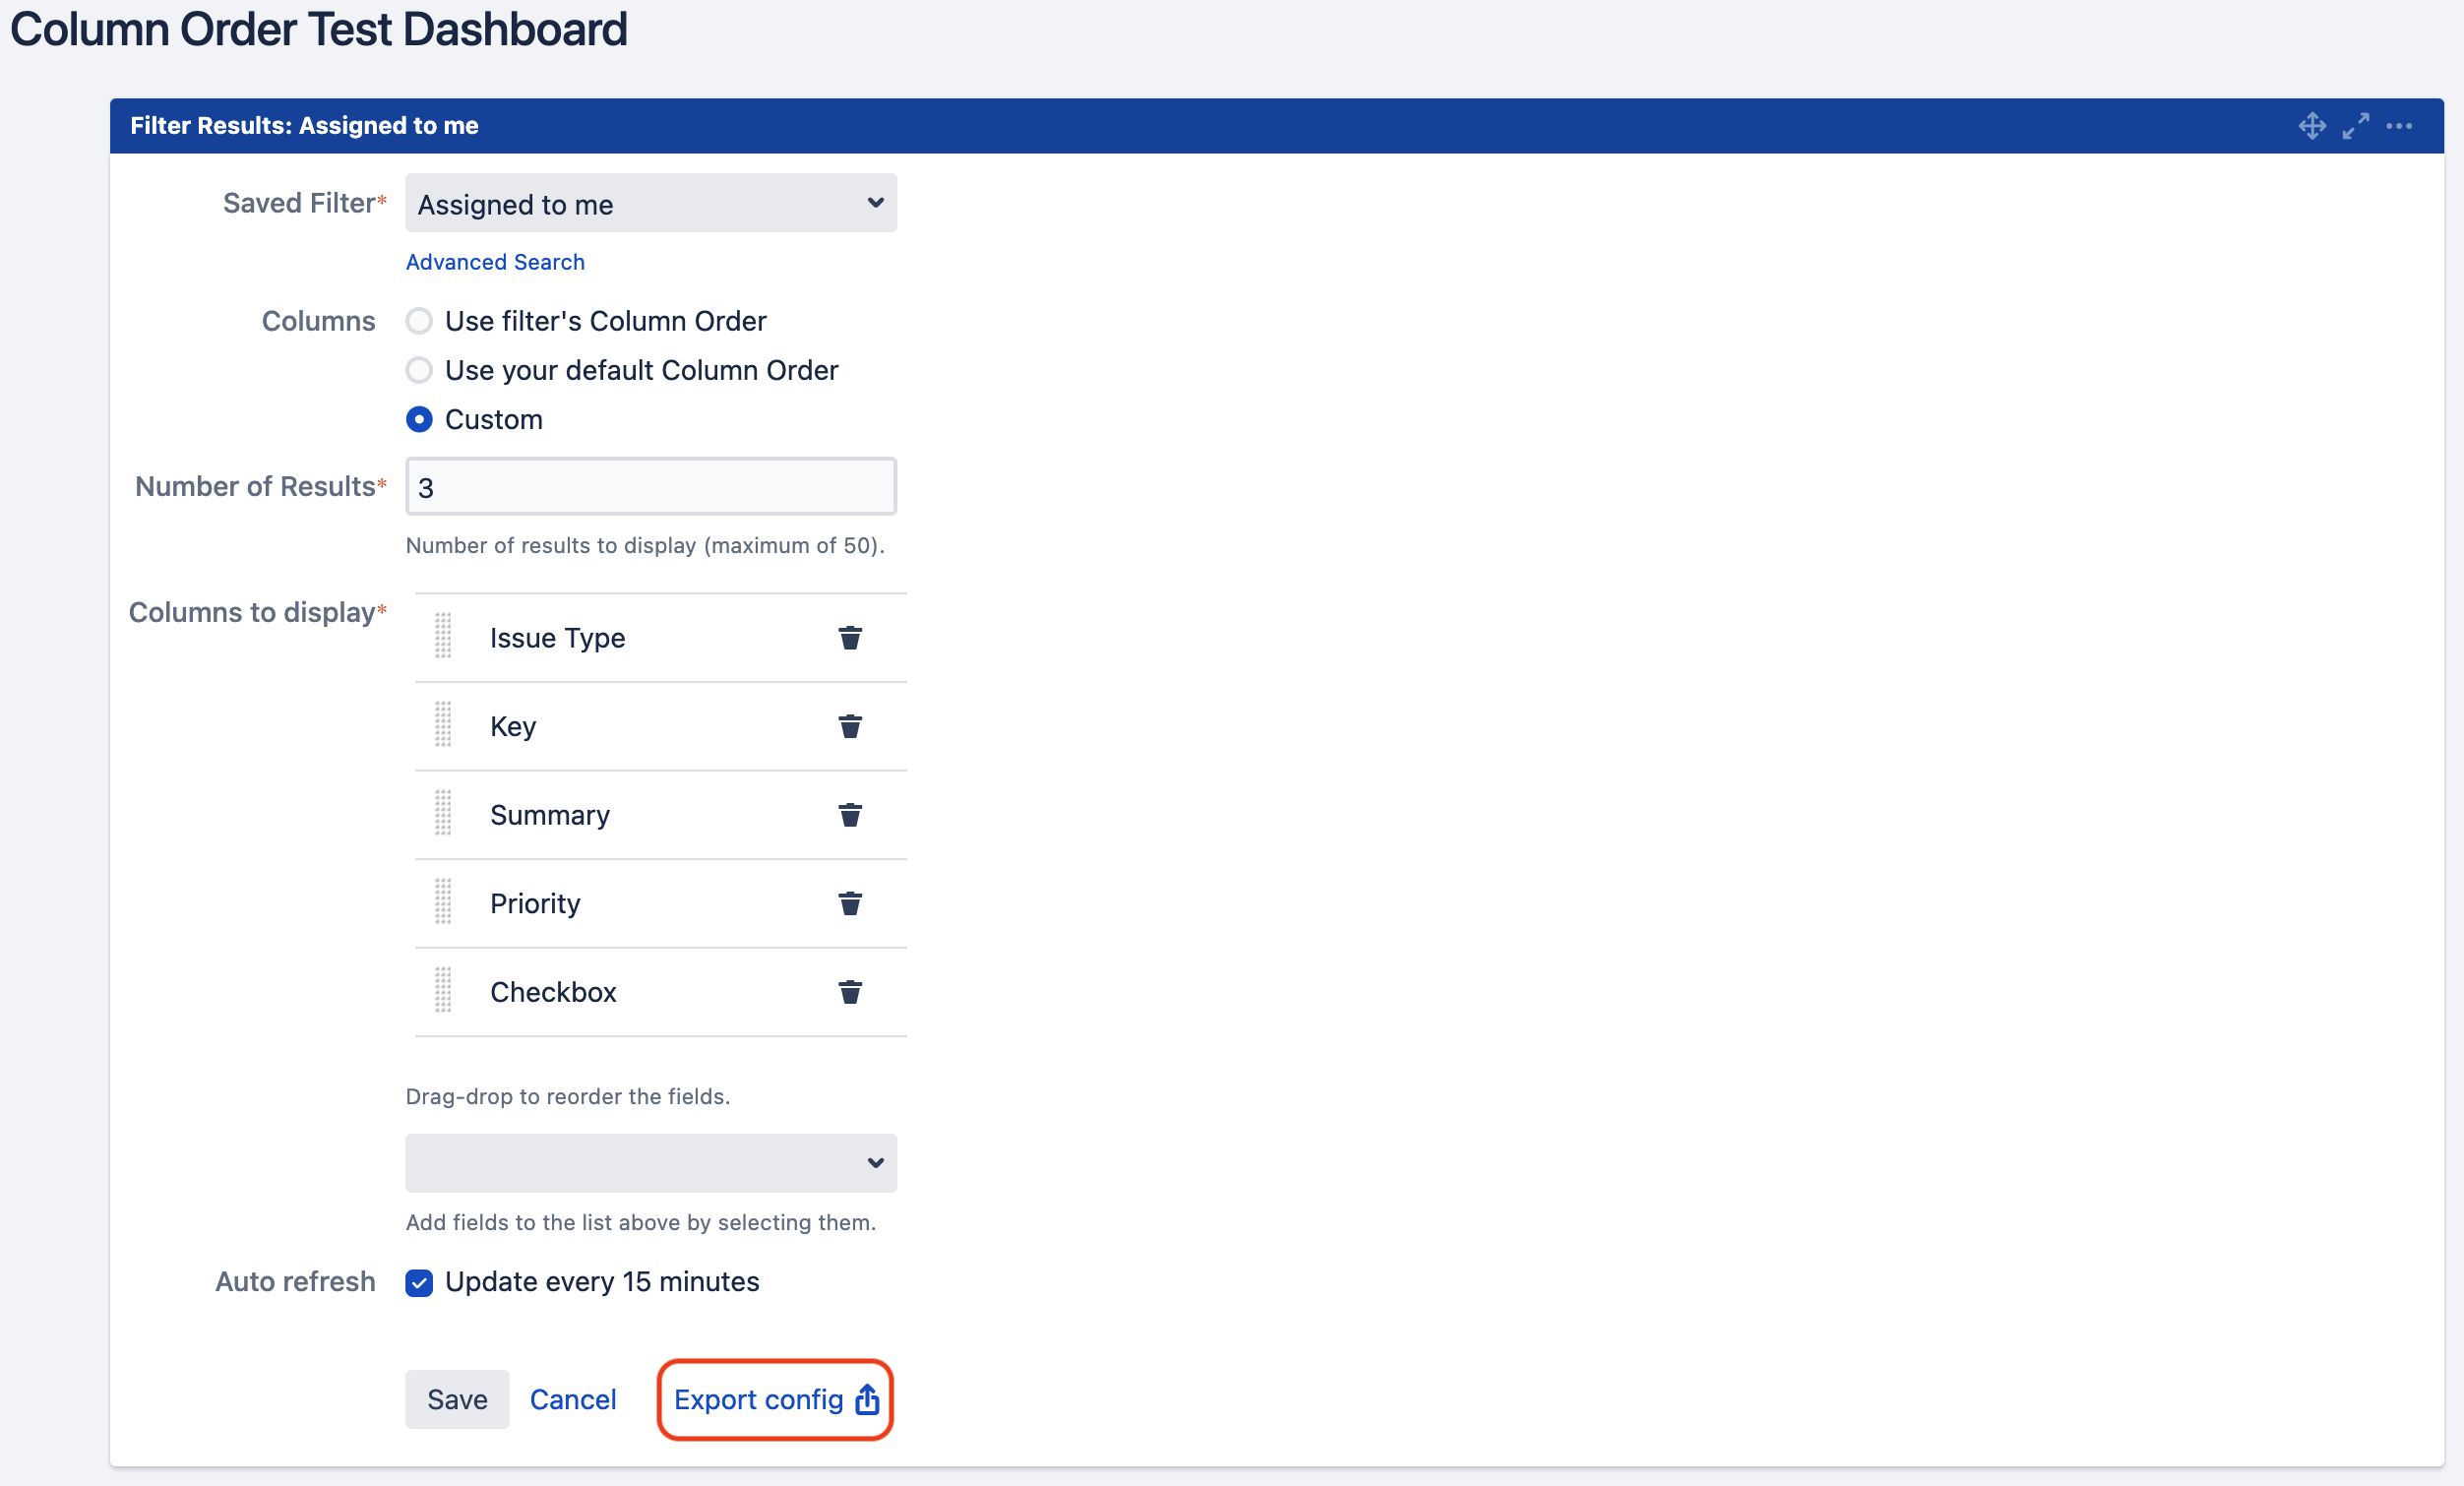 Image Modified Image ModifiedClick the “Export config” Button. This will store the configuration in your local clipboard. Now, go to the Cloud instance and create a new Column Order Gadget in the desired dashboard’s edit view. Here, you can see the “Import config” button (highlighted with the red border). Click it. 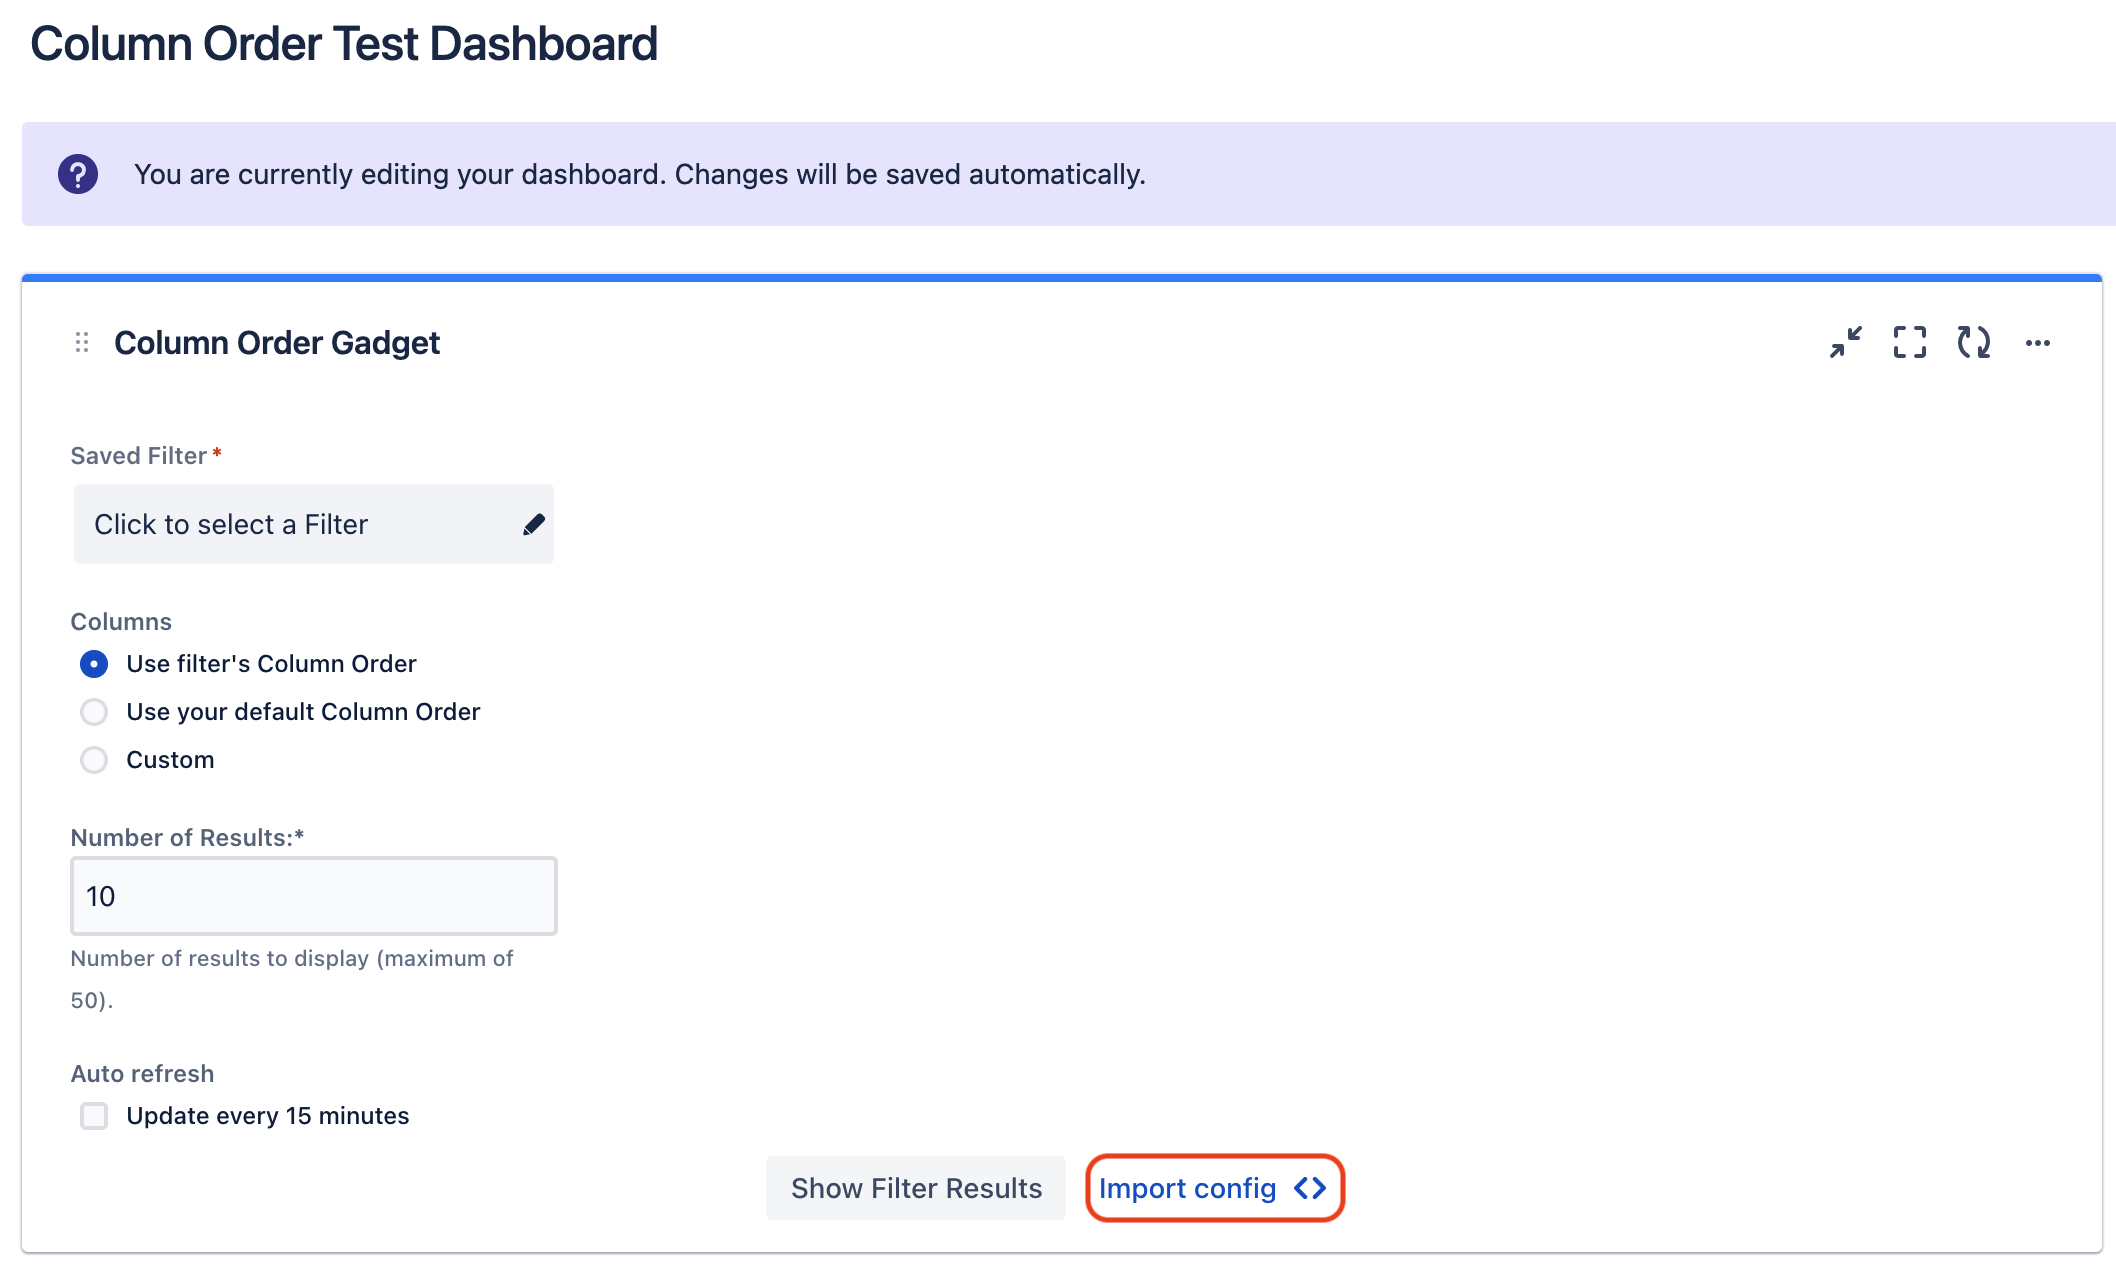 Image Modified Image ModifiedThis will bring up an input field for the configuration import. 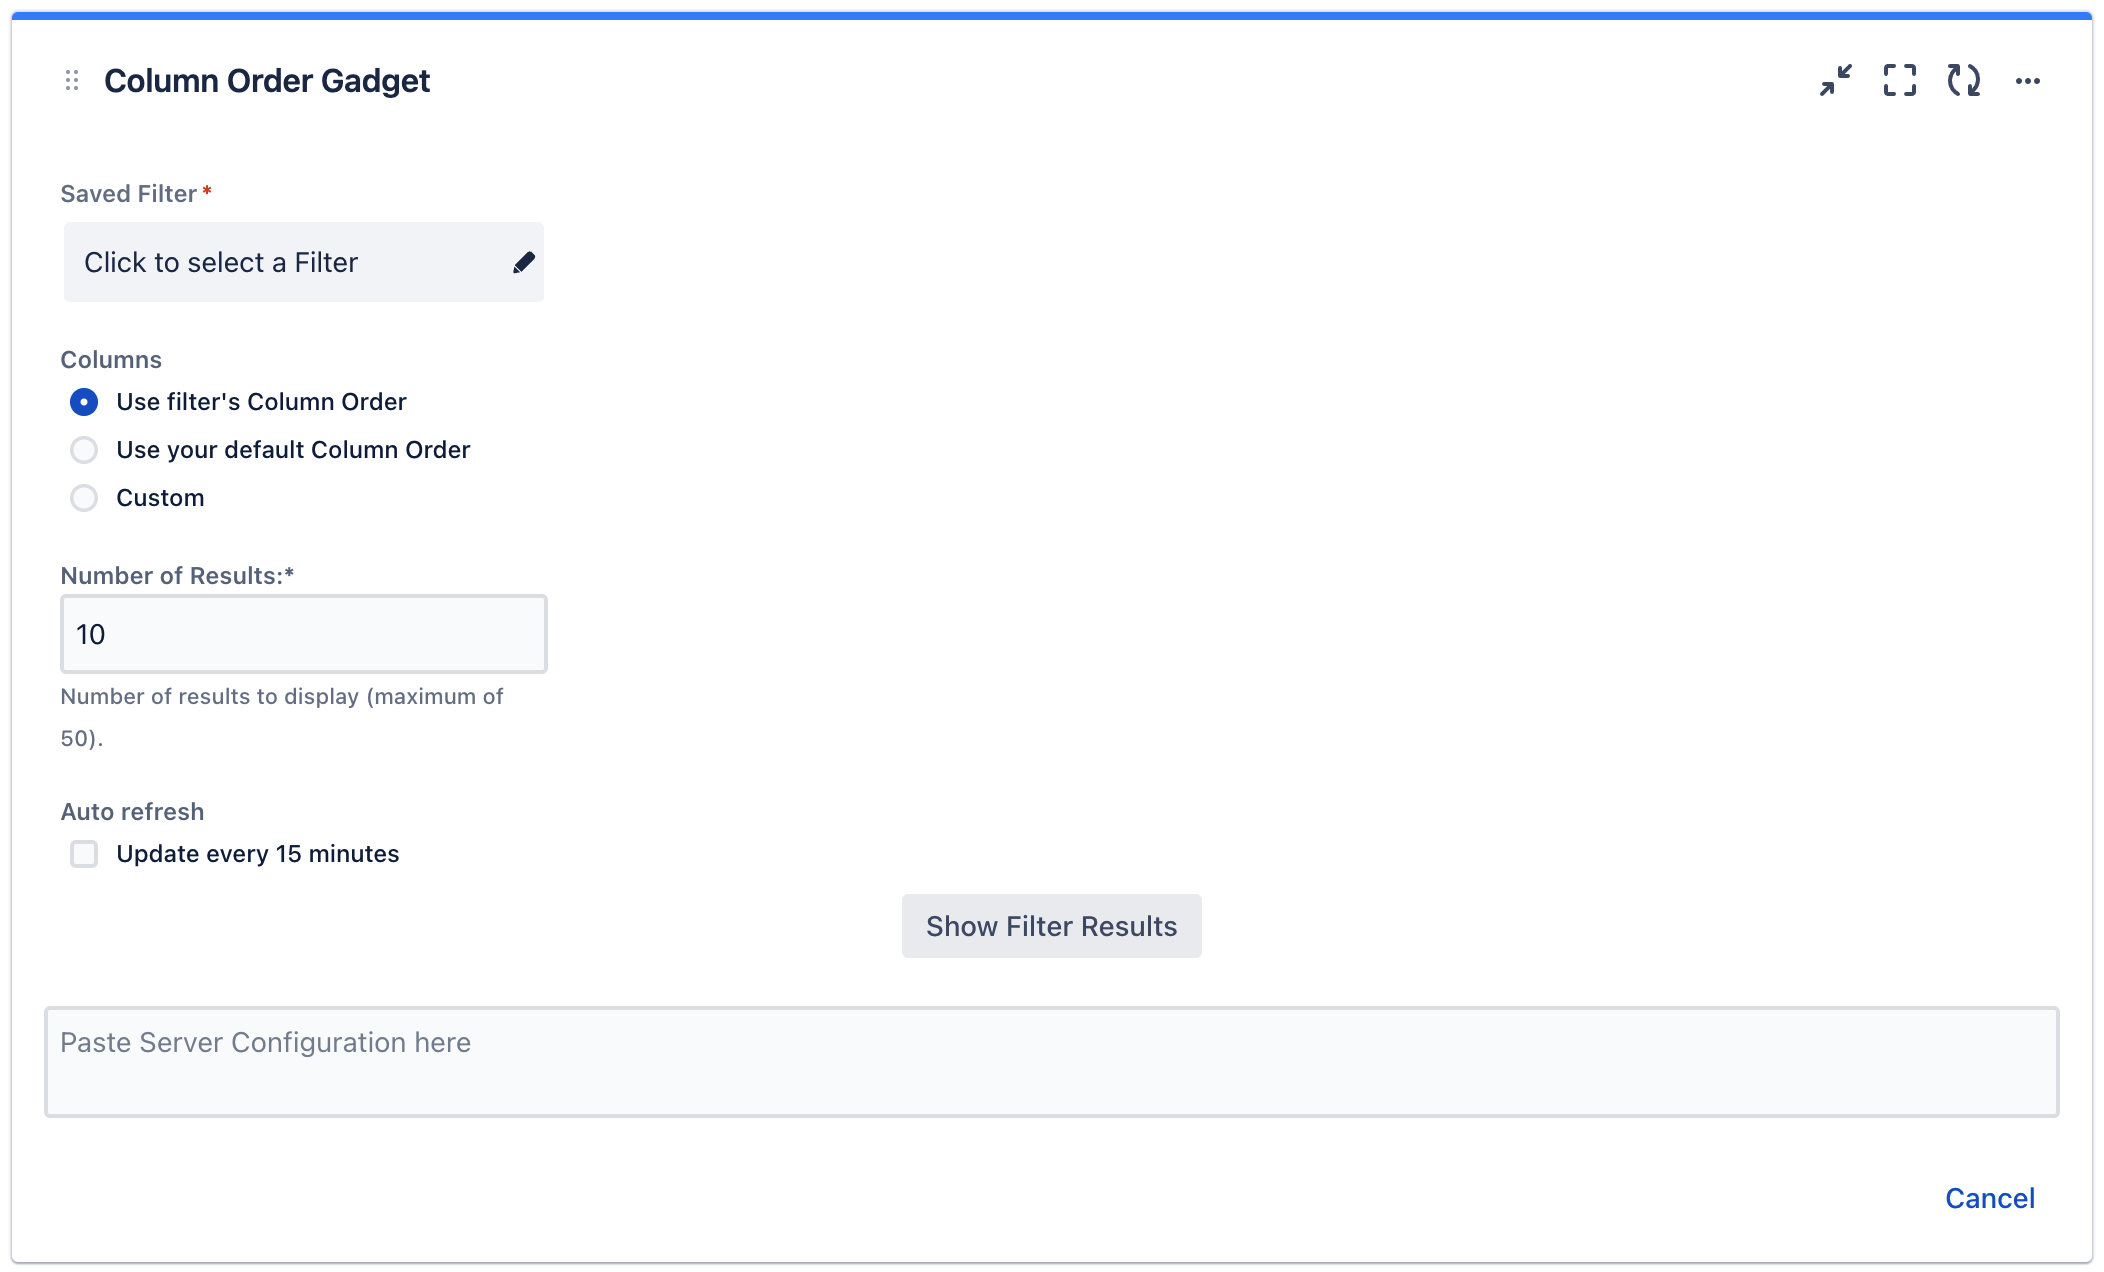 Image Modified Image ModifiedGo click inside this field and paste the exported configuration from the server plugin using Ctrl/Cmd+V. Now, all fields should be automatically configured, except the “Saved Filter” field. There are two different possibilities for this field: If your cloud instance already has a filter with the same name and JQL as the one used in the server gadget, then this field is also configured out of the box and the migration is complete. Please continue with Step 8. The filter used in the server gadget does not yet exist in the cloud instance. This means, we need to create it now. Therefore, you can use the button shown in the information field that showed up. Click it. 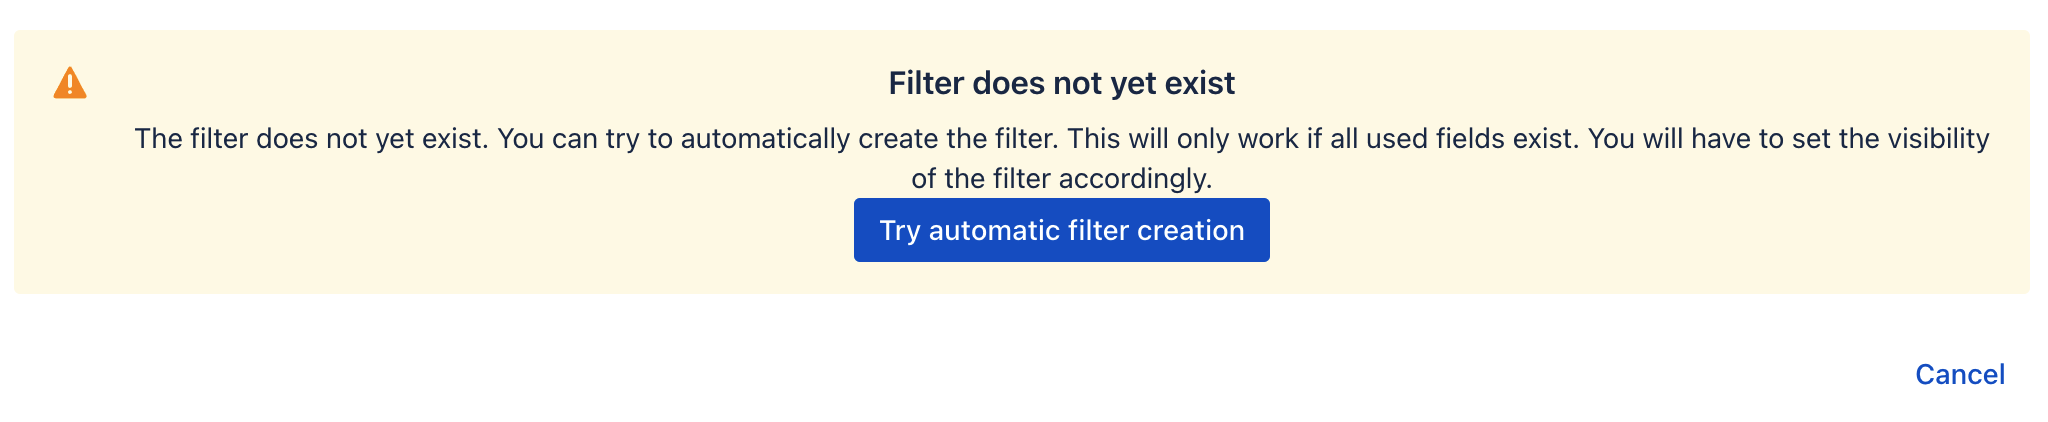 Image Modified Image ModifiedThe filter is automatically created and selected, if the JQL is valid in your cloud instance (i.e. all used fields, custom fields and methods exist). However, The filter is created as private filter for the user who imported configuration. You need to configure the visibility of the filter yourself afterwards. If the automatic creation is not successful, you can manually create and share the filter by clicking on the corresponding button. Afterwards, you need to manually select the created filter.
|
...
 Image Added Image Added
As last step, you can use the “Show filter results” button to test the configuration. 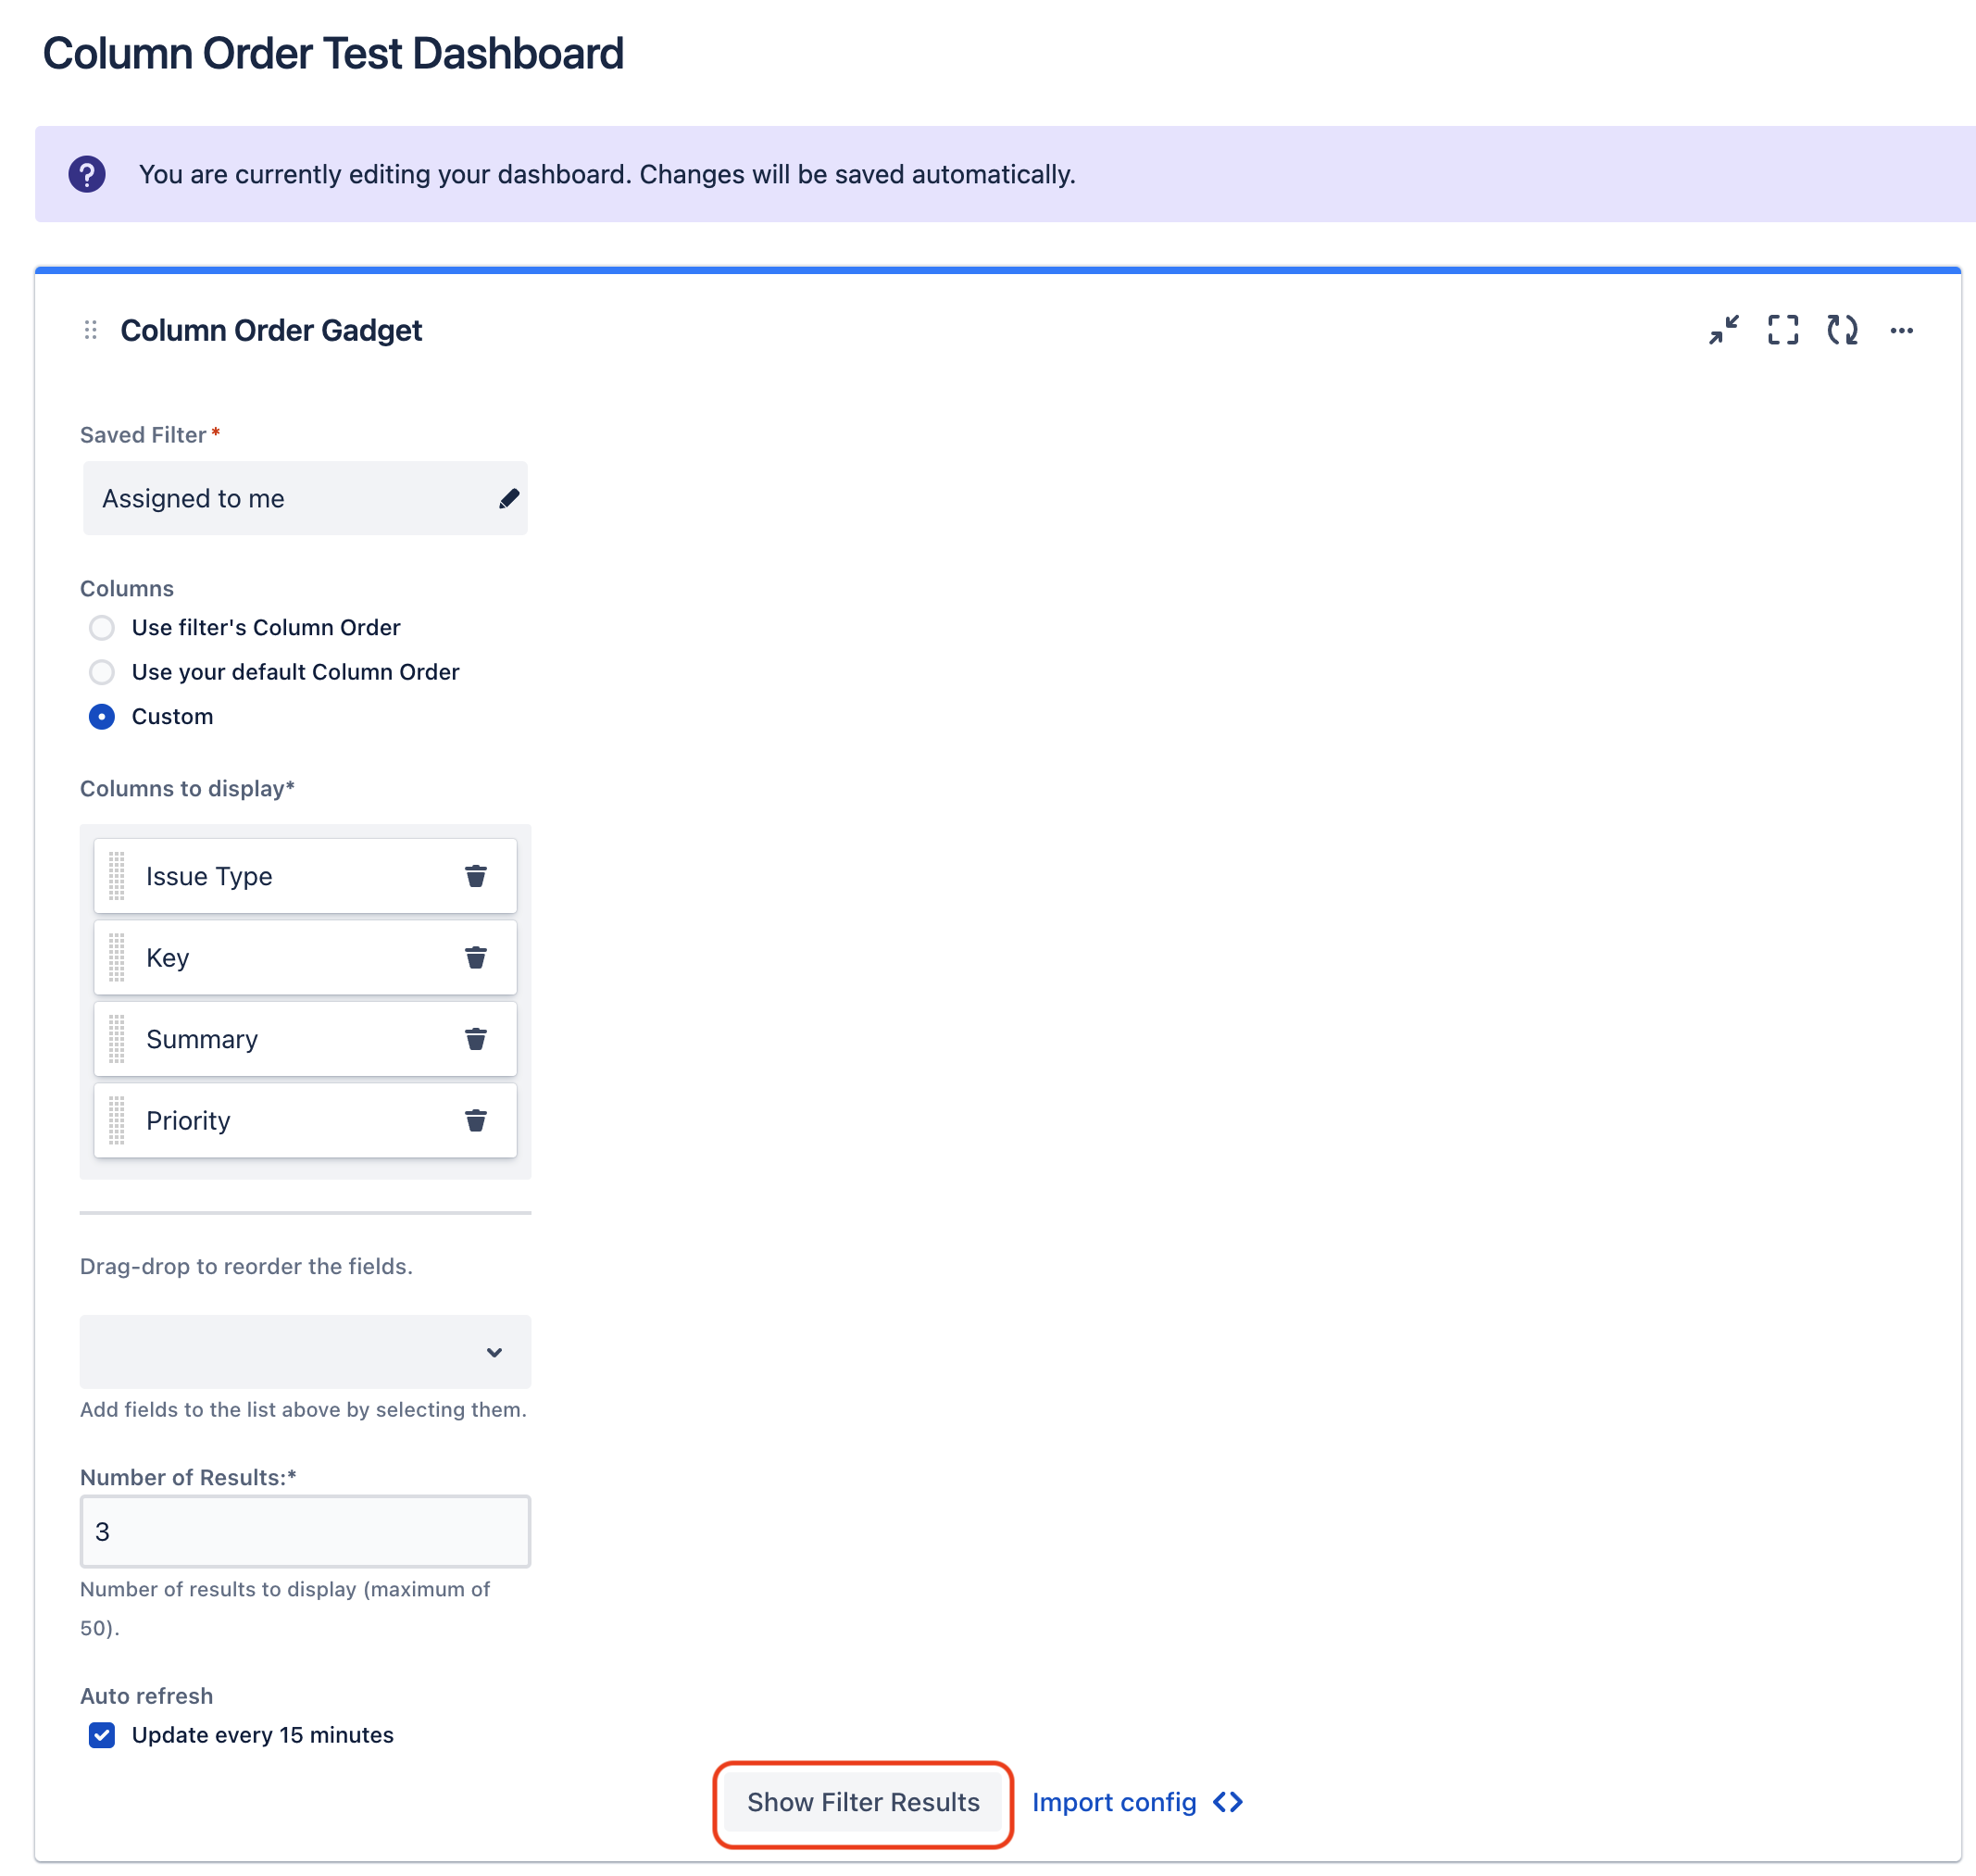 Image Modified Image Modified
|
Limitations
As already mentioned in Step 7, it is not possible to automatically create each filter that was used in your server instance.
Furthermore, it is also not possible to set the correct visibility on automatic filter creation. You have to do this manually after the filter is created.
The filter’s column ordering is not migrated. This means, You have to configure it manually in case you are using “Use filter's Column Order” Option for the column ordering.
Also, if you use a custom field and the custom field id from the server instance does not match the custom field id in the cloud instance, the view for this field does not contain useful content. The same is true, if the custom field does not exist in the cloud instance. Hence, you will have to delete the entry for such custom fields in the custom order configuration and newly add it, using the dropdown field in the configuration view.
...