Features
Convert images and videos to your preferred resolution and modern format
Drag and drop interface for converting media files
Remote fast central conversion process using FFmpeg and ImageMagick
Installation quick guide
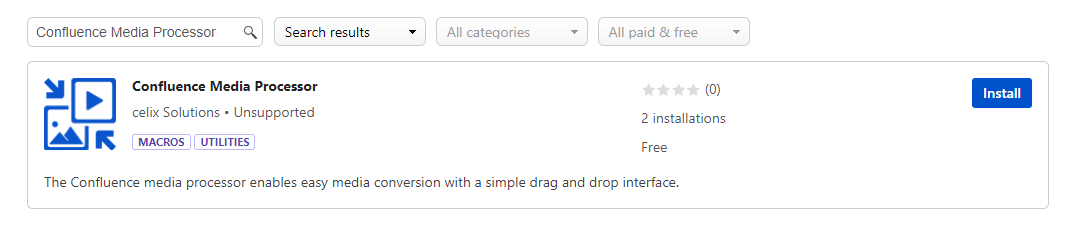
1. Download the Confluence Media Processor in Confluence
Minimum compatible Confluence version: see marketplace information for your specific Confluence Media Processor version
Click on the cog icon
Go to “Manage Apps”
Go to “Find new Apps”
Enter “Confluence Media Processor“ and click on install
2. Install requirements
(Contact your server administrator to install FFmpeg and ImageMagick on the Confluence Server, if you have no access rights to it.)
IMPORTANT:Theses two binaries have to be installed on every node on the same path if you are using Confluence Data Center!
How to install FFmpeg
How to install it on Ubuntu 18.04 or Ubuntu 20.04:
Run
sudo apt-get updateRun
sudo apt-get install ffmpegRun
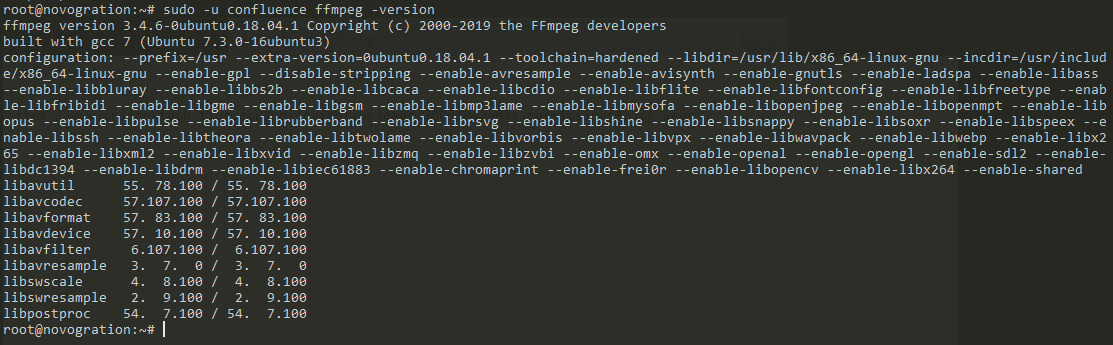
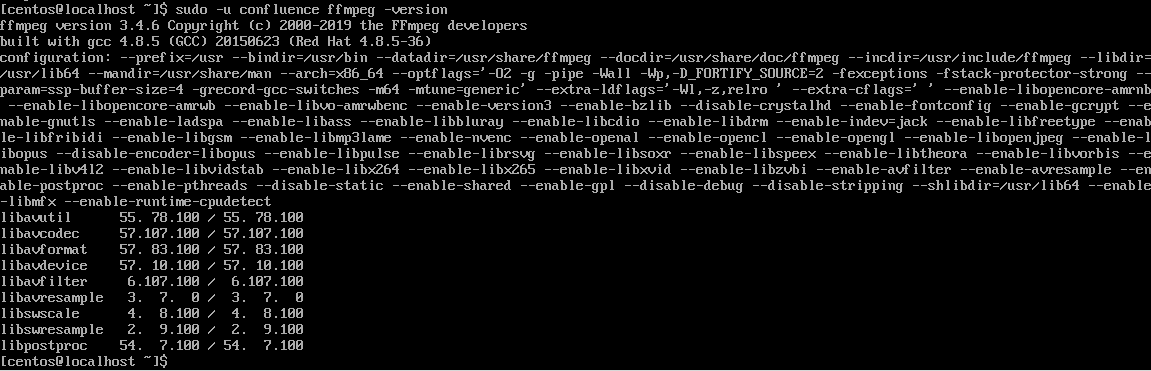
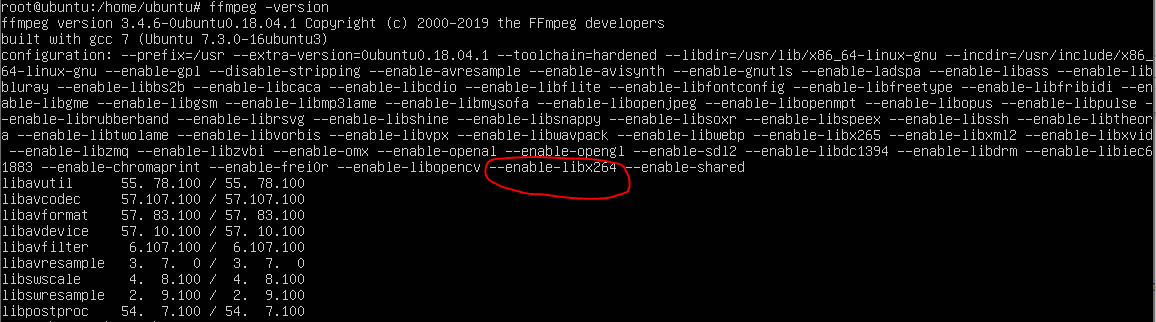
sudo -u confluence ffmpeg -versionwhere 'confluence' is the service user for your confluence installationIf it looks like this, you are finished:
Type
which ffmpeg(normally this returns/usr/bin/ffmpeg) and note this path, you need it later.
How to install it on Windows Server:
Download https://www.gyan.dev/ffmpeg/builds/ffmpeg-release-full.7z
Extract it to
YOUR_INSTALL_DIR\ffmpeg-4.4-full_buildwheree.g. YOUR_INSTALL_DIR = C:\Program FilesMake sure the executing user of confluence can read this directory (Username is usually confluence).
You can add the executing user of confluence to the directory ACL by right-click and properties on the directory
ffmpeg-4.4-full_buildClick on edit:

Click on add:

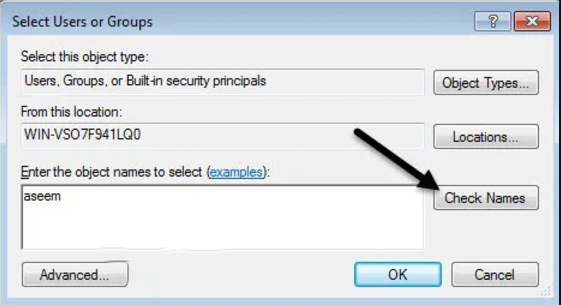
Type the execution user of confluence and click on “Check Names”
Click on ok.
Note the path
YOUR_INSTALL_DIR\ffmpeg-4.4-full_build\bin\ffmpeg.exe
How to install it on CentOS 7 or CentOS 8:
Run
cd /optGo to https://johnvansickle.com/ffmpeg/ and download the latest release for you cpu architecture. E.g. run
sudo wget https://johnvansickle.com/ffmpeg/releases/ffmpeg-release-amd64-static.tar.xzfor amd64/x86_64 architectures. You can find your architecture running the commanduname -aDownload the corresponding MD5 file. E.g. run
sudo wget https://johnvansickle.com/ffmpeg/releases/ffmpeg-release-amd64-static.tar.xz.md5Verify your download with
md5sum -c ffmpeg-release-amd64-static.tar.xz.md5Untar the ffmpeg build with
sudo tar xvf ffmpeg*.xzRun
cd ffmpeg-*-staticCreate symlinks to one of your binary paths. E.g
sudo ln -s "${PWD}/ffmpeg" /usr/bin/Run
sudo -u confluence ffmpeg -versionwhere 'confluence' is the service user for your confluence installationIf it looks like this, you are finished:
Type
which ffmpeg(normally this returns/usr/bin/ffmpeg) and note this path, you need it later.
How to install ImageMagick
HEIF Support: Note that ImageMagick on Linux systems does not automatically support HEIF encoded files. If you need to convert images or videos of this format you have to build ImageMagick from source with the corresponding flag to use heic. In case you have any troubles doing that, please contact us at support@celix.at.
How to install it on Ubuntu 18.04 or Ubuntu 20.04:
Run
sudo apt-get updateRun
sudo apt-get install imagemagickRun
sudo -u confluence convert -versionwhere 'confluence' is the service user for your confluence installationIf it looks like this, you are finished:

Type
which convert(normally this returns/usr/bin/convert) and note this path, you need it later.
How to install it on Windows Server:
Extract it to
C:\Program Files\ImageMagick-7.1.0-portable-Q16-x64Make sure the executing user of confluence can read this directory (Username is usually confluence).
You can add the executing user of confluence to the directory ACL by right-click and properties on the directory
ImageMagick-7.1.0-portable-Q16-x64Click on edit:
Click on add:
Type the execution user of confluence and click on “Check Names”
Click on ok.
Note the path
C:\Program Files\ImageMagick-7.1.0-portable-Q16-x64\convert.exe
How to install it on CentOS 7:
sudo yum updatesudo yum install ImageMagickRun
sudo -u confluence convert -versionwhere 'confluence' is the service user for your confluence installationIf it looks like this, you are finished:

Type
which convert(normally this returns/urs/bin/convert) and note this path, you need it later.
How to install it on CentOS 8:
dnf install -y epel-releasednf install -y ImageMagickRun
sudo -u confluence convert -versionwhere 'confluence' is the service user for your confluence installationIf it looks like this, you are finished:
Type
which convert(normally this returns/usr/bin/convert) and note this path, you need it later.
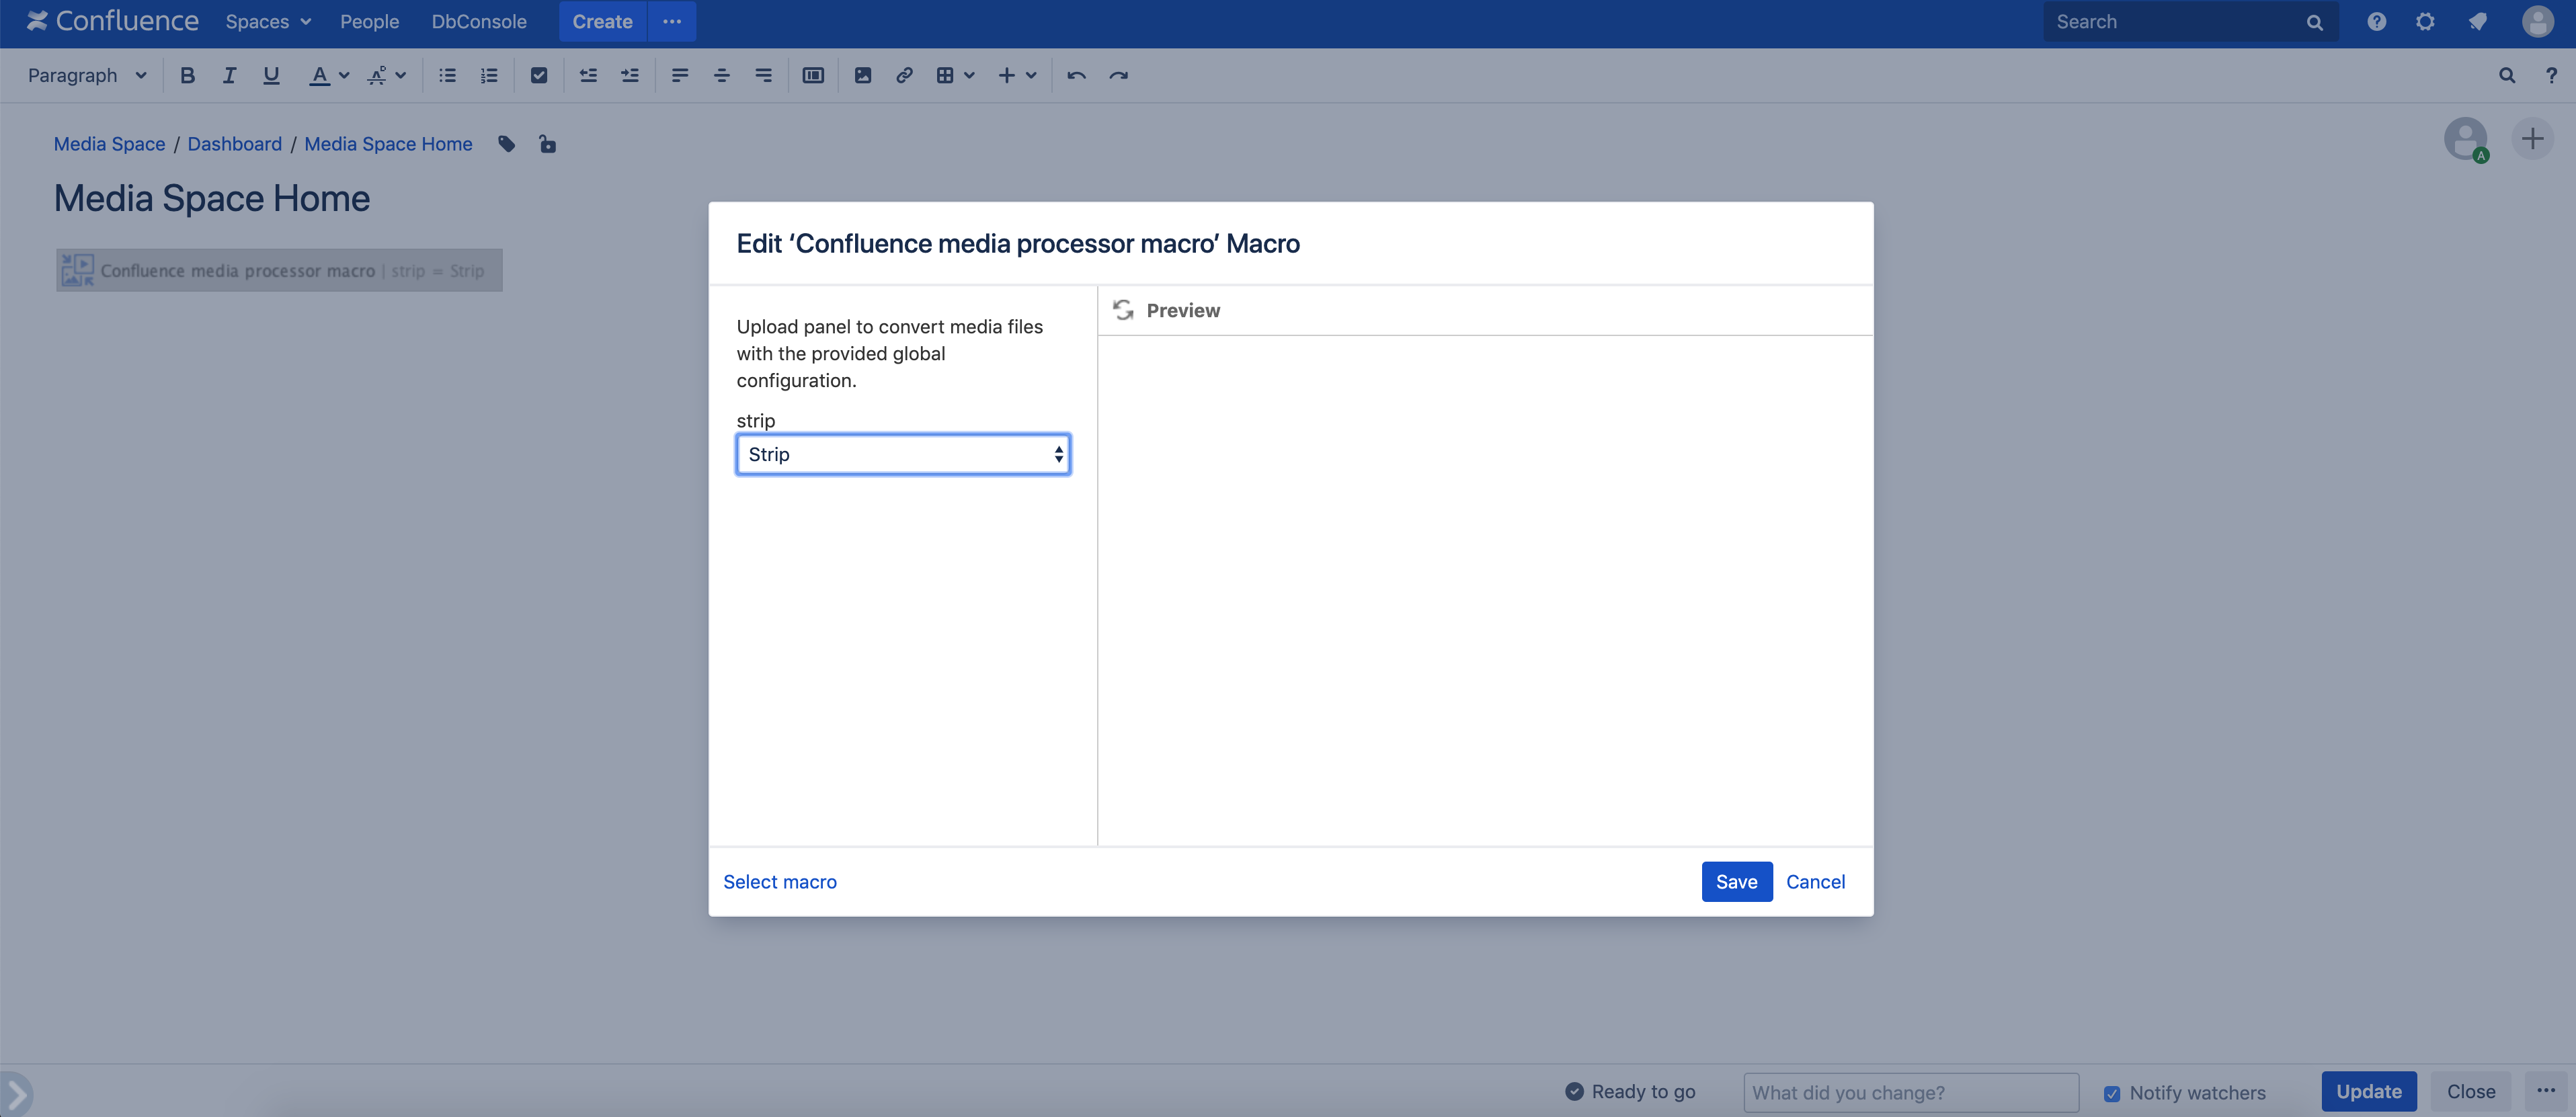
3. Configure the add-on
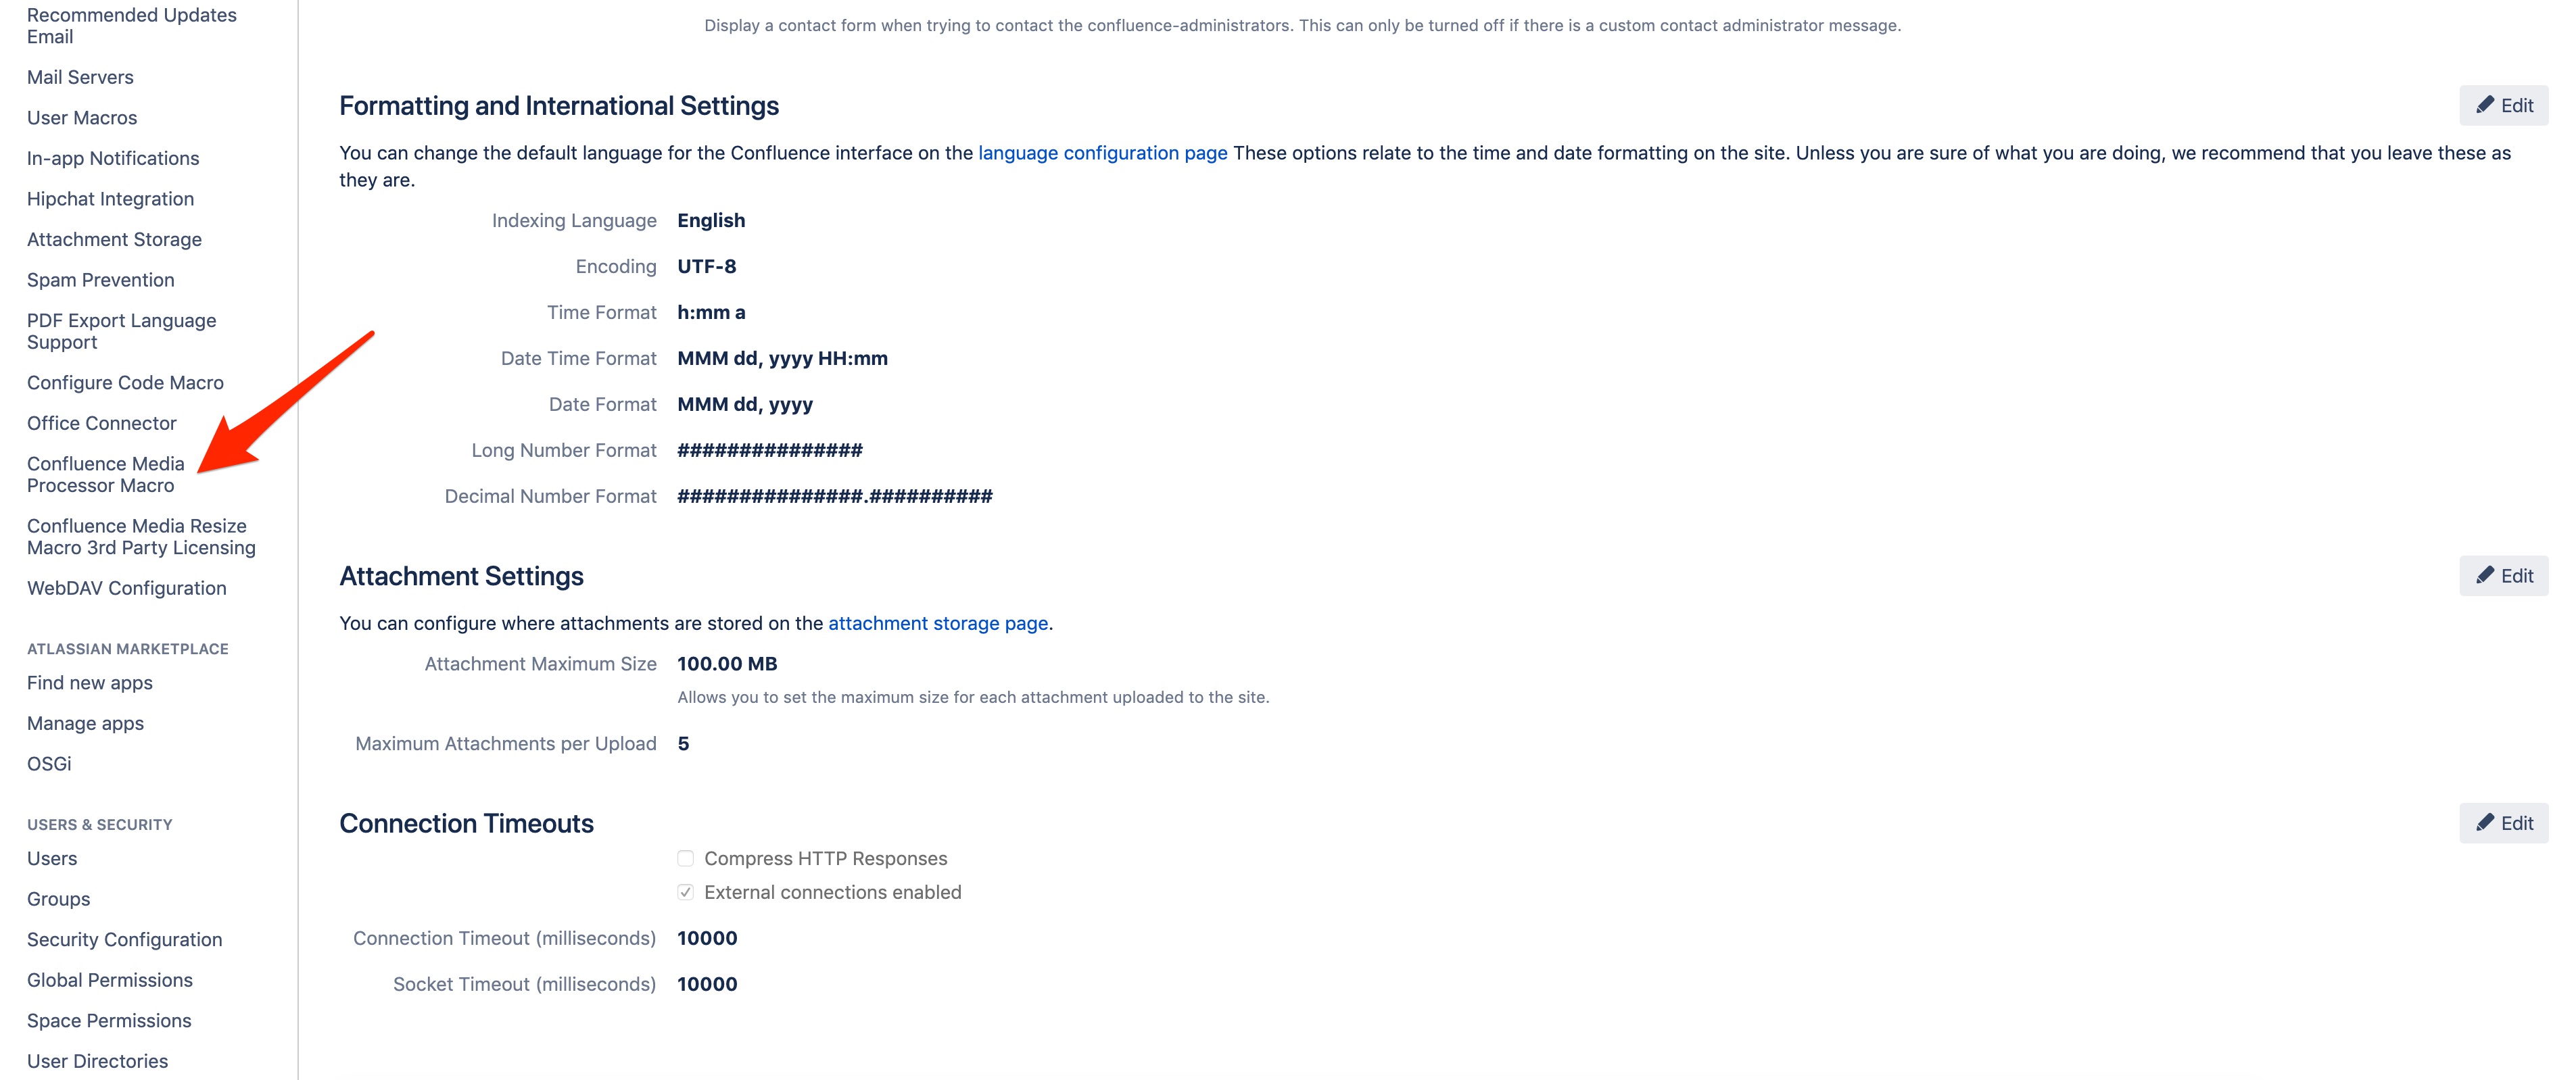
After installation of the plugin and prerequisites, go to the Add-ons section and find the Confluence Media Processor Macro Link
Enter your global configuration settings, these will be used to convert all the media in the macro. Here you can define:
The absolute path to FFmpeg and ImageMagick (used for the conversion process) - use previous determined paths.
The maximum video height (to which all videos will be converted to).
The length of the lon
gest image edge (the length of the edge above which images should be scaled down to).Whether to remove metadata from the media files during conversion.
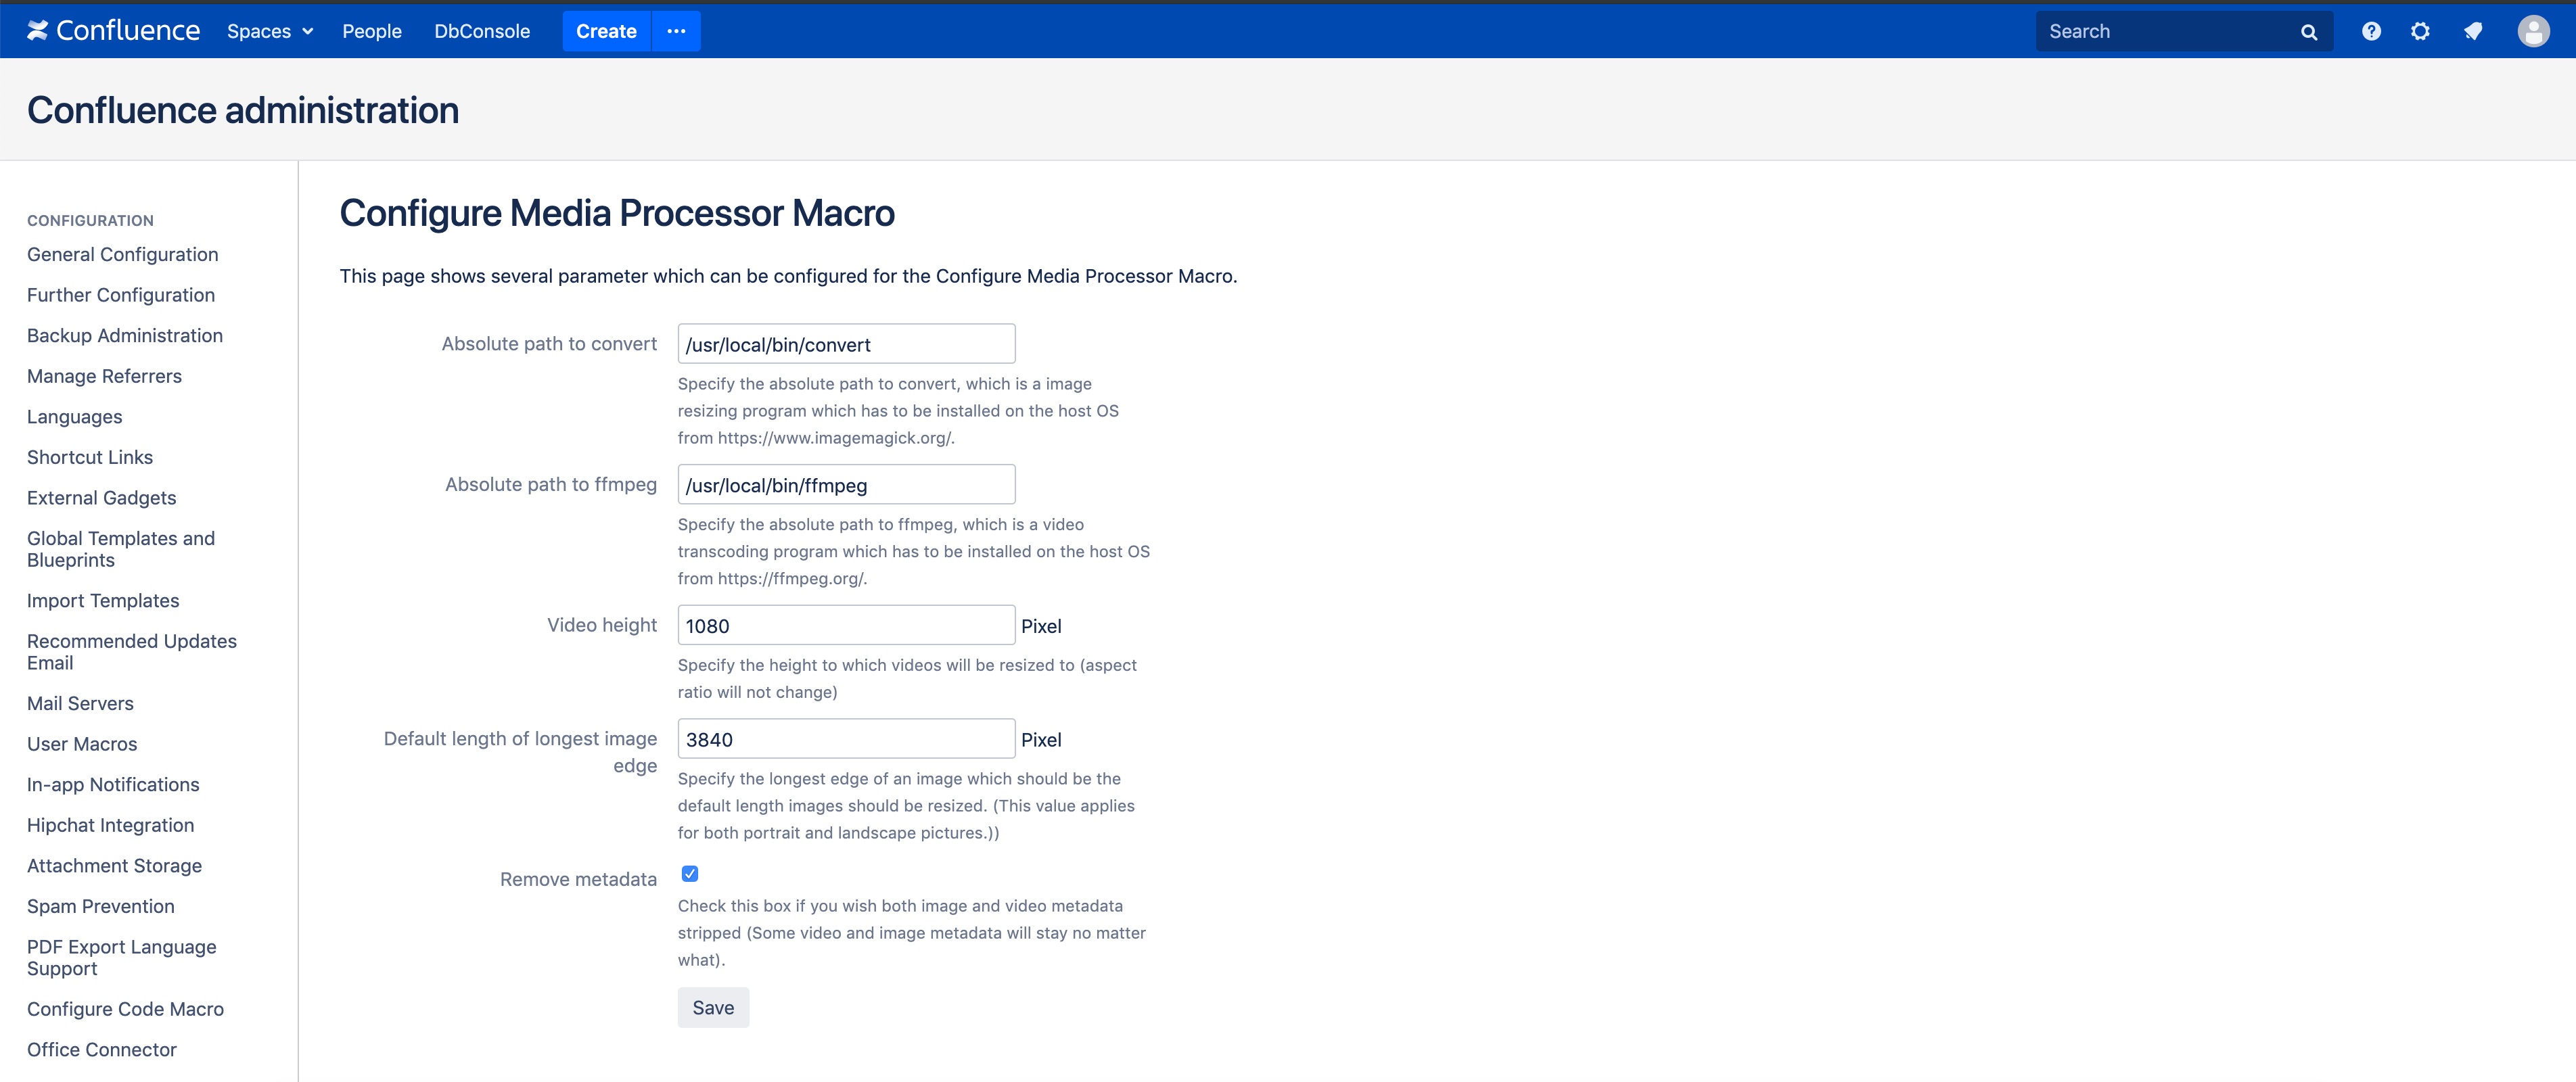
Click on save.
4. Installation finished
Further information for Prerequisites
FFmpeg - we recommend using version 3.4.x and install it via package manager (apt, yum, etc.) or downloading a static build version
ImageMagick - we recommend using version 6.7+ and install using a package manager or download a portable version from ImageMagick
Individual media files cannot exceed the maximum attachment size, otherwise you will not be able to upload them.
Make sure both work correctly where Confluence is running before attempting to use the Add-on.
Verified prerequisites
Windows Server 2016 | Ubuntu 18.04 | CentOS 7 | |
|---|---|---|---|
ImageMagick | Tested Version
| Tested Version
| Tested Version
|
FFmpeg | Tested Version
| Tested Version
| Tested Version
|
Compiling from Source
We do not recommend that but, feel free to compile ImageMagick or FFmpeg from Source if you need that.
You have to ensure that the delegates for ImageMagick contain at least jpeg and png and that at least the libx264 library is enabled in FFmpeg.
.png?version=1&modificationDate=1566903002402&cacheVersion=1&api=v2)
Usage in Confluence 6.15.X
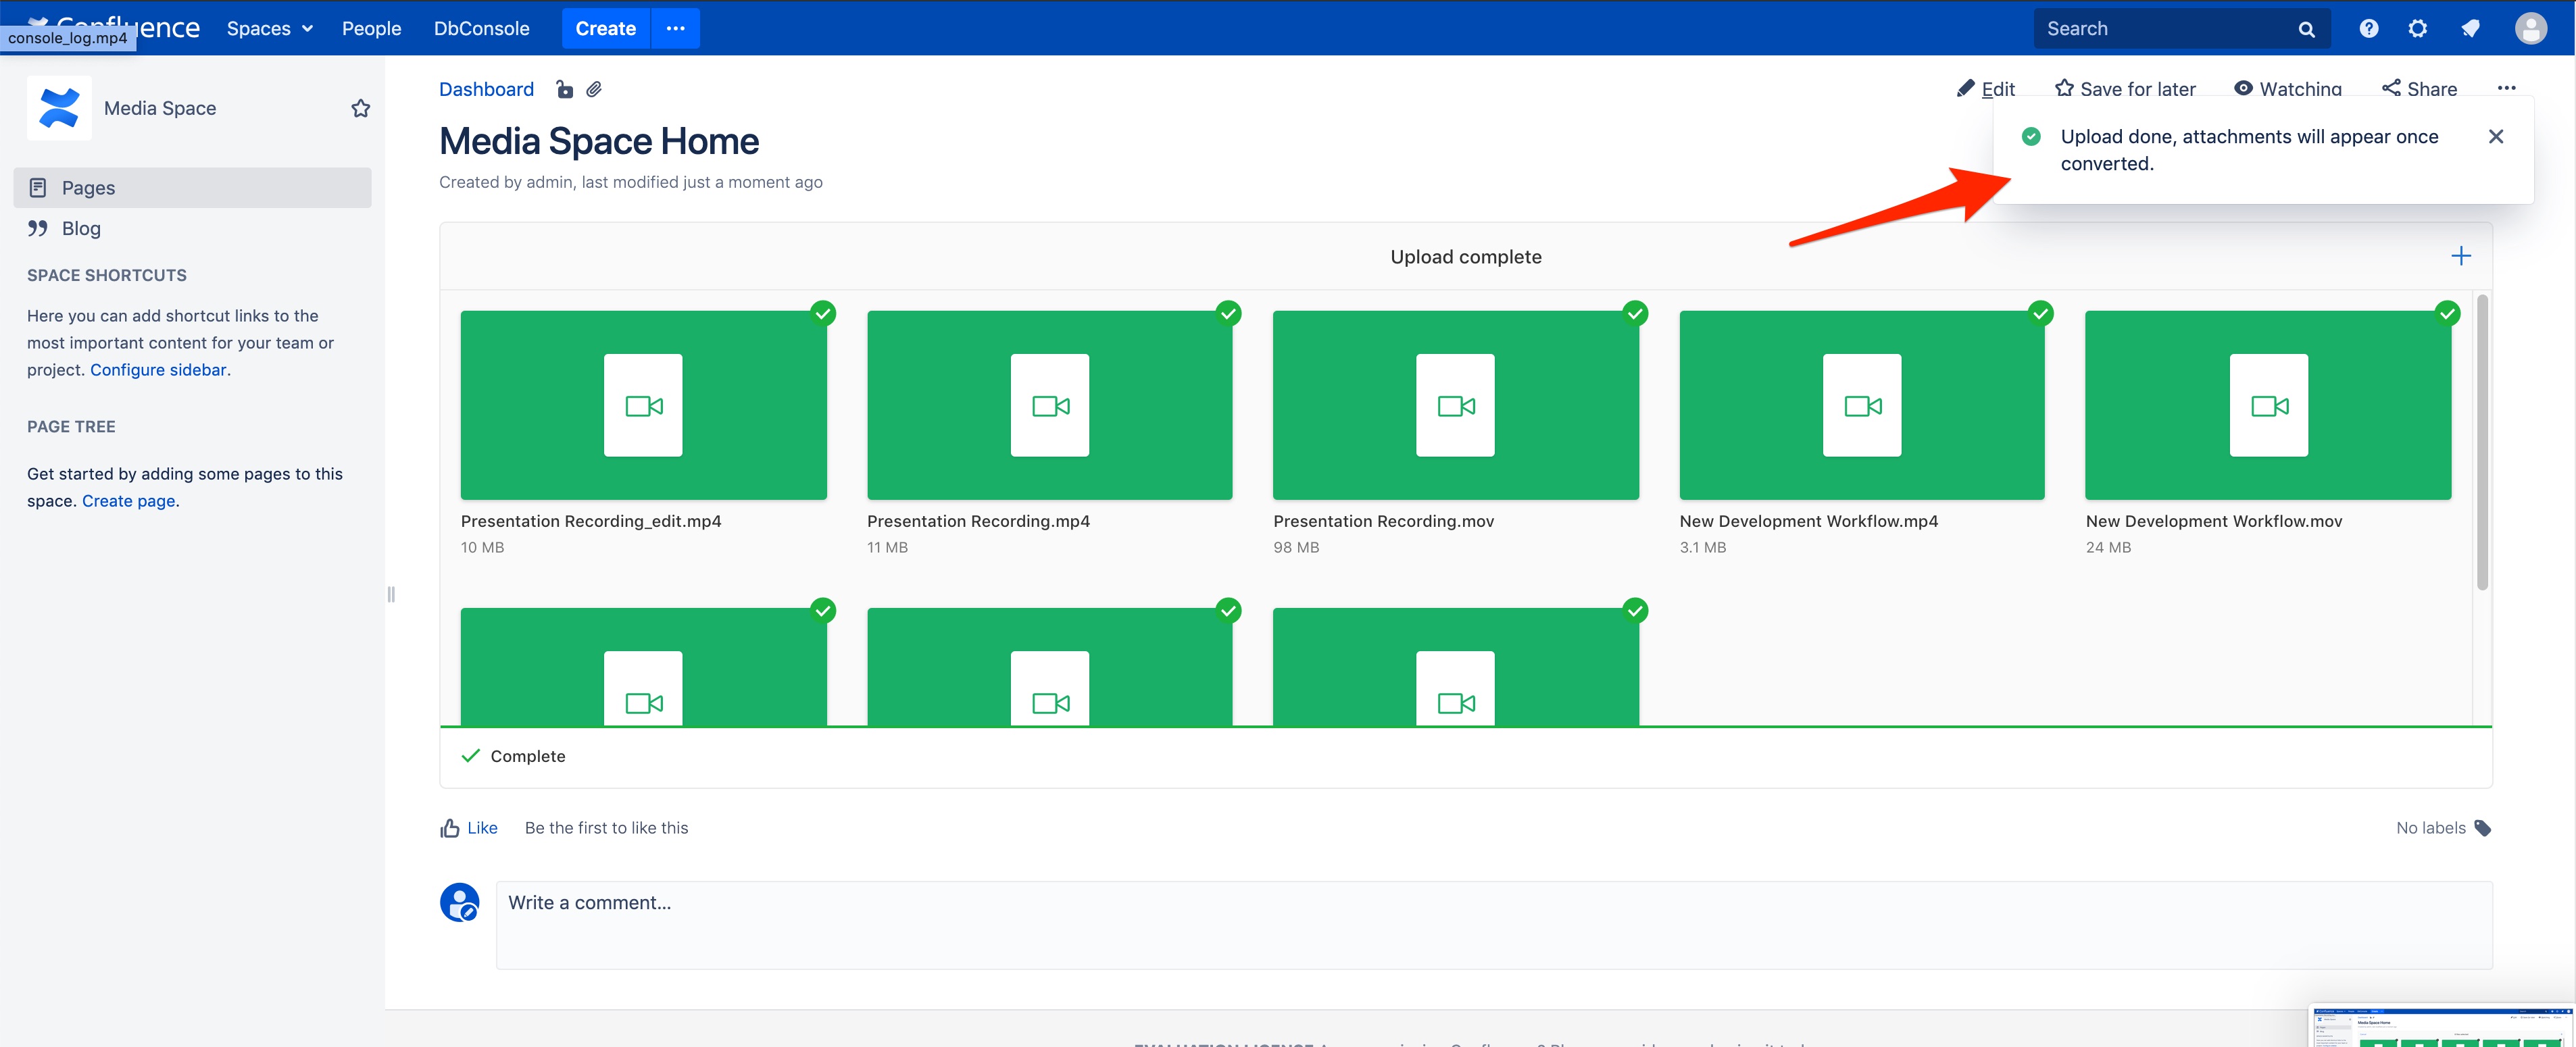
To use the macro you need to include it in a page where the data should be saved. You can select whether metadata should be striped, kept or if the global configuration should be used.
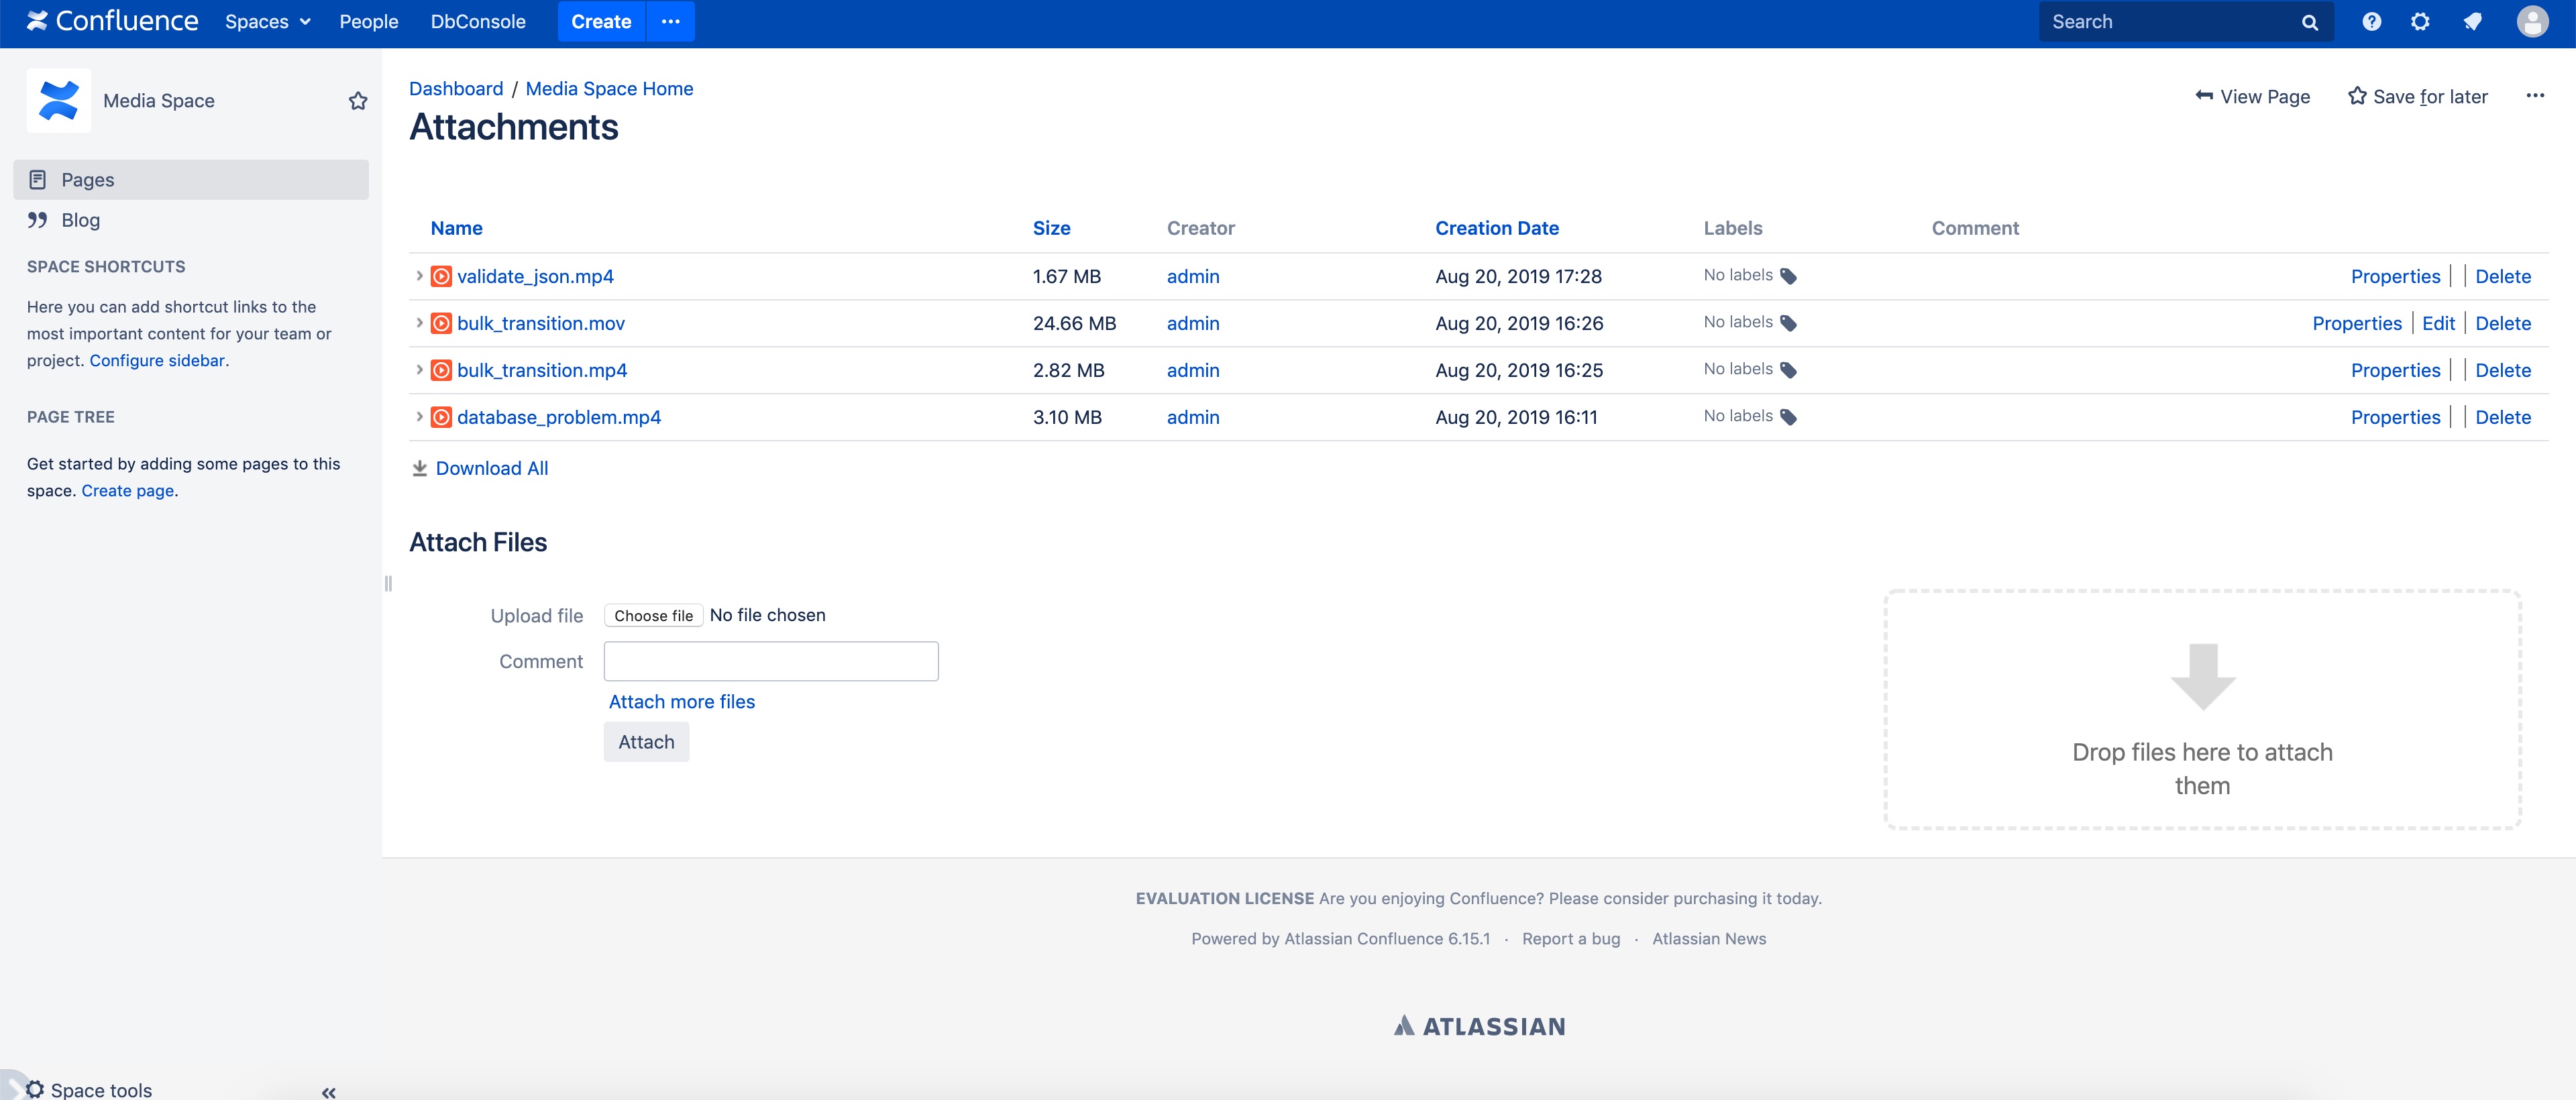
You can then use the drag and drop interface on the page to upload your desired media files, these will be converted and appear as attachments once the conversion process is done. If the files have the same name and extension as existing files they will appear as new versions.