Example Configuration - Use Case Services
- Nikola ILO (Deactivated)
Table of Contents
Consider the following scenario
- You want to handle a lot of services in one JIRA project
- You have a permission scheme for 1st-Lvl-Support, 2nd-Lvl-Support and 3rd-Lvl-Support
- Each service has its own support team
Prerequisites
- Login as a user with JIRA-Administrator rights
- Click "Administration" in the top right corner to browse the "Administration home page"
- Create test users (if needed)
- On the users view (click "Users" on the Administration home page) create
- "Service User 1 " to "Service User 10"
- On the users view (click "Users" on the Administration home page) create
Creating Custom Fields
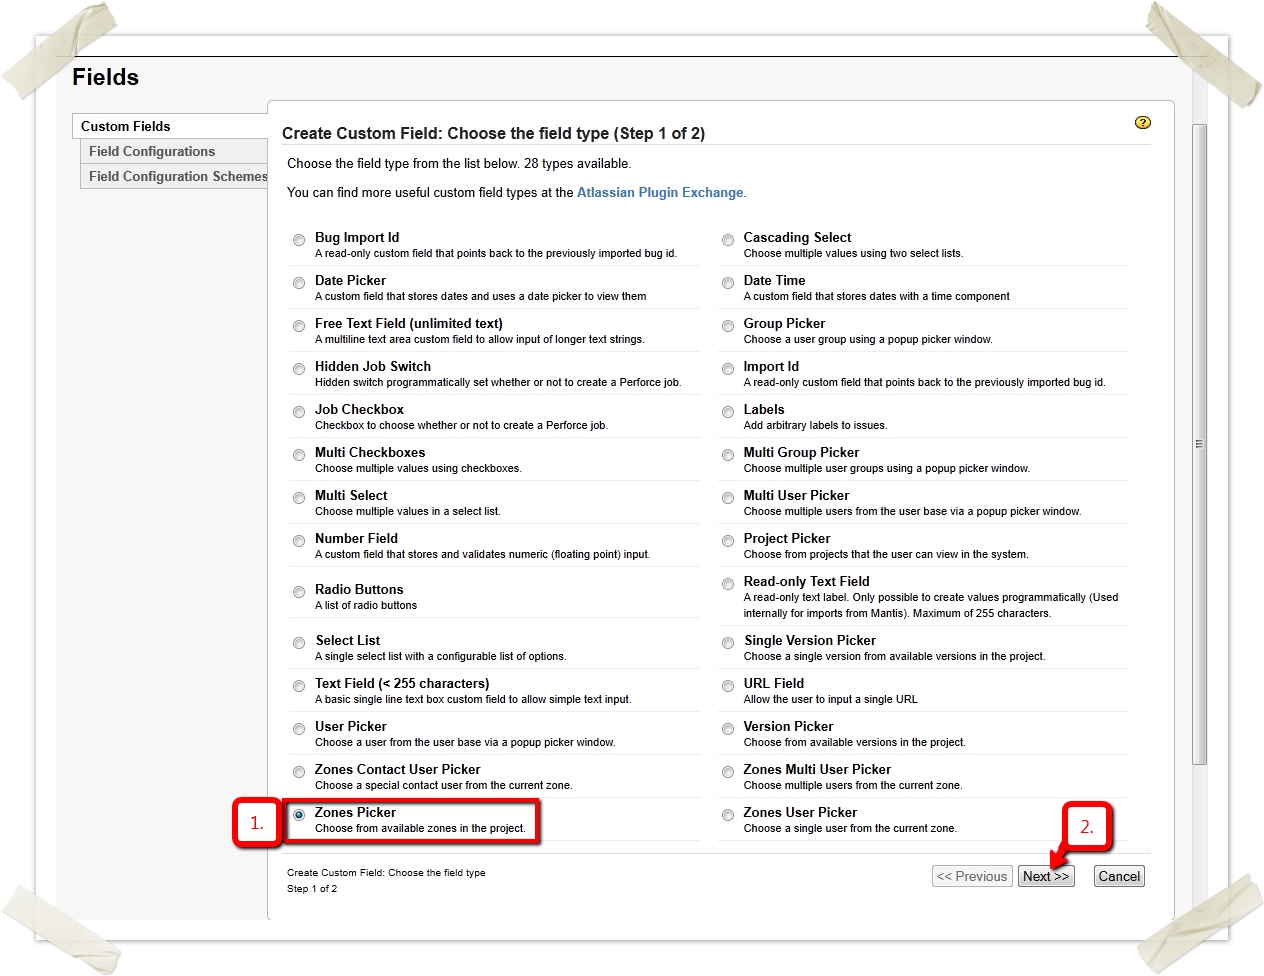
First create a custom field named "Zones Picker" (this type of custom field is usually referred to as "Zone Field"): on the Administration home page click "Custom Fields" and then "Add Custom Field", choose "Zones Picker" as type and proceed by clicking "next".
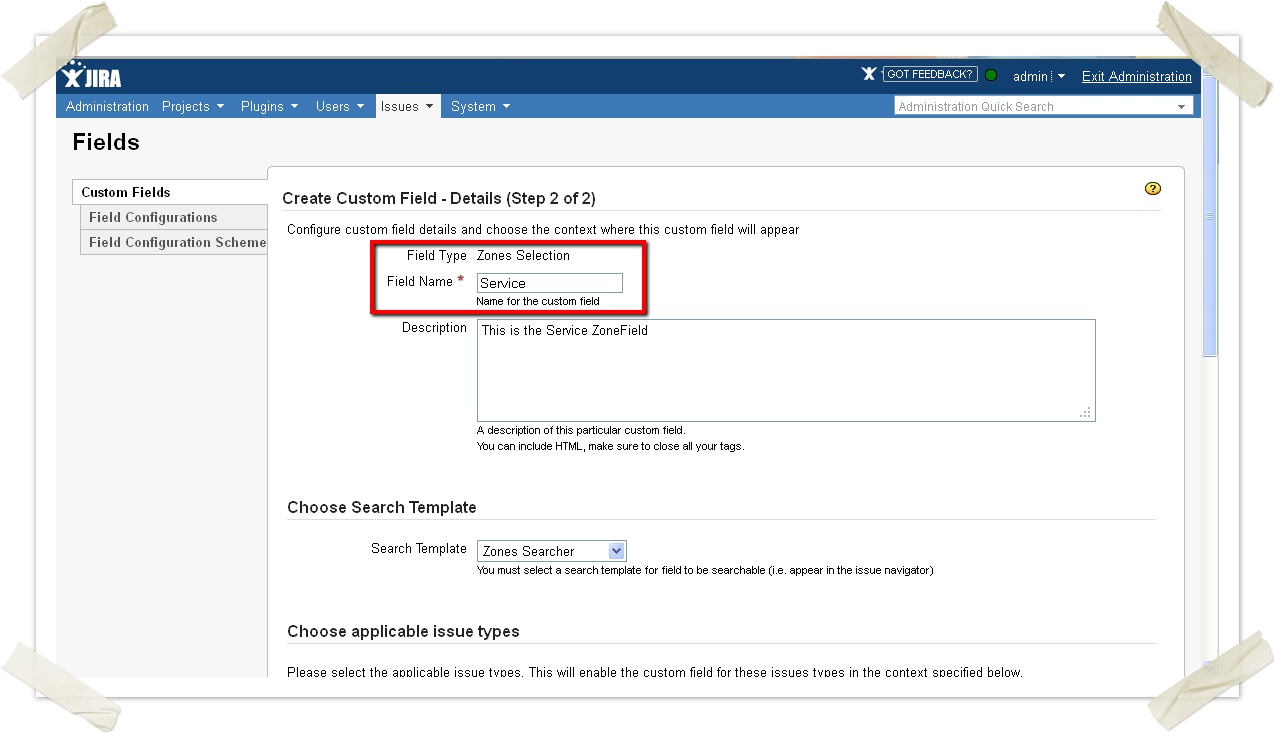
In this example the field will be named "Service" (as it will be used to distinguish the service within a project).
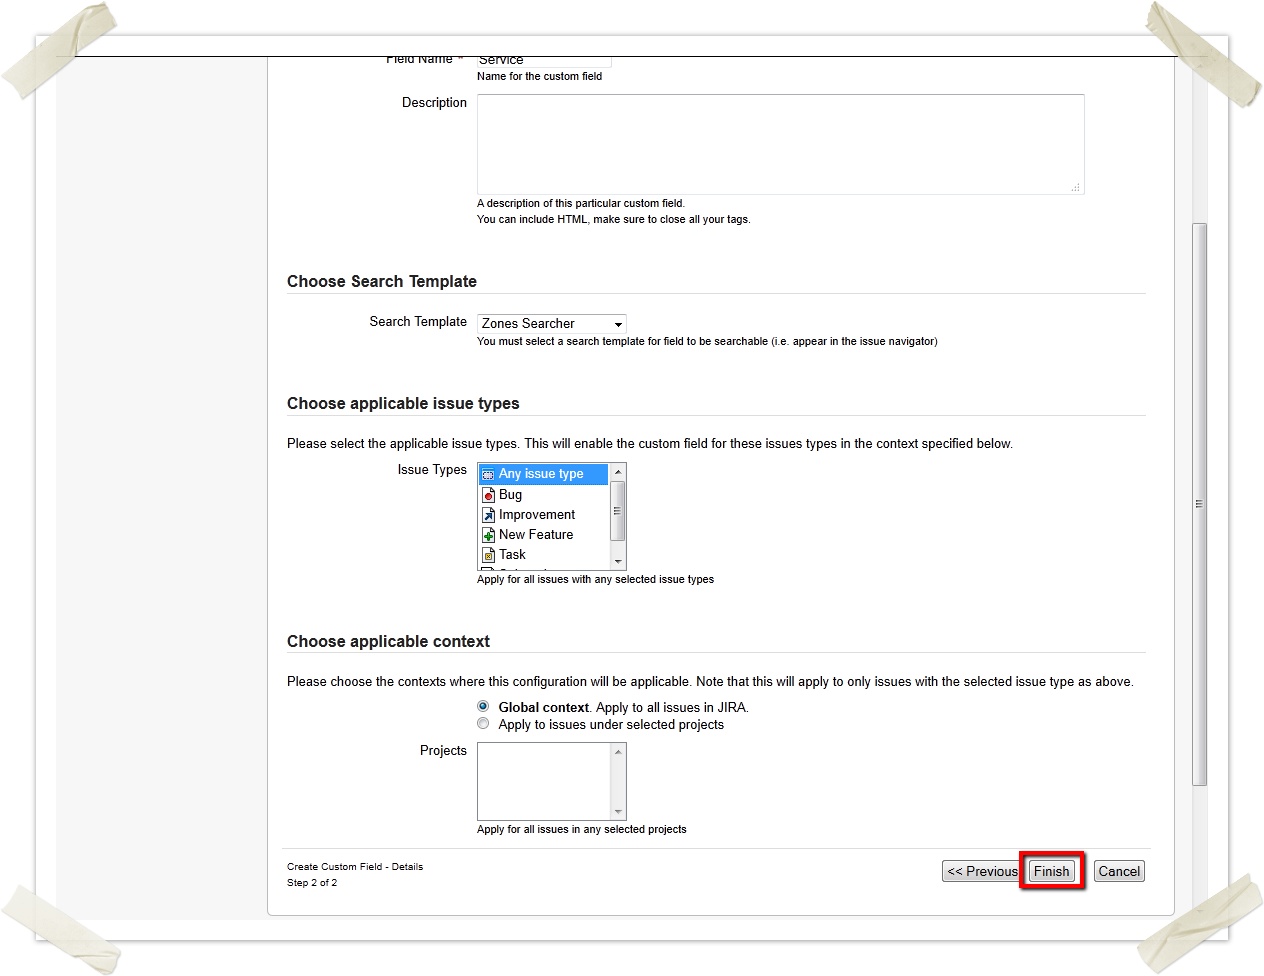
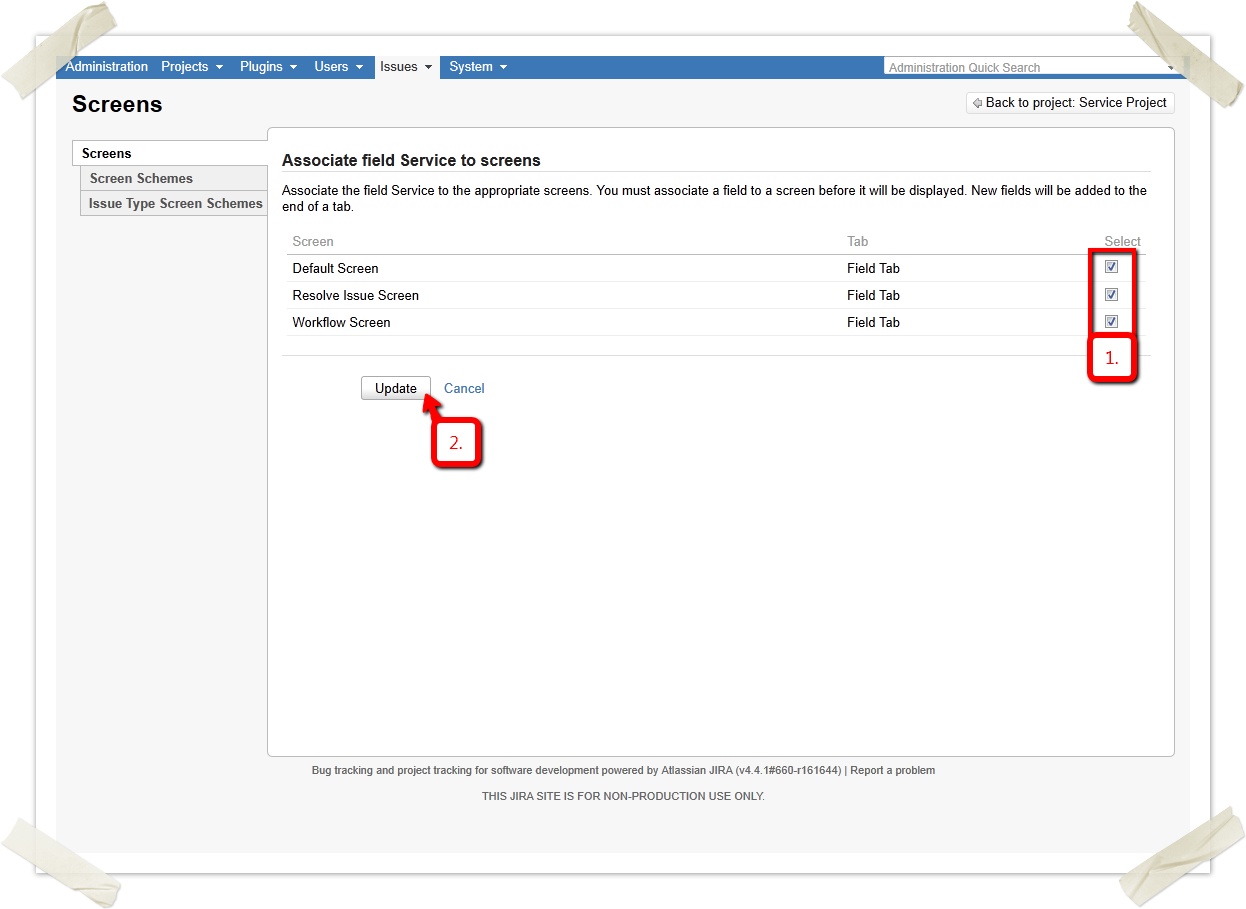
The field shall be visible on all screens:
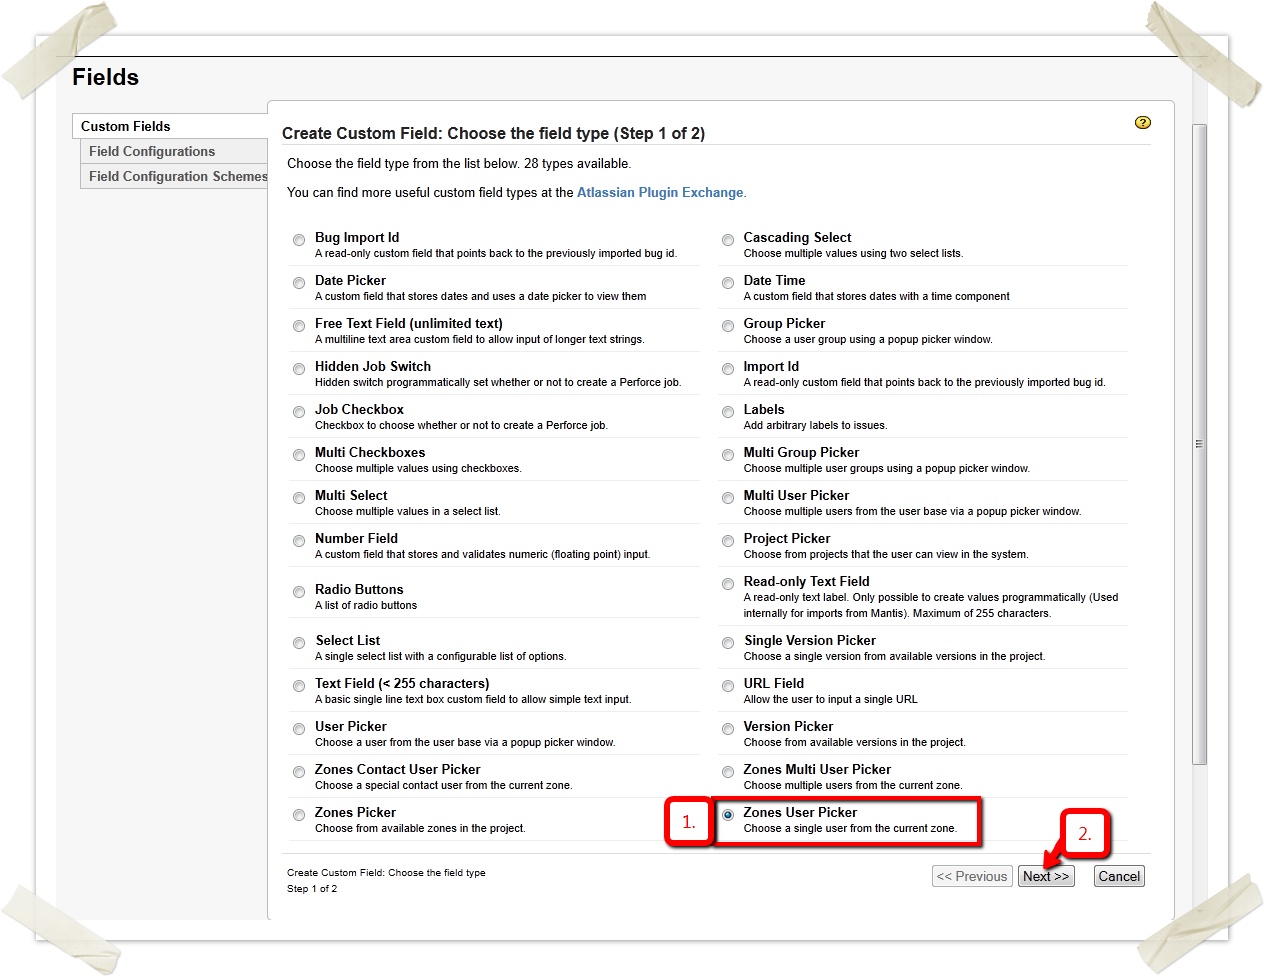
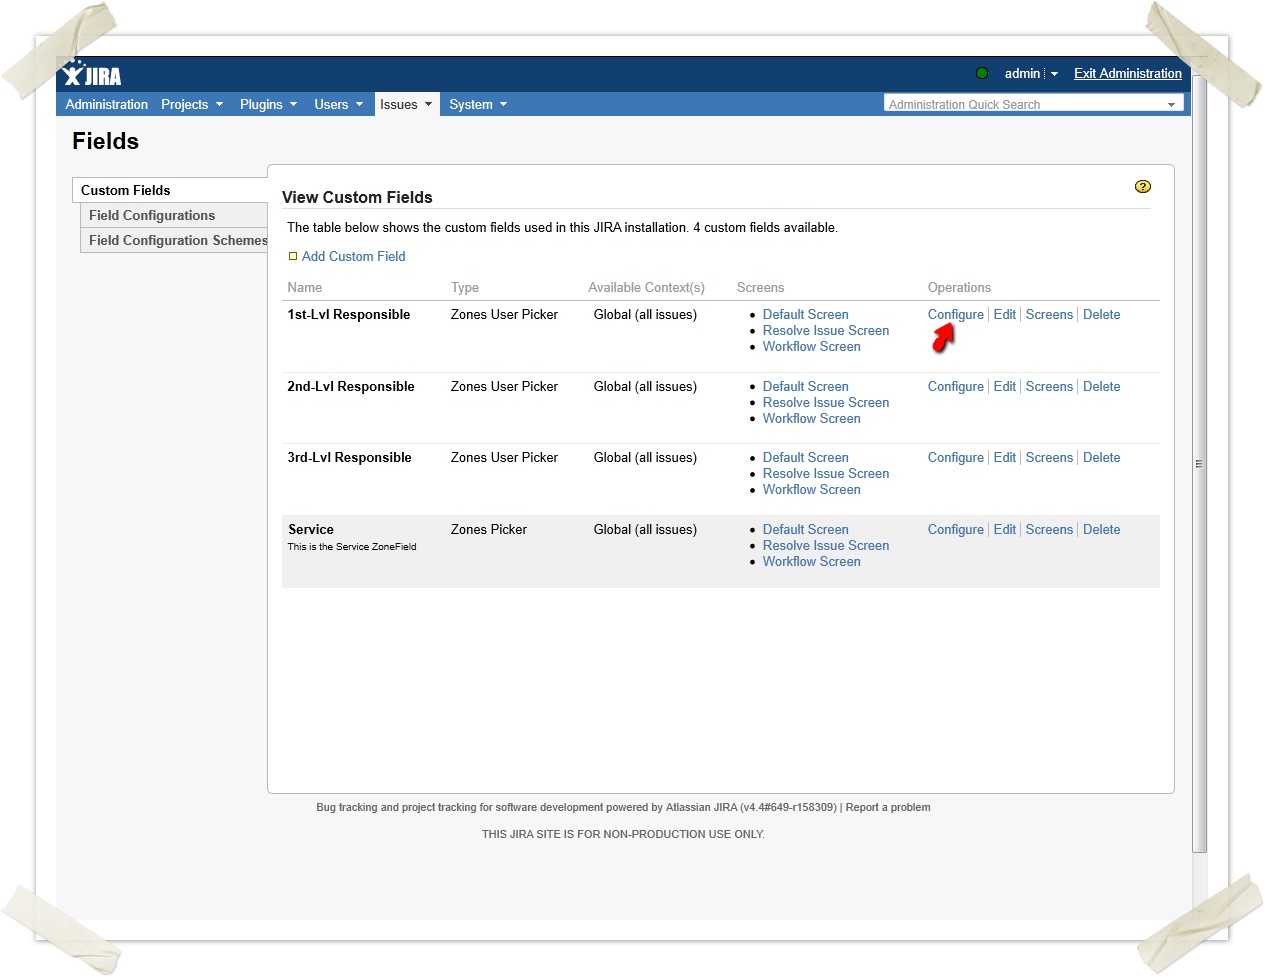
Similarly create three new "Zones User Picker" custom fields (these fields act like user picker but will only show users within a certain zone) and name them "1st-Lvl Responsible", "2nd-Lvl Responsible" and "3rd-Lvl Responsible".
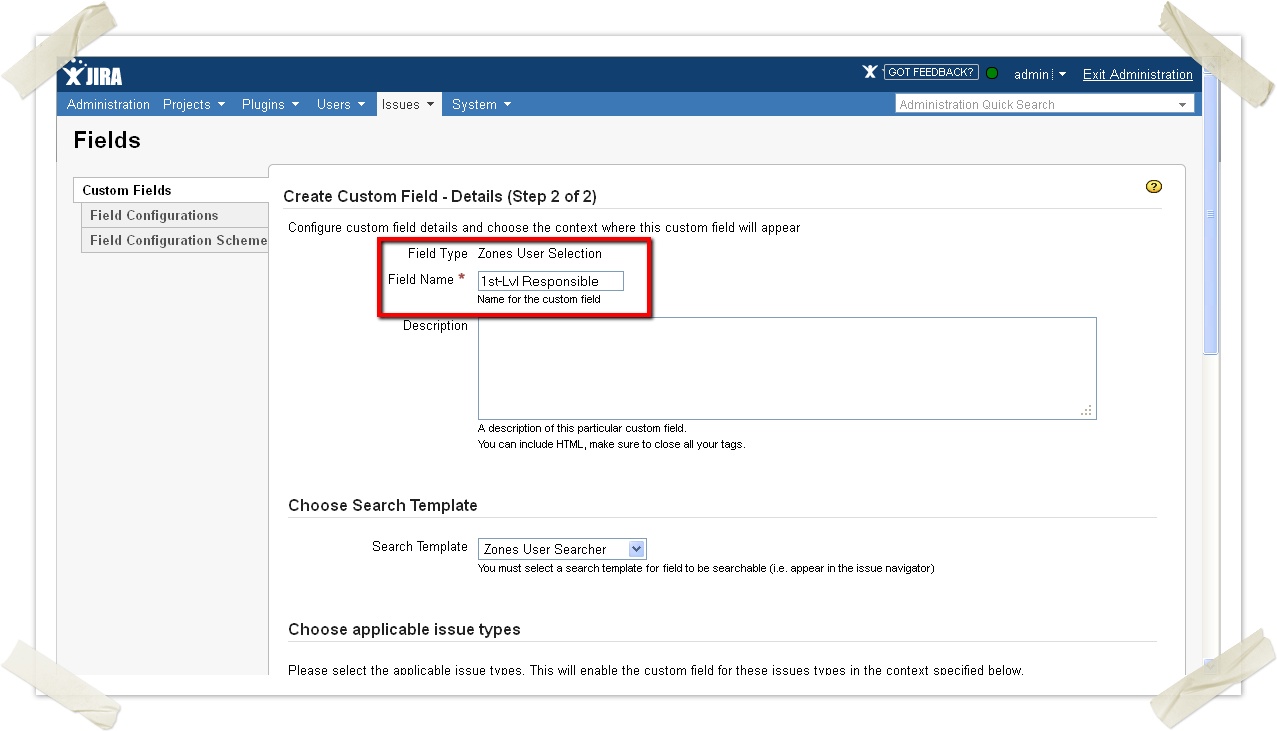
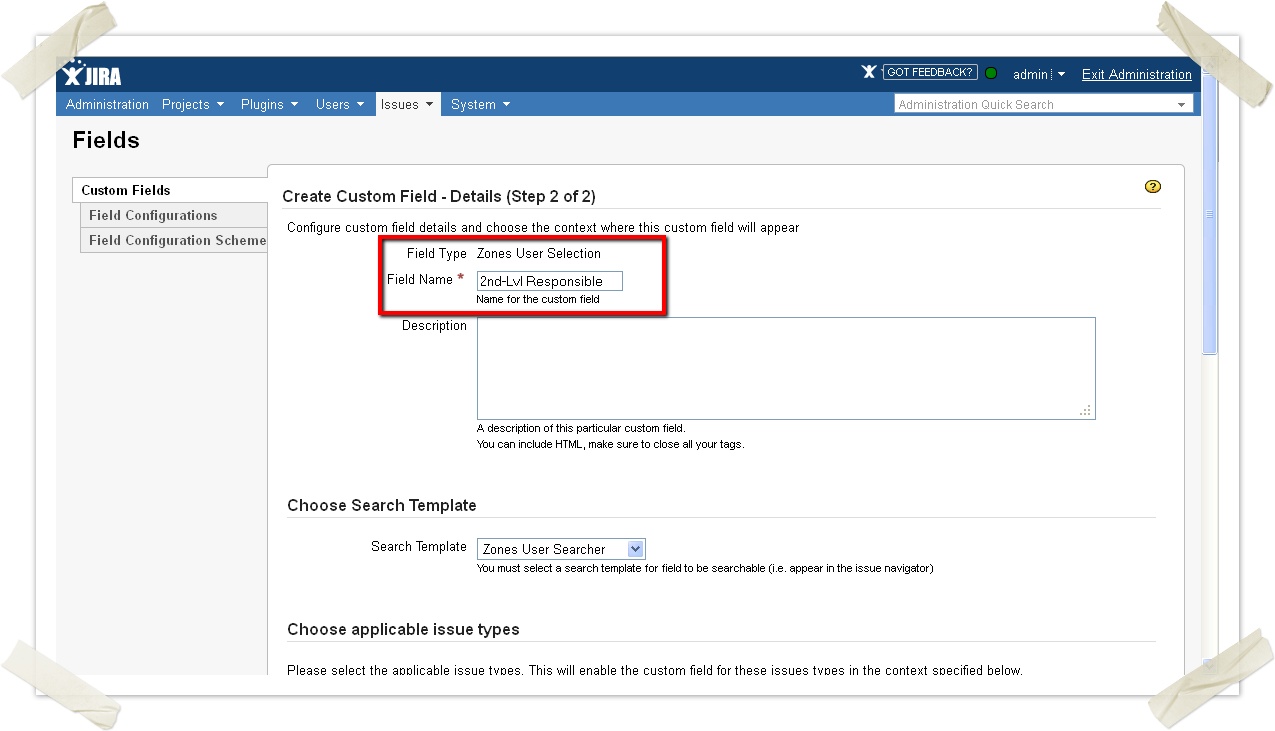

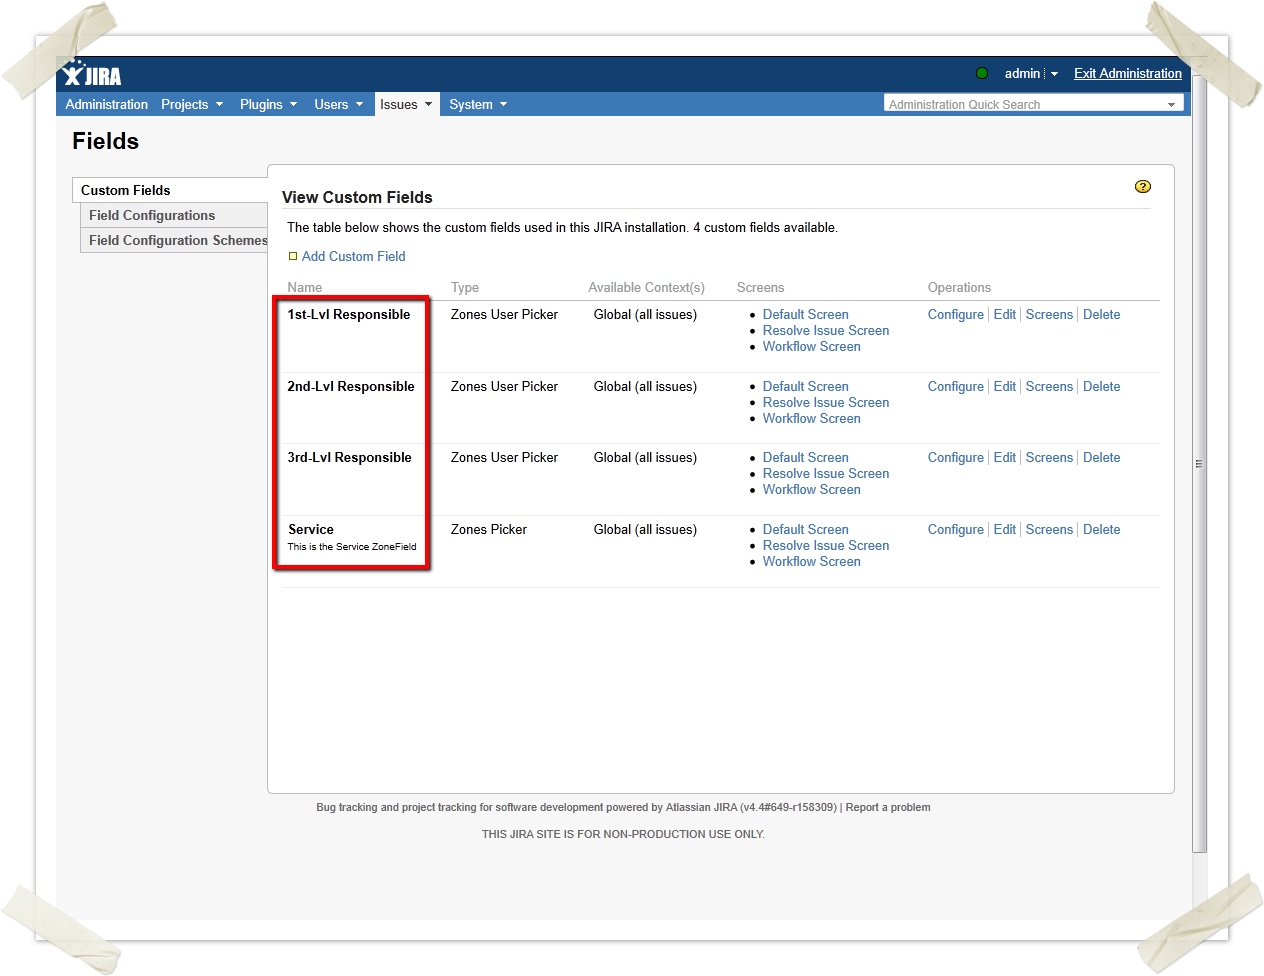
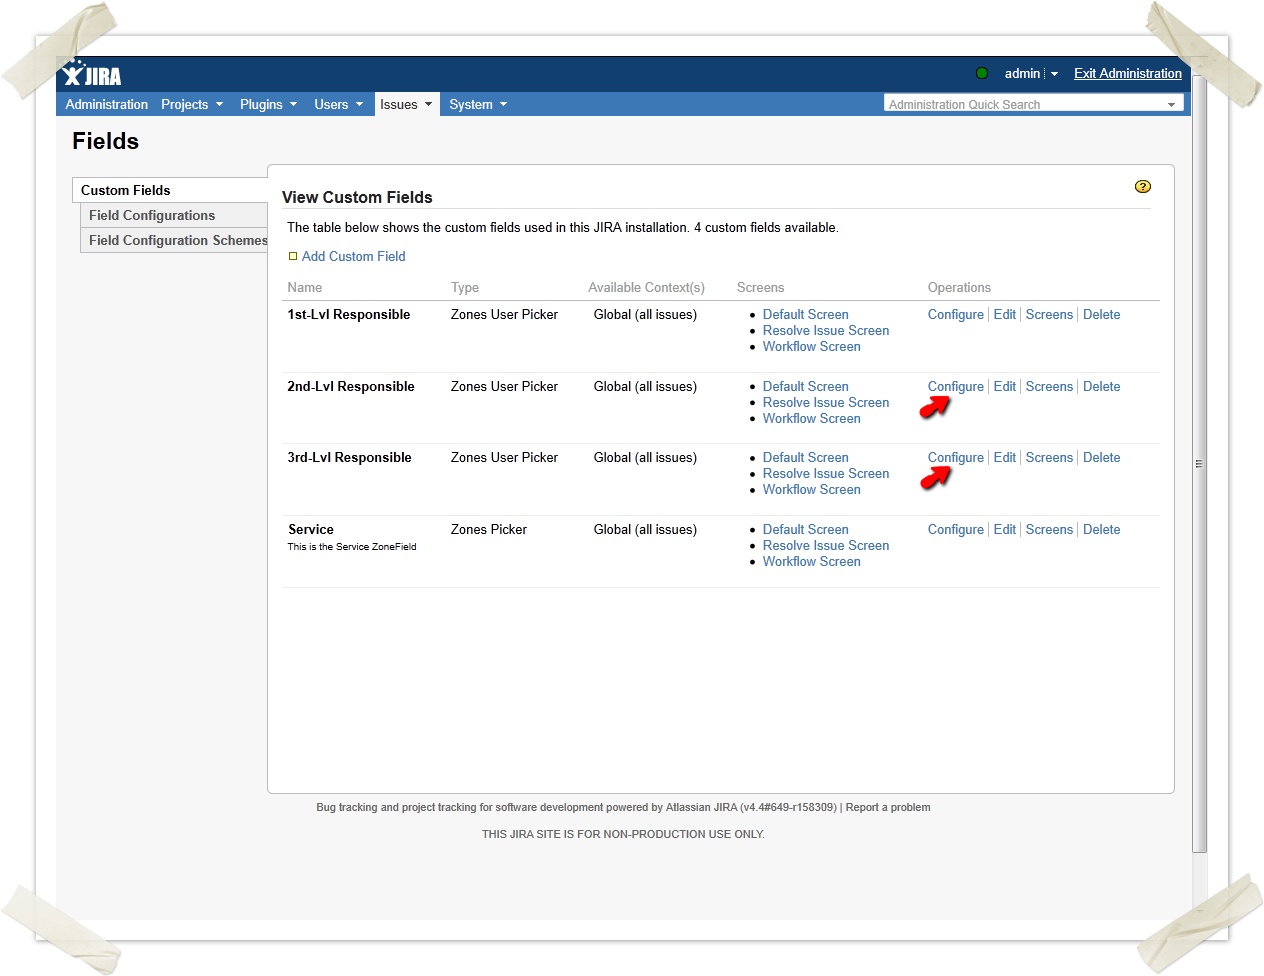
Now you have generated 4 new custom fields.
Configuring zone roles and project roles
You may define several zone roles within a zone. Users can then be assigned a zone role within a certain zone (e.g., user X is user of zone Y and his zone role within zone Y is "Administrator"). The Celix Zones Plugin will assist you by mapping such zone roles to project roles (e.g., you may define that users in the Zone Role "Administrator" shall be mapped to the project role "Developer"). Thus you need to configure which zone roles and project rRoles you need and how they correspond.
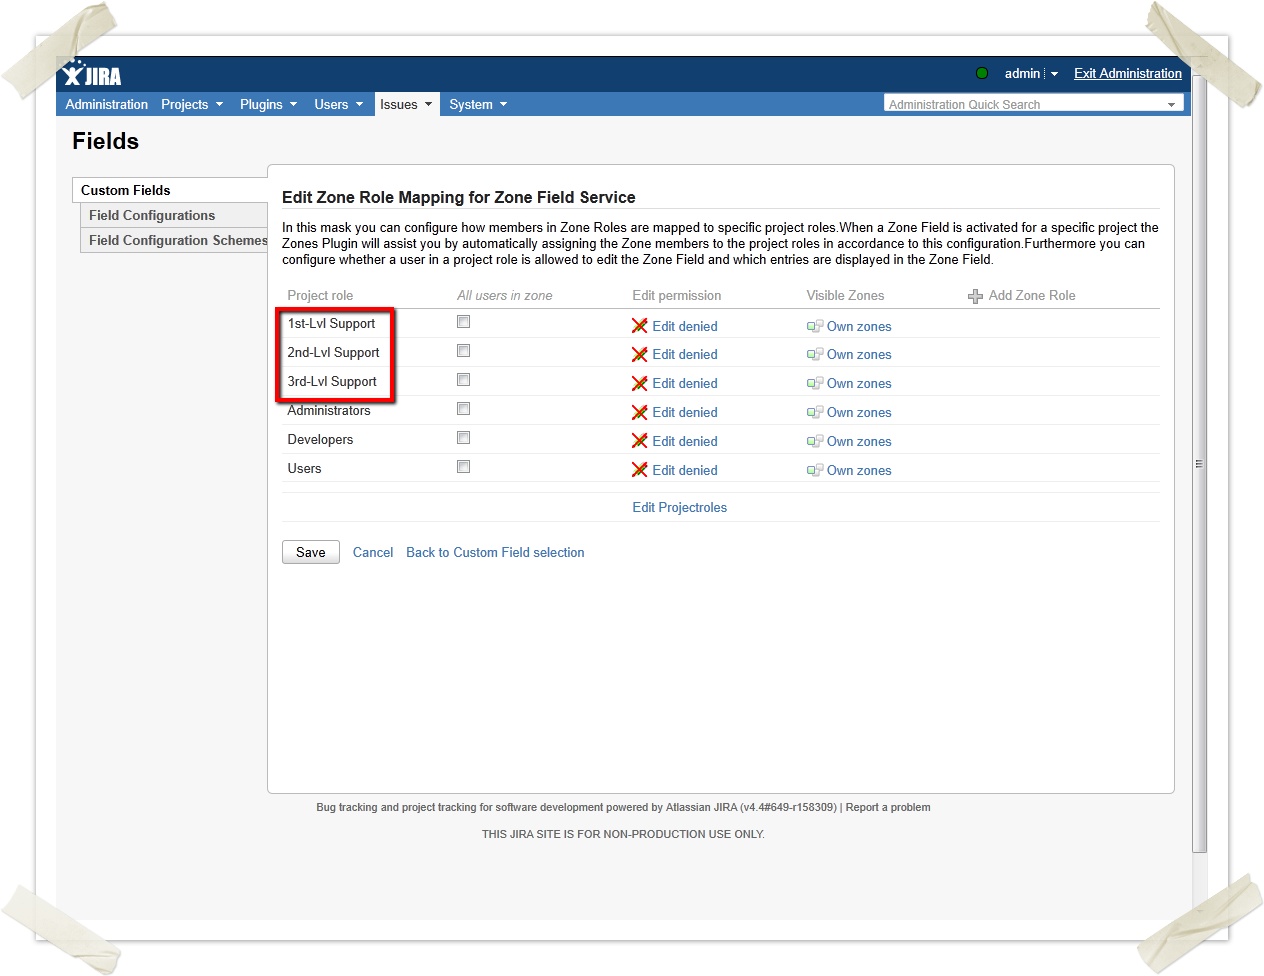
Your sample setup will need 3 roles: 1st, 2nd and 3rd Level support, which will be created as zone roles as well as project roles. Finally you map them: zone role "1st-Lvl Support" will be mapped to the project role "1st-Lvl Support" etc.
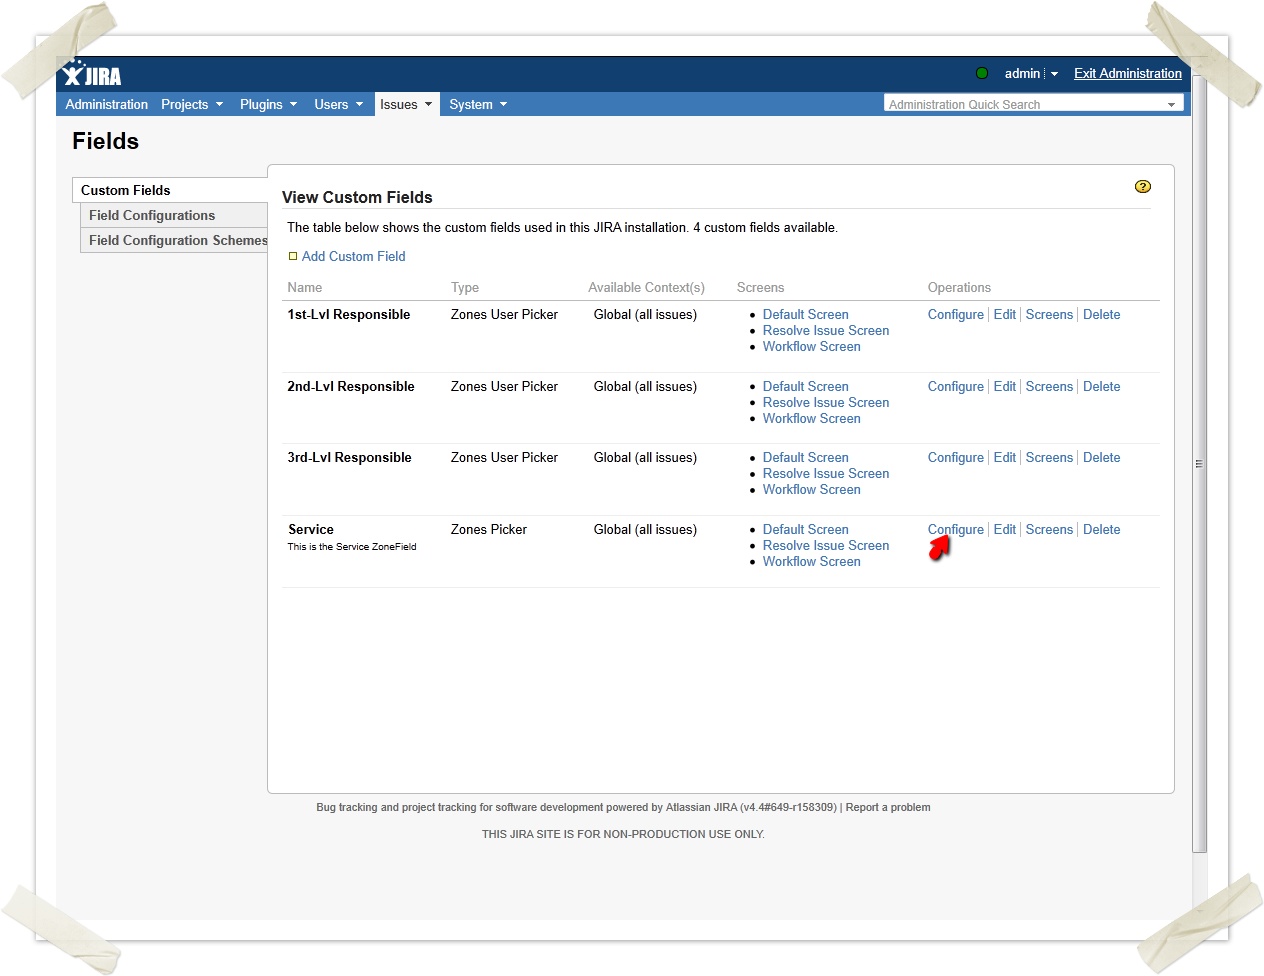
Configure the "Zones Picker" custom field.
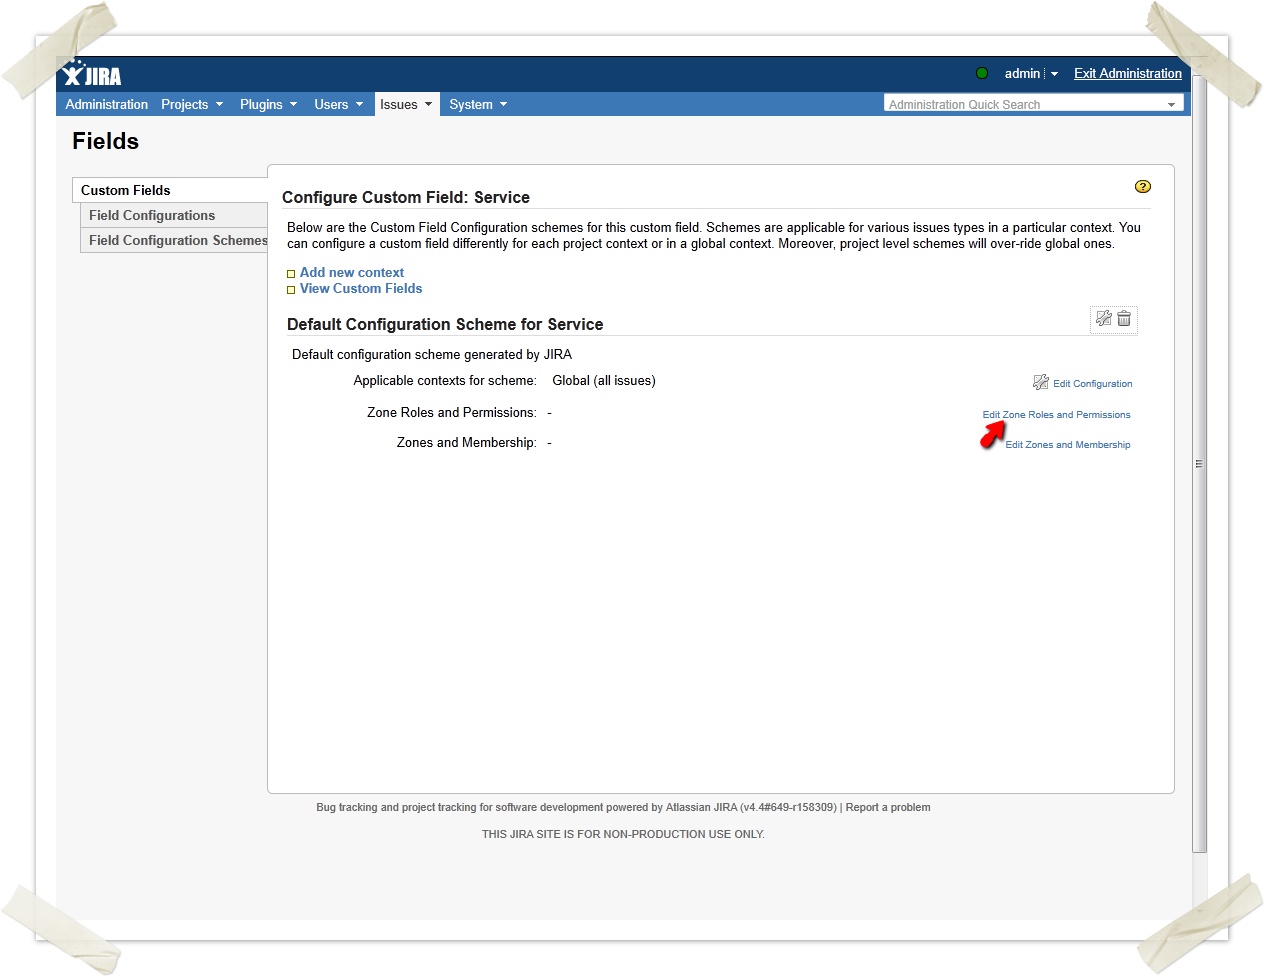
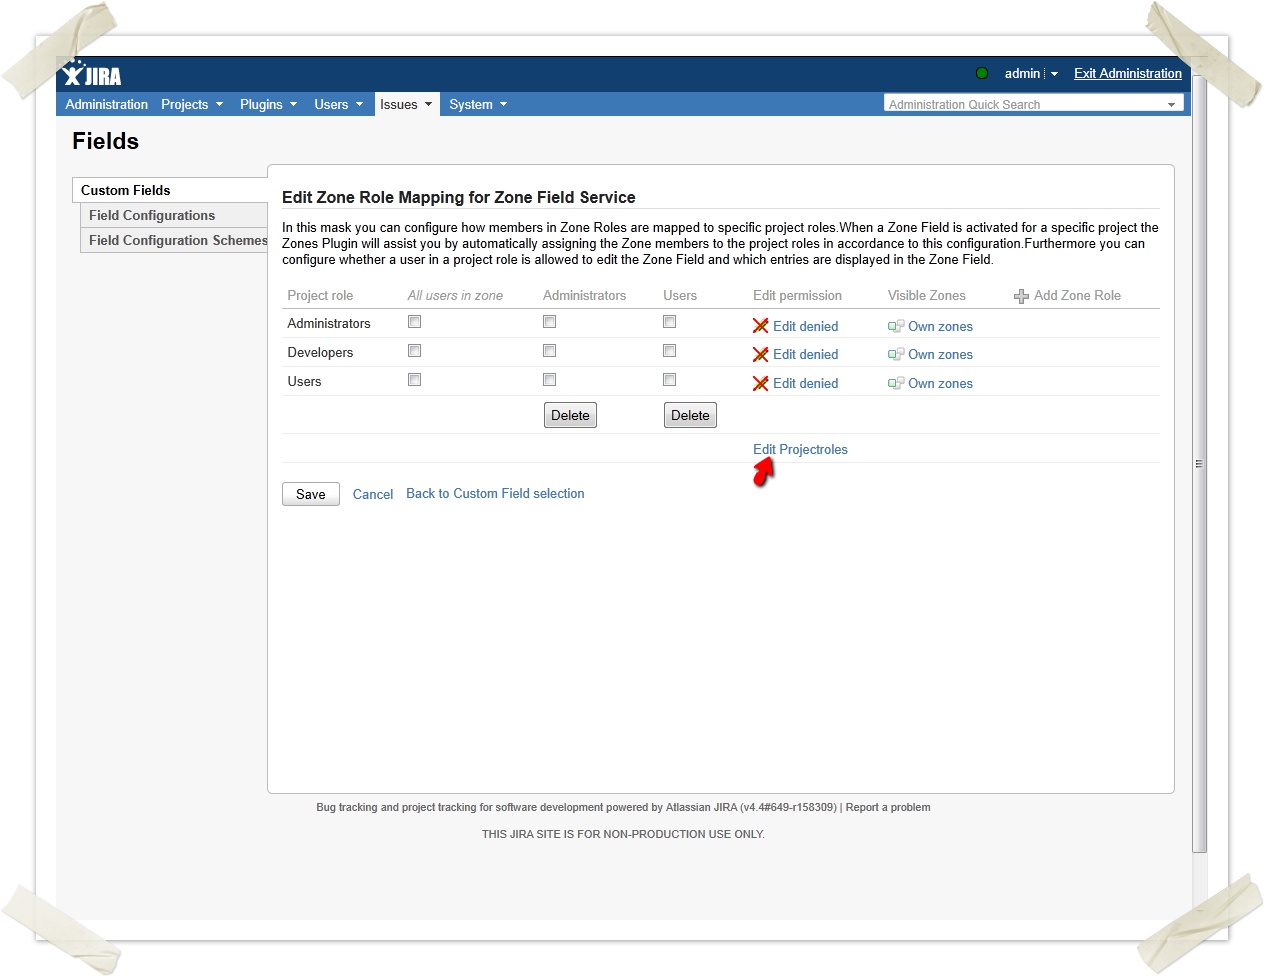
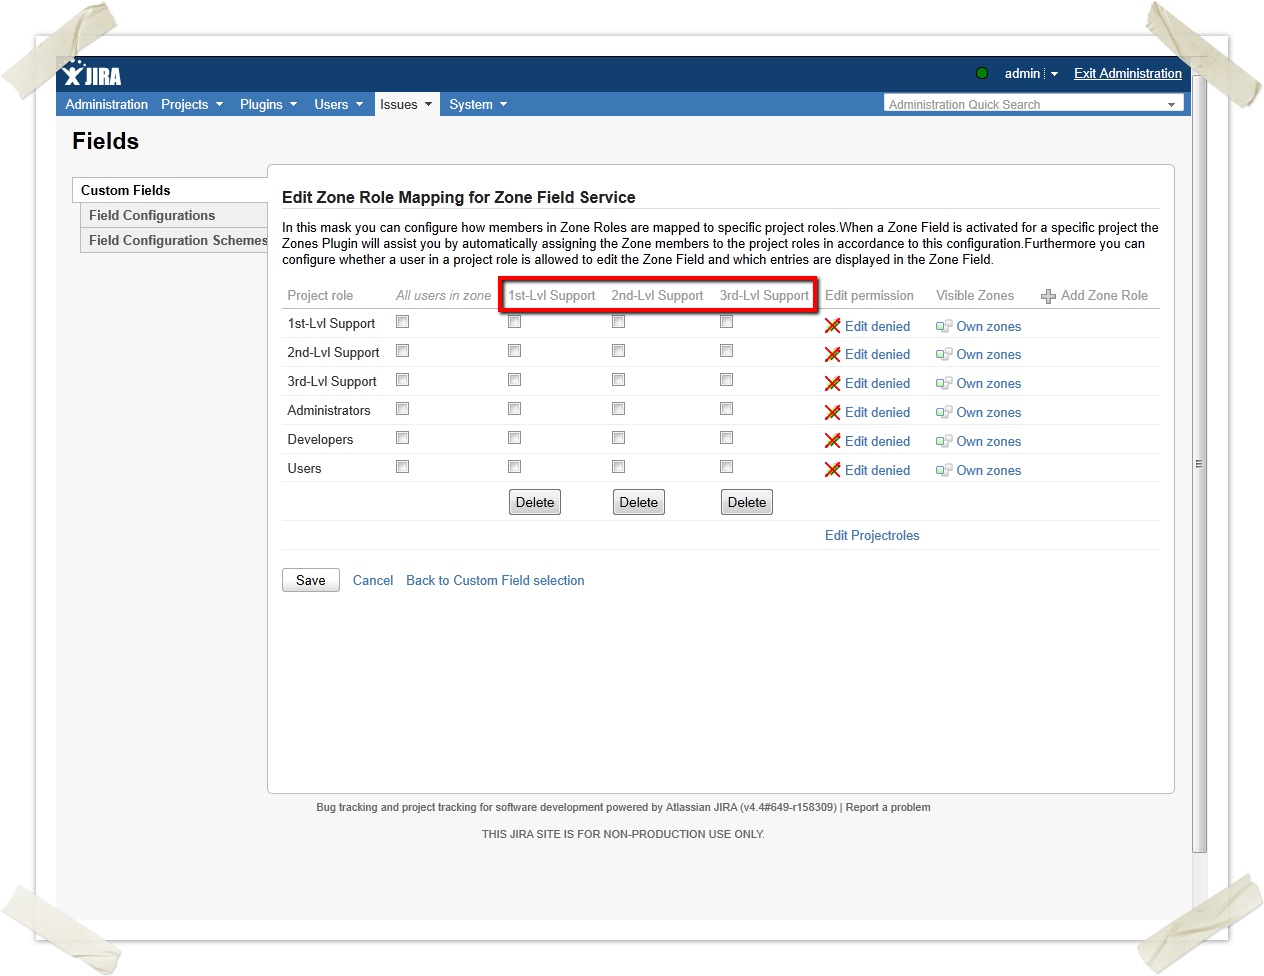
Edit the zone roles and the permissions
First create JIRA project roles for the support.
A "1st-Lvl Support" project role:
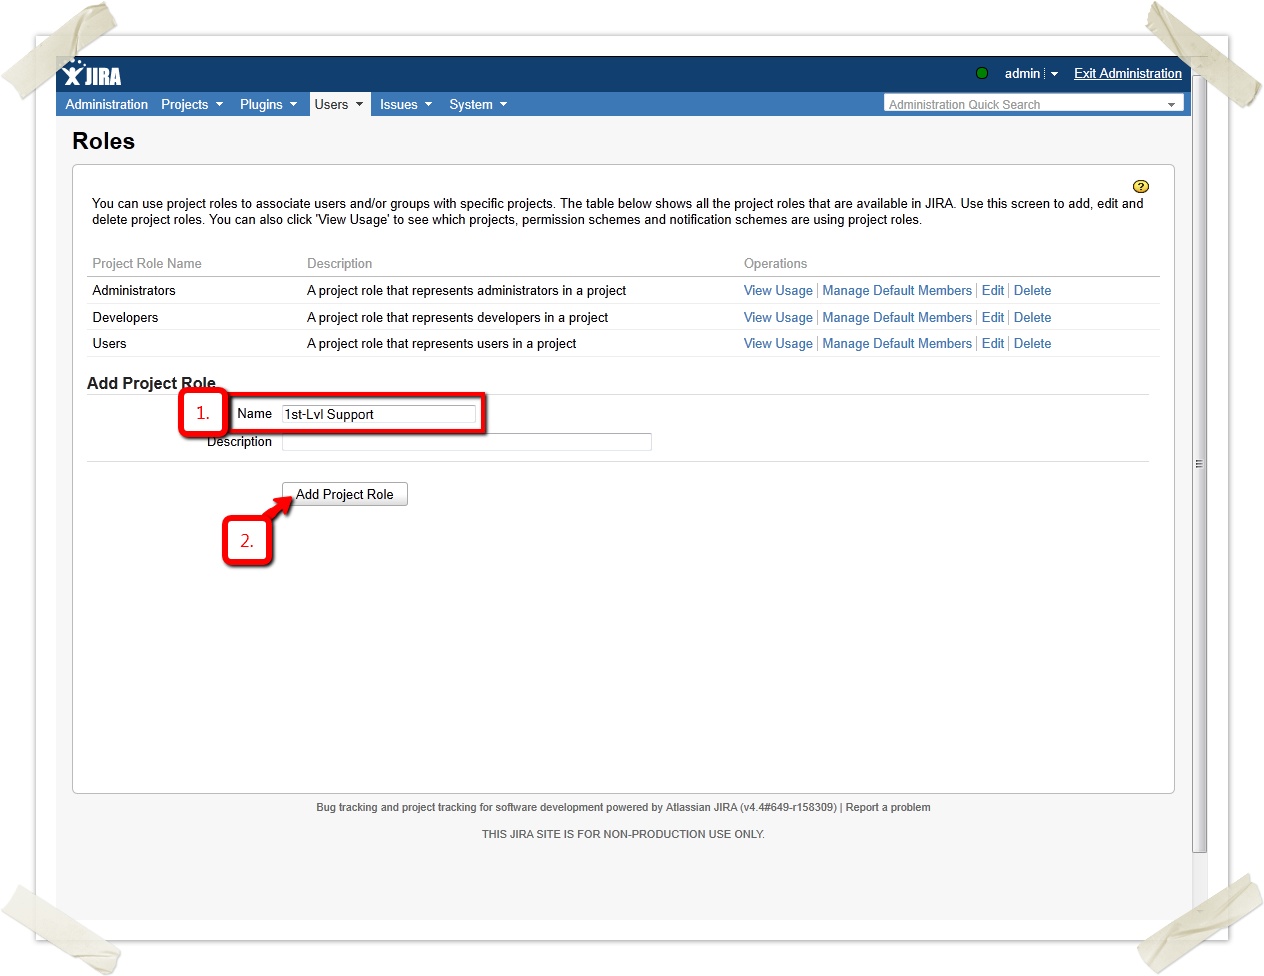
Similarly create the project roles "2nd-Lvl Support" and "3rd-Lvl Support".
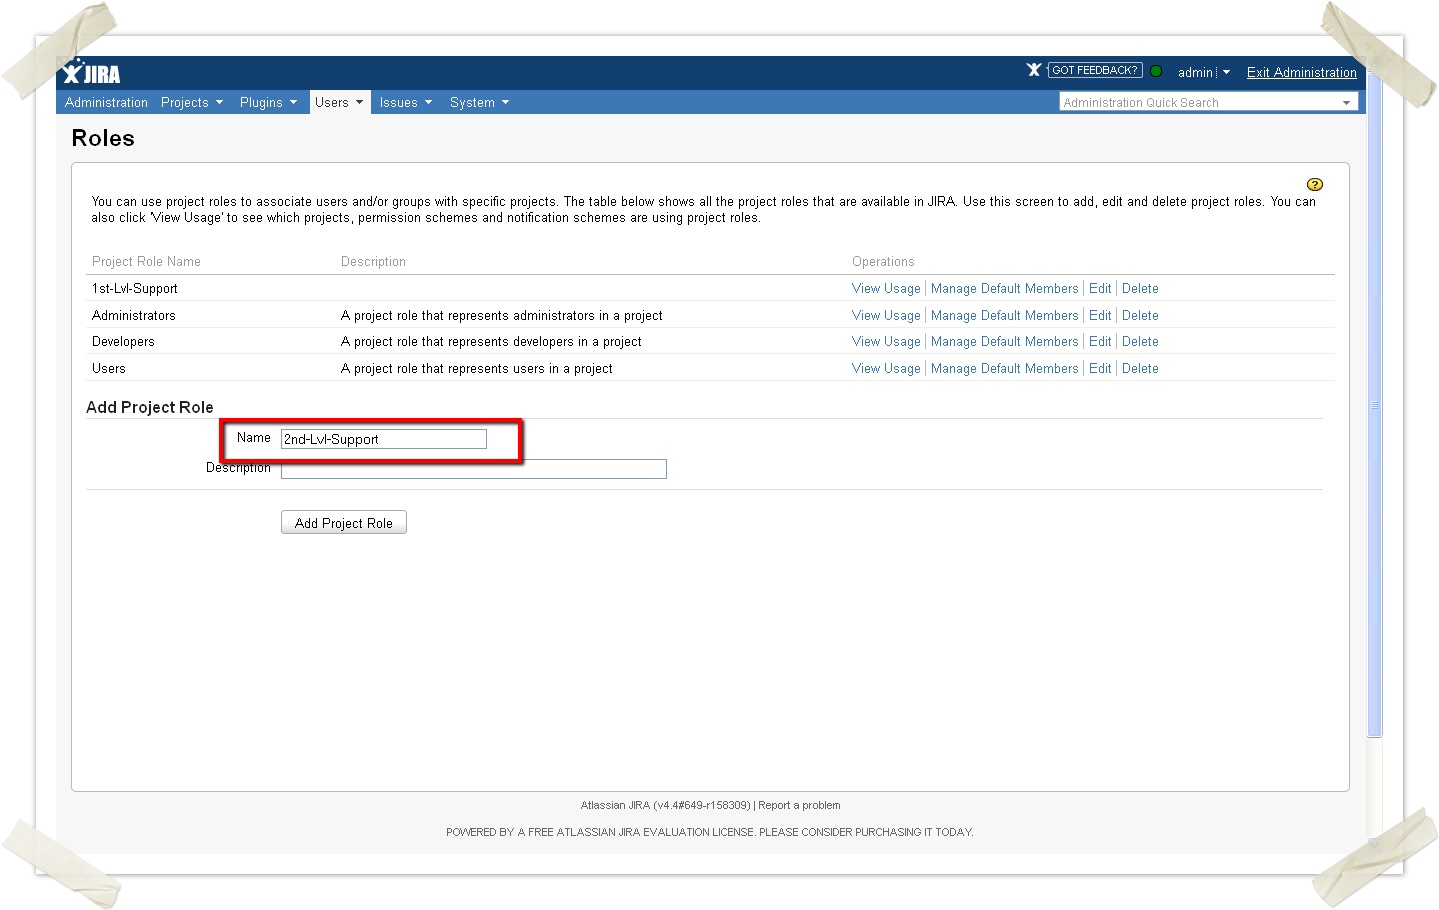
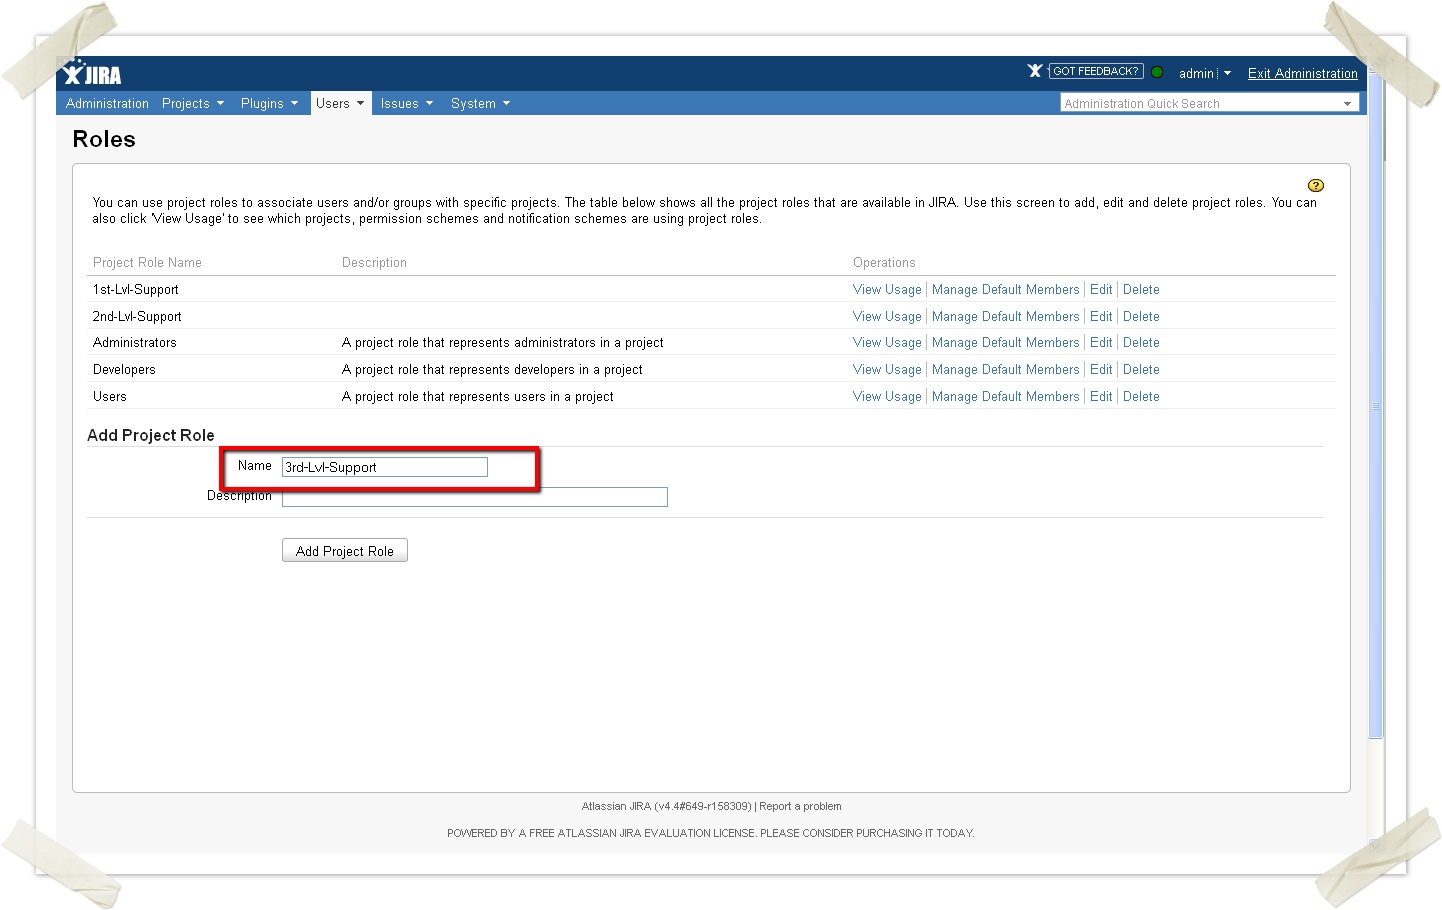
Click the back-button of your browser - the newly added project roles are now visible as additional roles in the view:
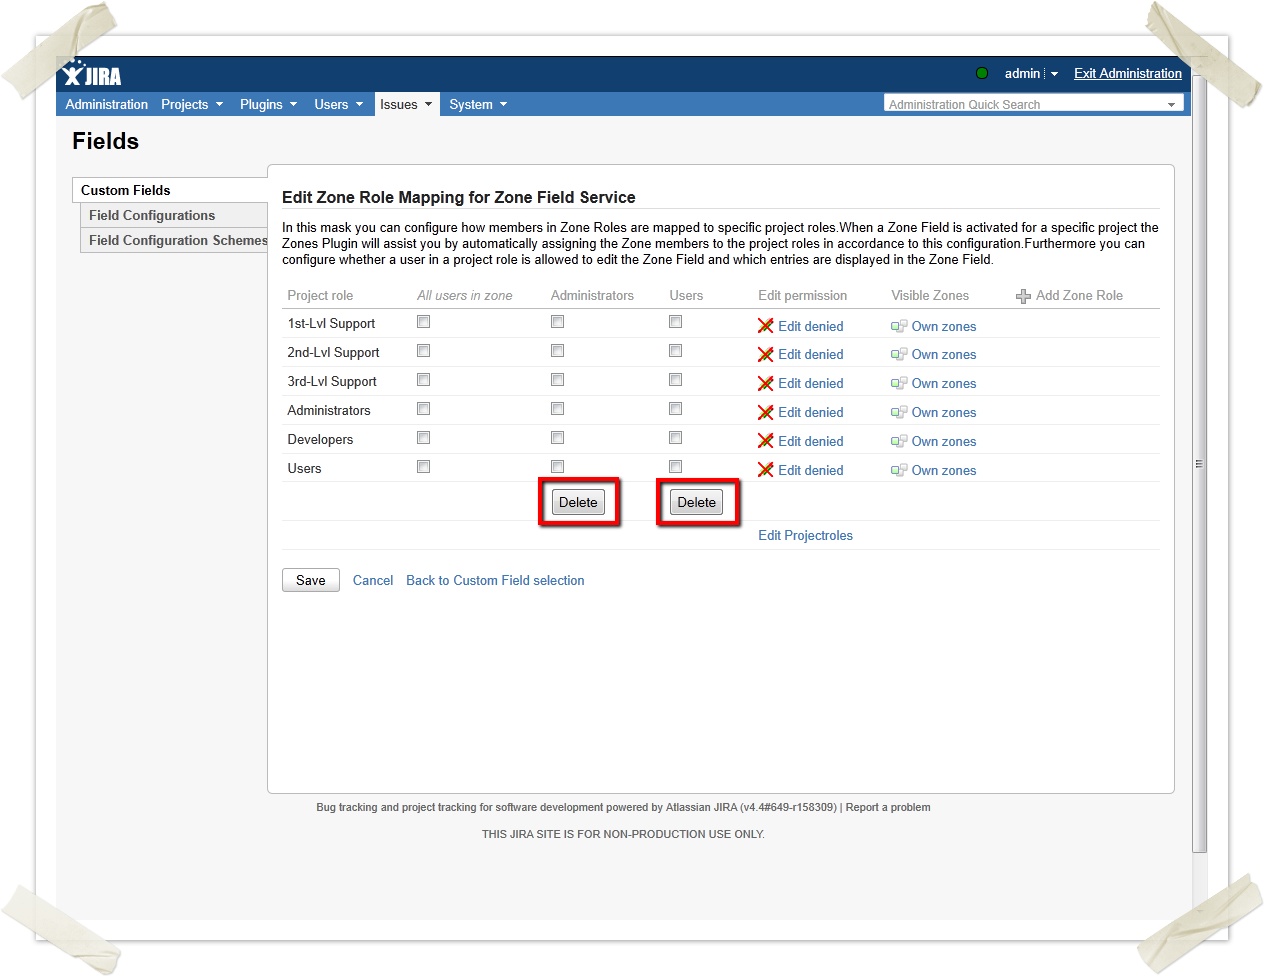
Then delete the default zone roles:
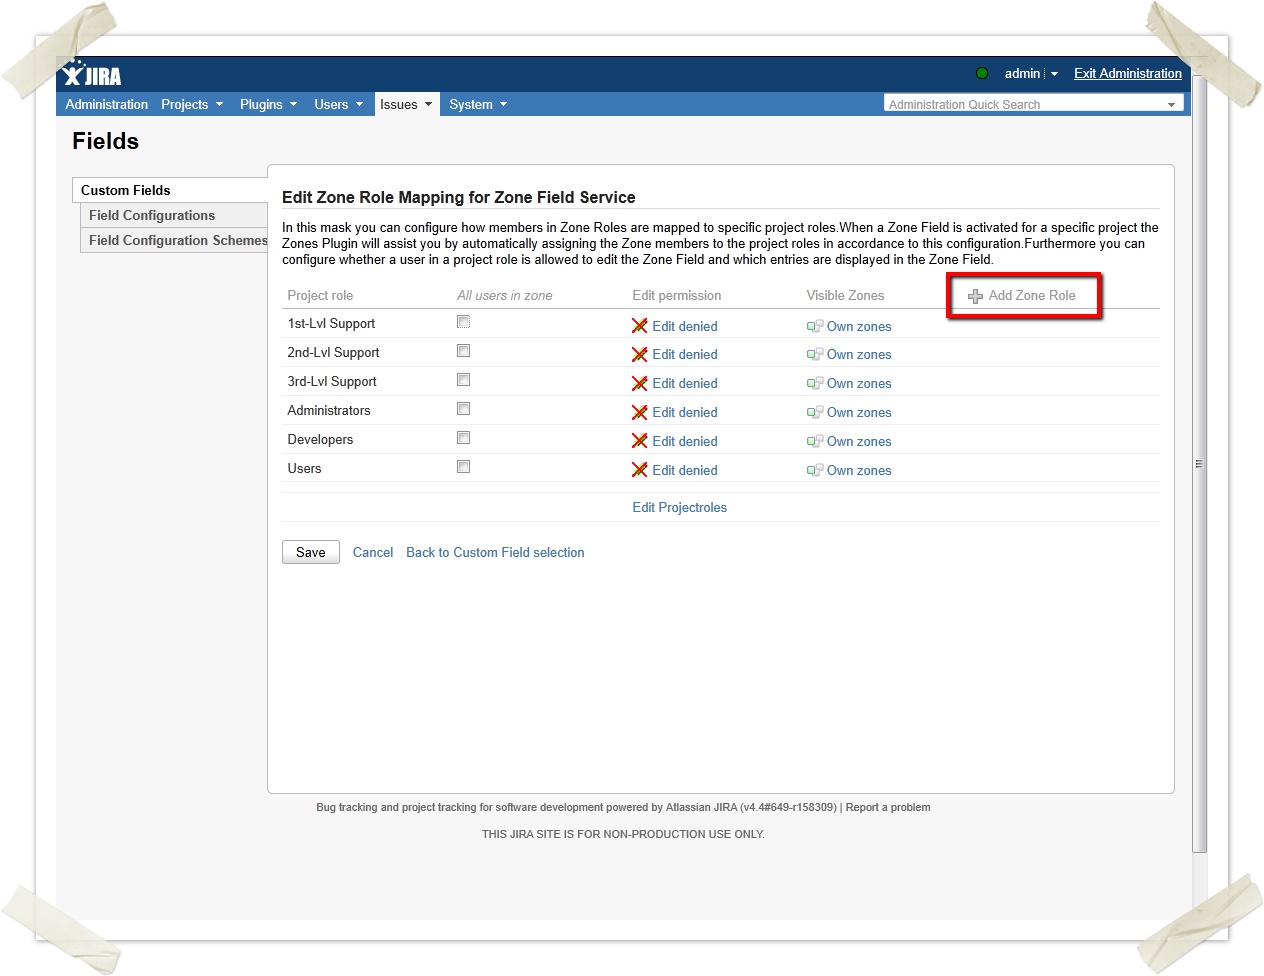
Now add new zone roles for the support.
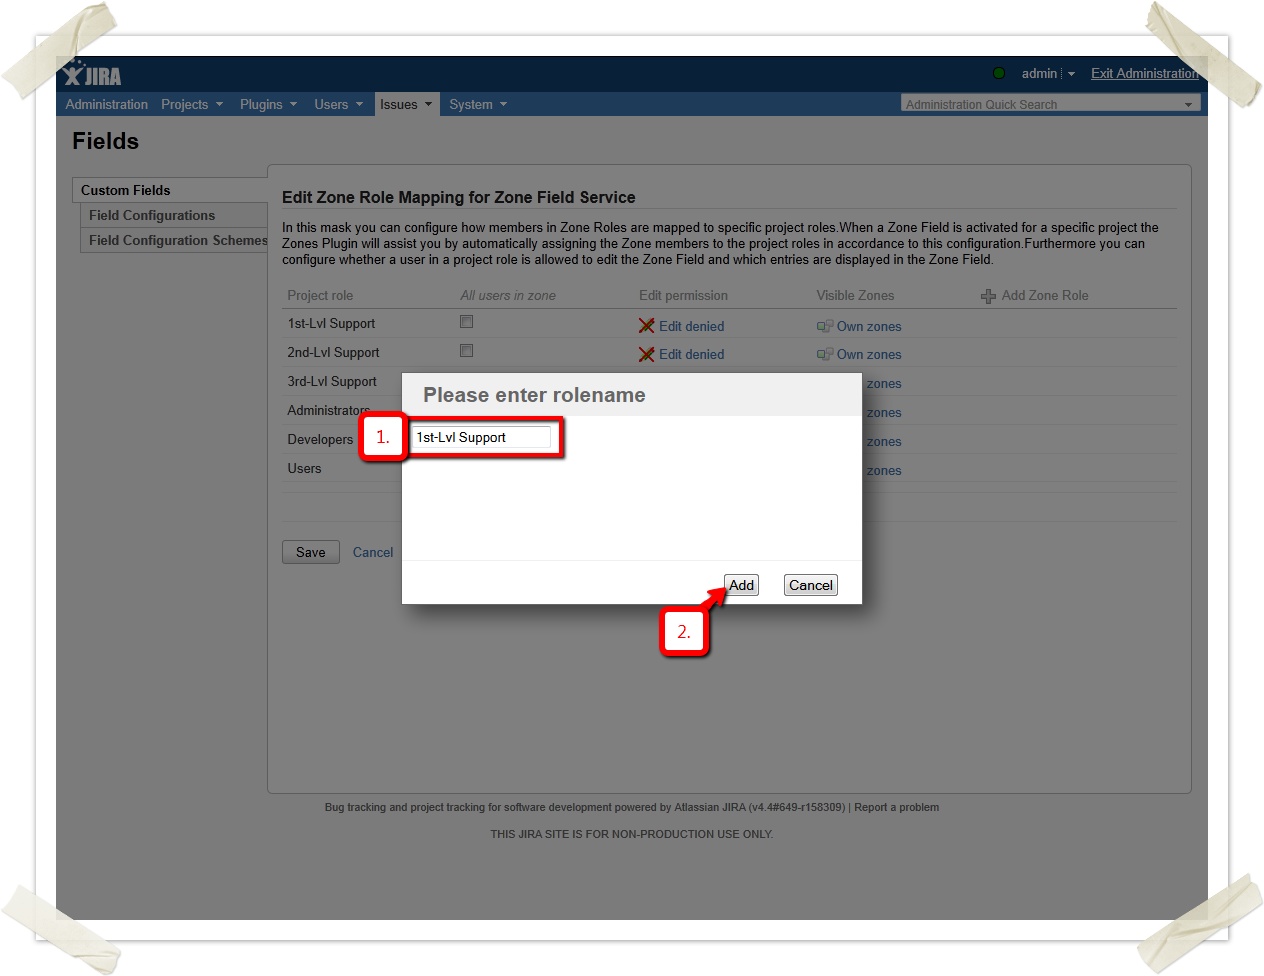
In a similar manner create additional zone roles "2nd-Level Support" and "3rd-Level Support".
The newly created zone roles are now visible as colums in the view:
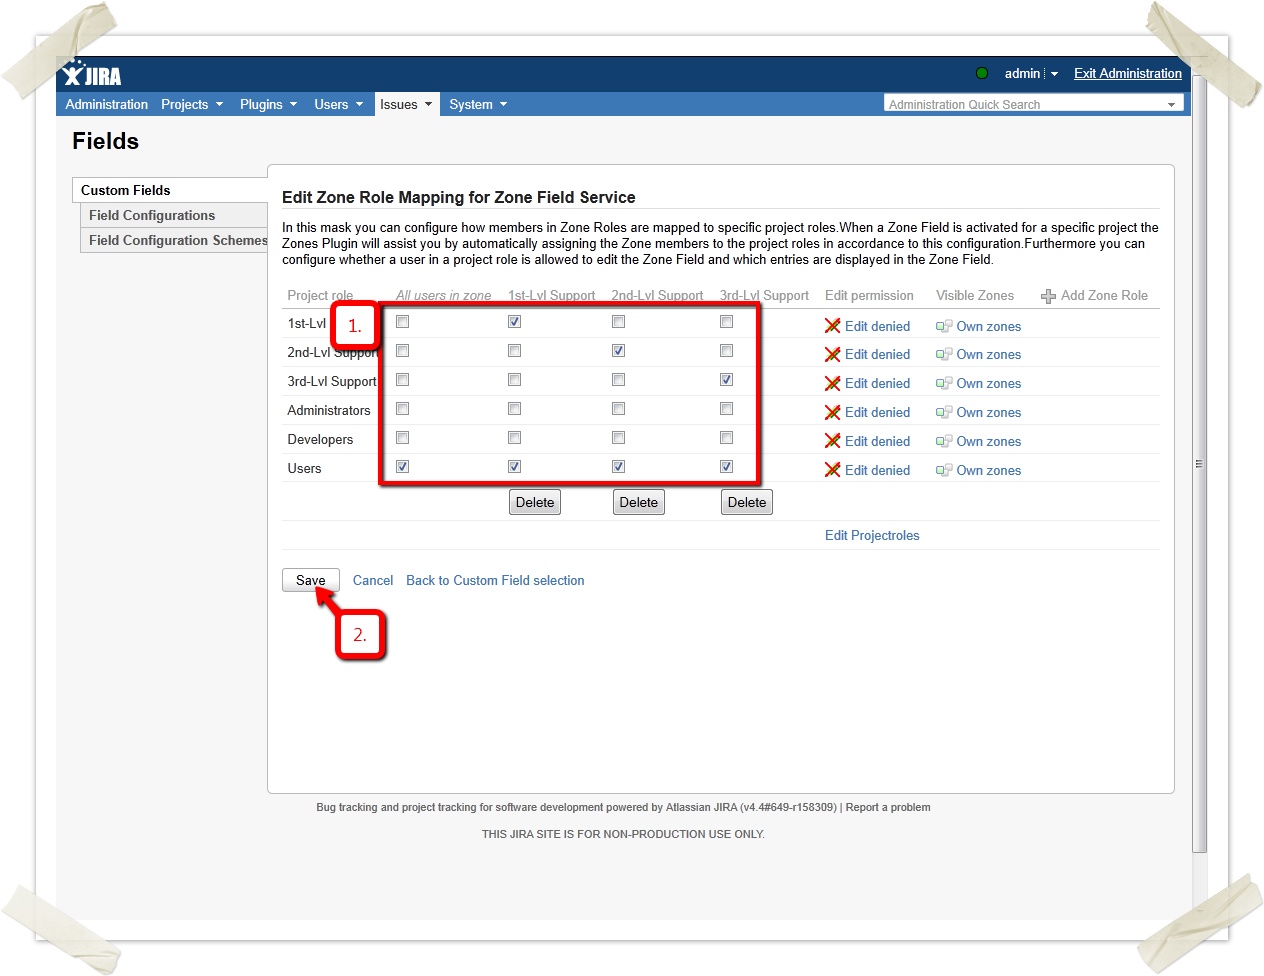
Defining the Role Mapping
Each 1st-Level-Support user is automatically assigned to the JIRA project roles "1st-Level-Support" and "Users".
Each 2nd-Level-Support user is automatically assigned to the JIRA project roles "2nd-Level-Support" and "Users".
Each 3rd-Level-Support user is automatically assigned to the JIRA project roles "3rd-Level-Support" and "Users".
Defining Permissions
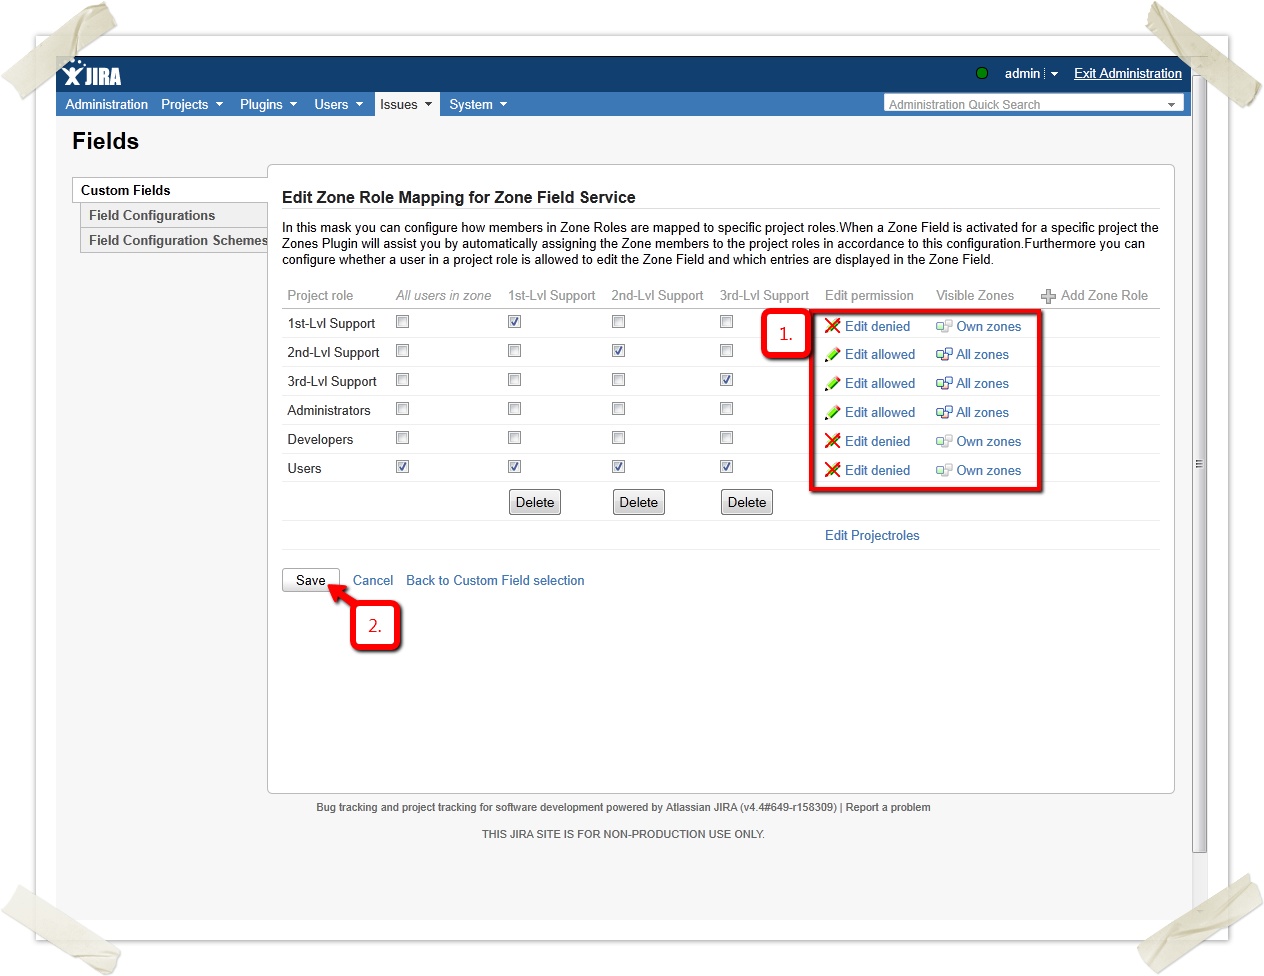
Now define which operations the zone fields shall offer, based on the project role of the current user. E.g., a user might be allowed to edit a zone field, or only to view it. Or a user may be allowed to see all existent zones or only the zones he belongs to.
In this configuration only 2nd-Lvl, 3rd-Lvl and Administrators are allowed to edit the zone field (and see all existing zones). Notice that the configurations "Editing denied/See all zones" and "Editing denied/See only own zones" usually make a difference in practice: a zone field is only considered to be edited when the issue already exists - hence if the issue is edited. Thus, if an issue is created, the zone field is not considered to be edited. This means that a user may define its value whenever he likes during issue creation. Thus when creating an issue, a user with permission "Editing denied/See all zones" may choose the value of the field arbitrarily, whereas a user with permission "Editing denied/See only own zones" can only select those zones he belongs to.
Only the JIRA project roles "2nd-Lvl-Support", "3rd-Lvl-Support" and "Administrators" can edit the custom fields after they are initially set.
Only the JIRA project roles "2nd-Lvl-Support", "3rd-Lvl-Support" and "Administrators" can see all zones. "1st-Lvl-Support" users will only see their own zones.
Now click "Back to Custom Field selection".
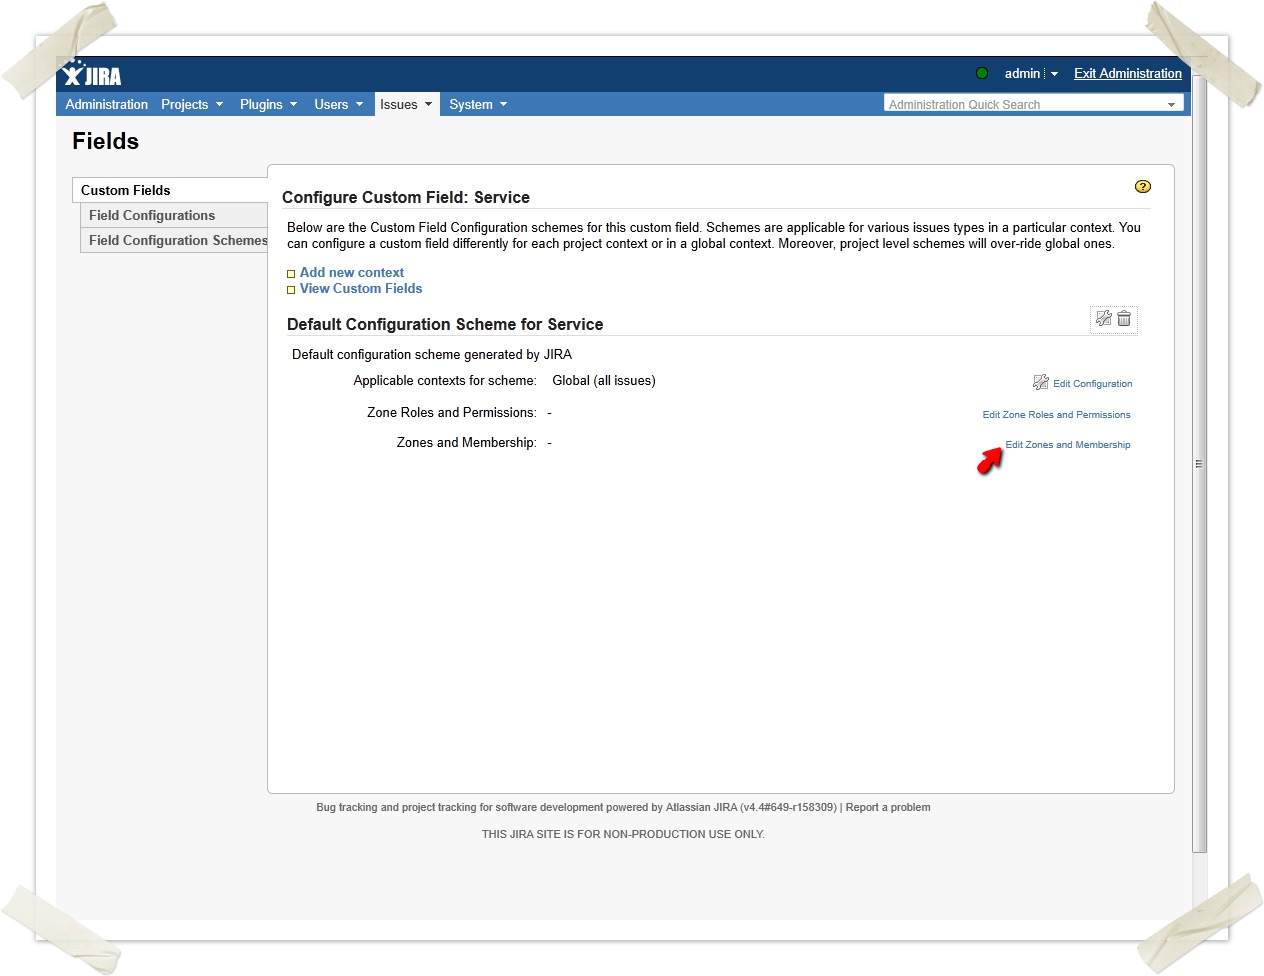
Configuring the user mapping
Let's now configure which users belong to which zone:
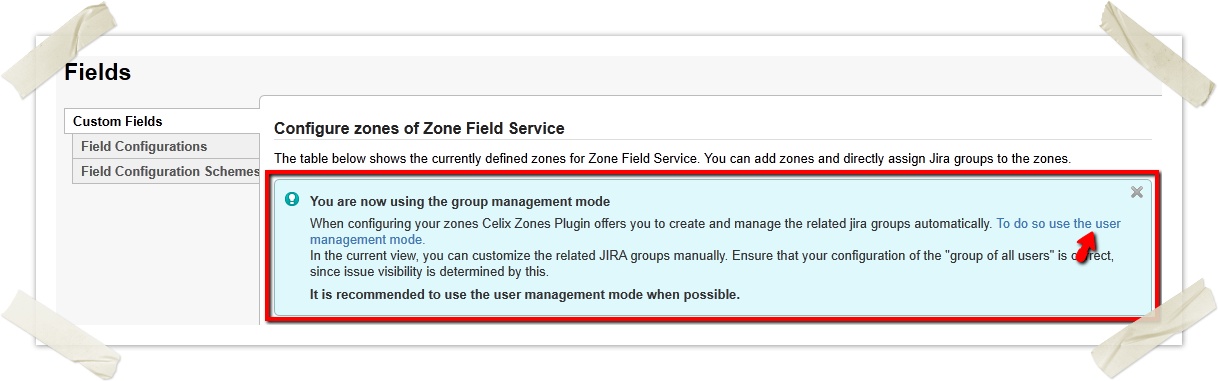
Depending on your JIRA configuration, the Celix Zones Plugin will either use the "group management mode" or "user management mode" by default. For the next steps you must be in the "user management mode". If you are presented the hint below, click "use the user management mode". If this hint is not displayed, simply proceed.
You can add a new zone to your custom field now.
Define which users belong to each zone role.
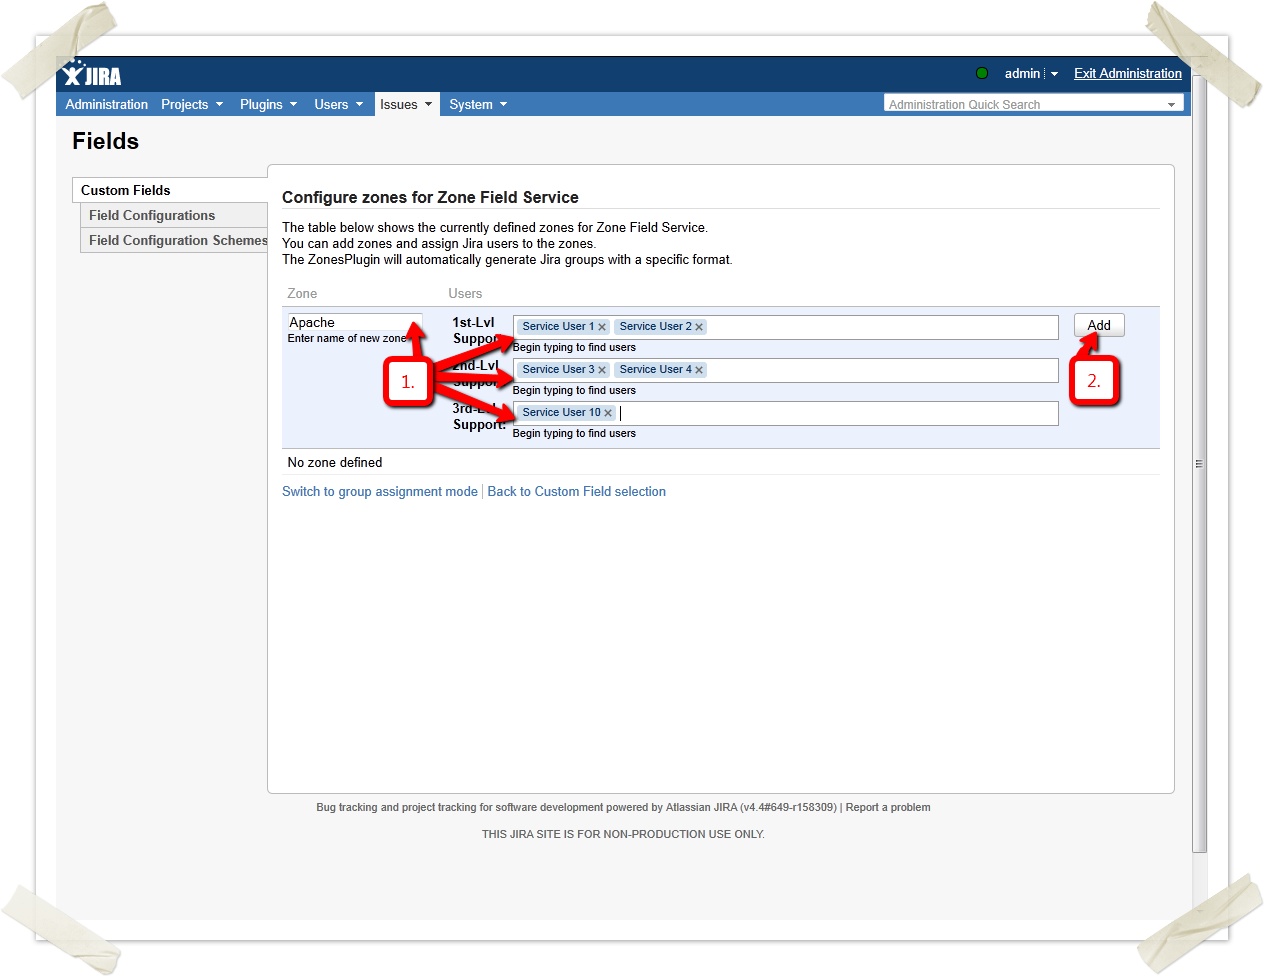
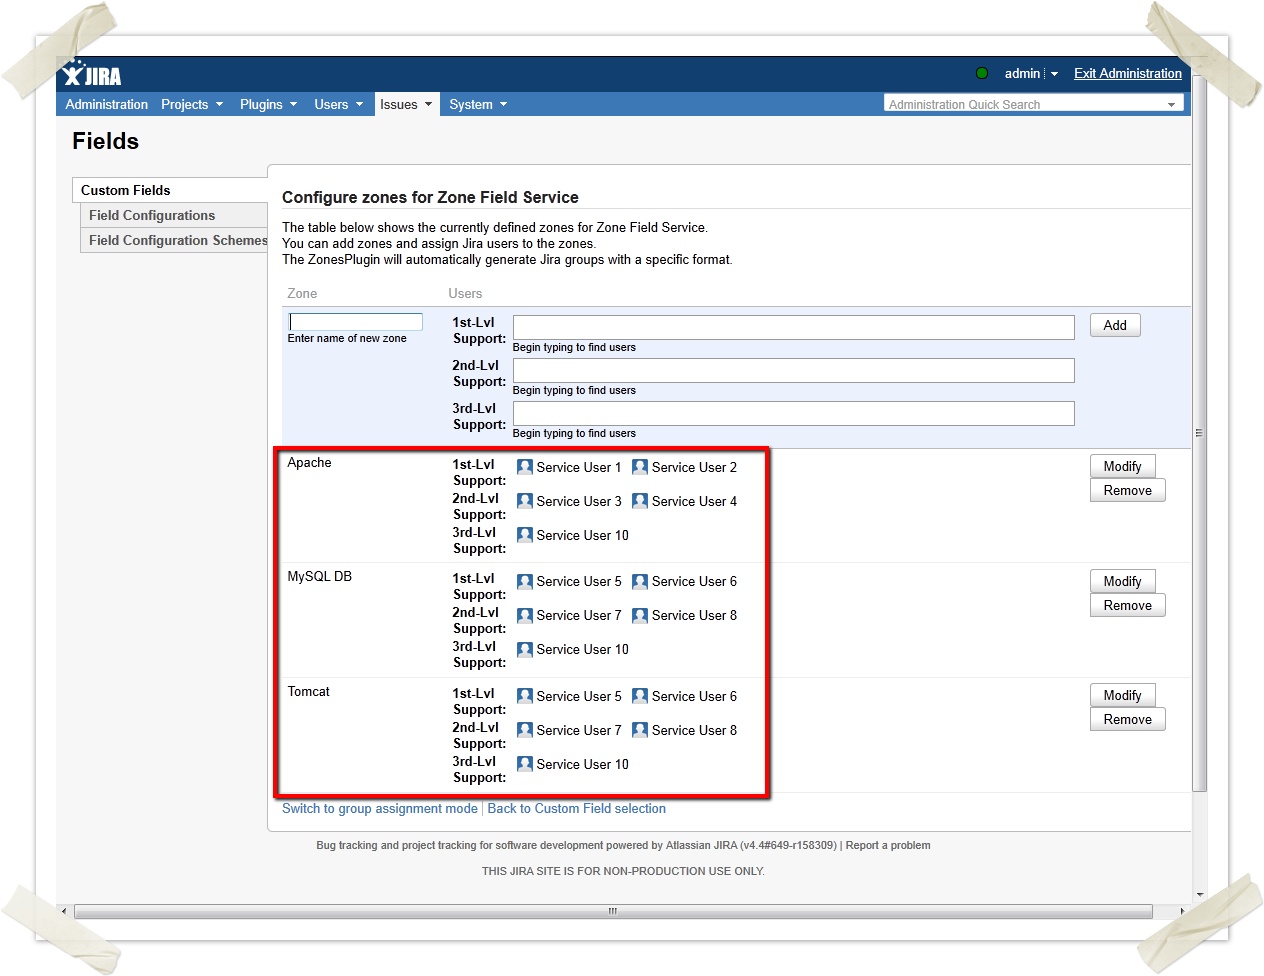
You define 3 zones like the following:
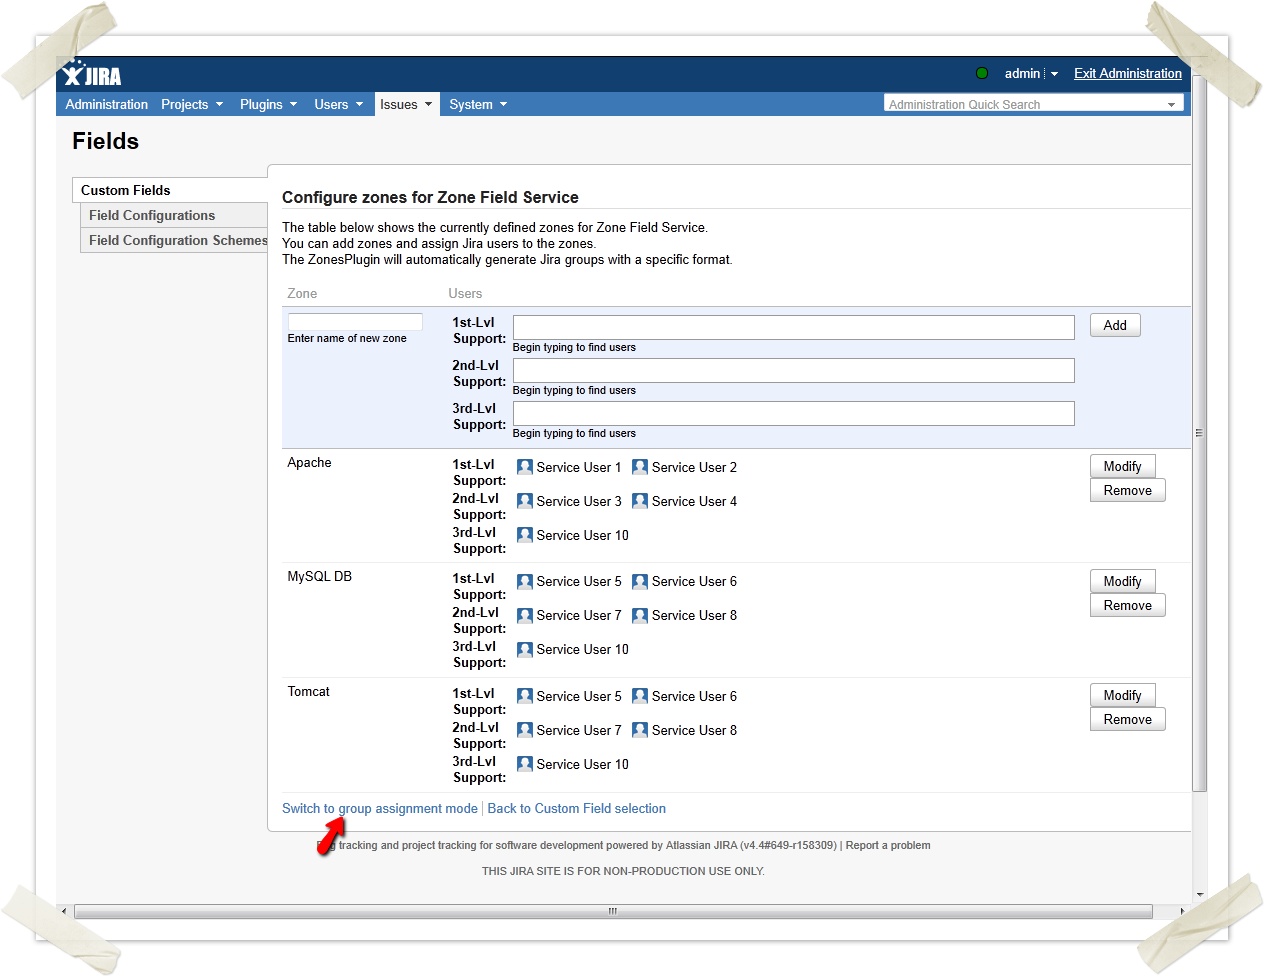
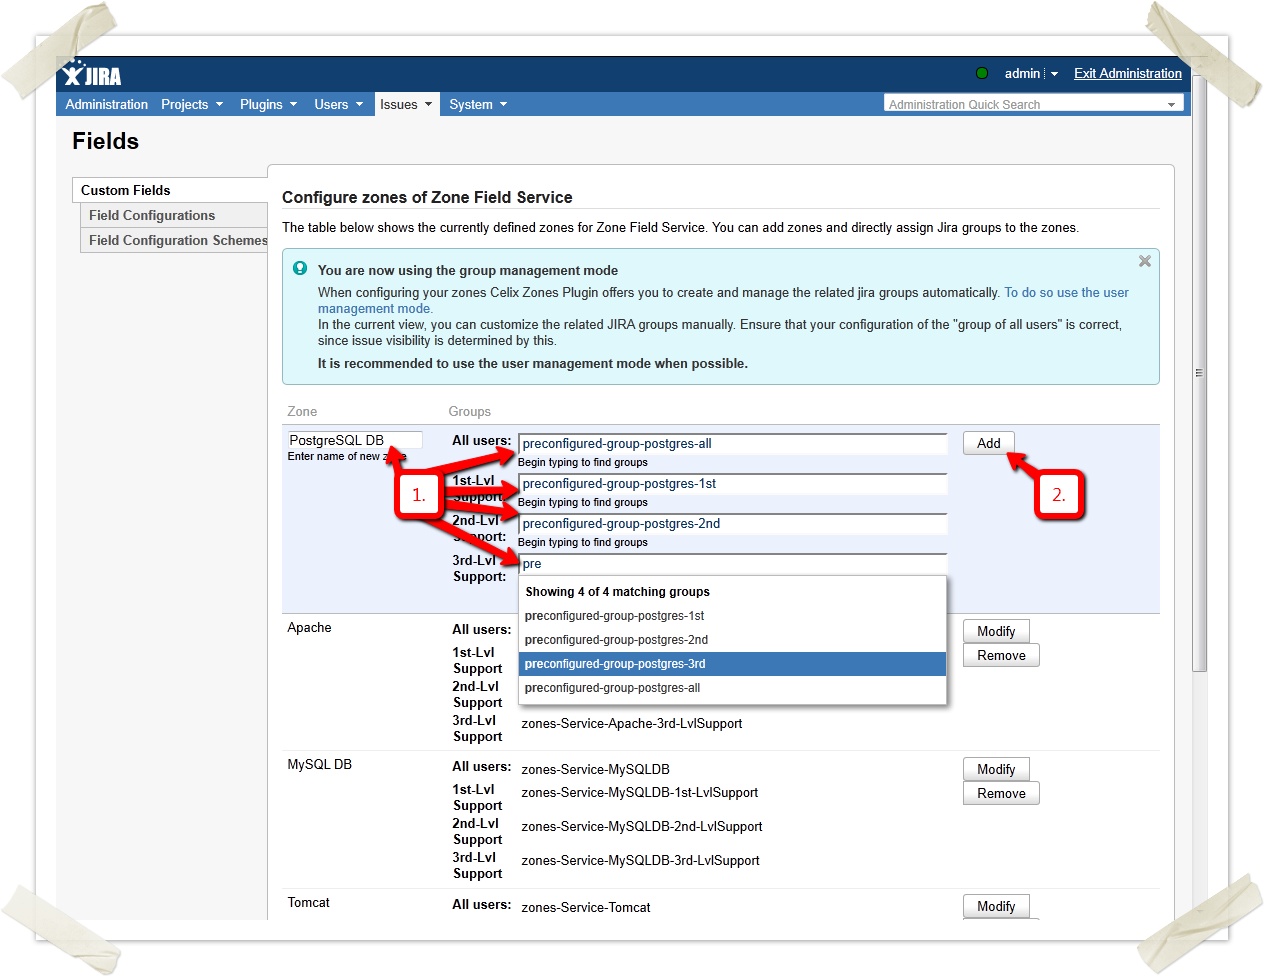
Instead of assigning users to the zone roles - which will result in automatically created groups - you can also choose a JIRA group for a zone role directly.
Switch to the direct "group management mode".
Now assign the groups directly.
The first entry "All users" should now contain a group containing all zone users (i.e. all users of 1st-Lvl-Support, 2nd-Lvl-Support and 3rd-Lvl-Support)
Configuring the user custom fields
Next you have to configure the user custom fields.
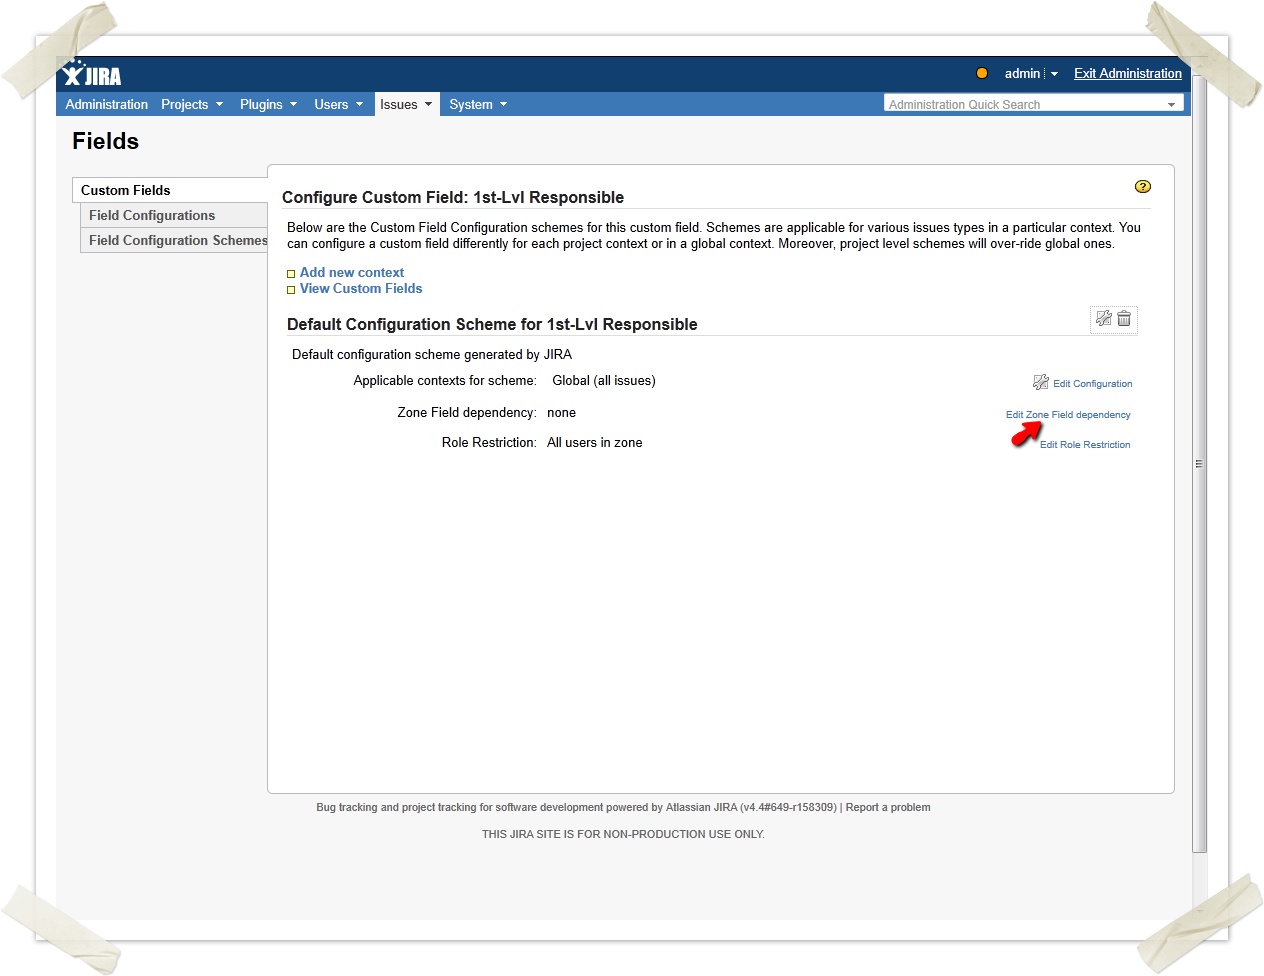
A "Zone User Selection" custom field depends on a "Zone Selection" custom field.
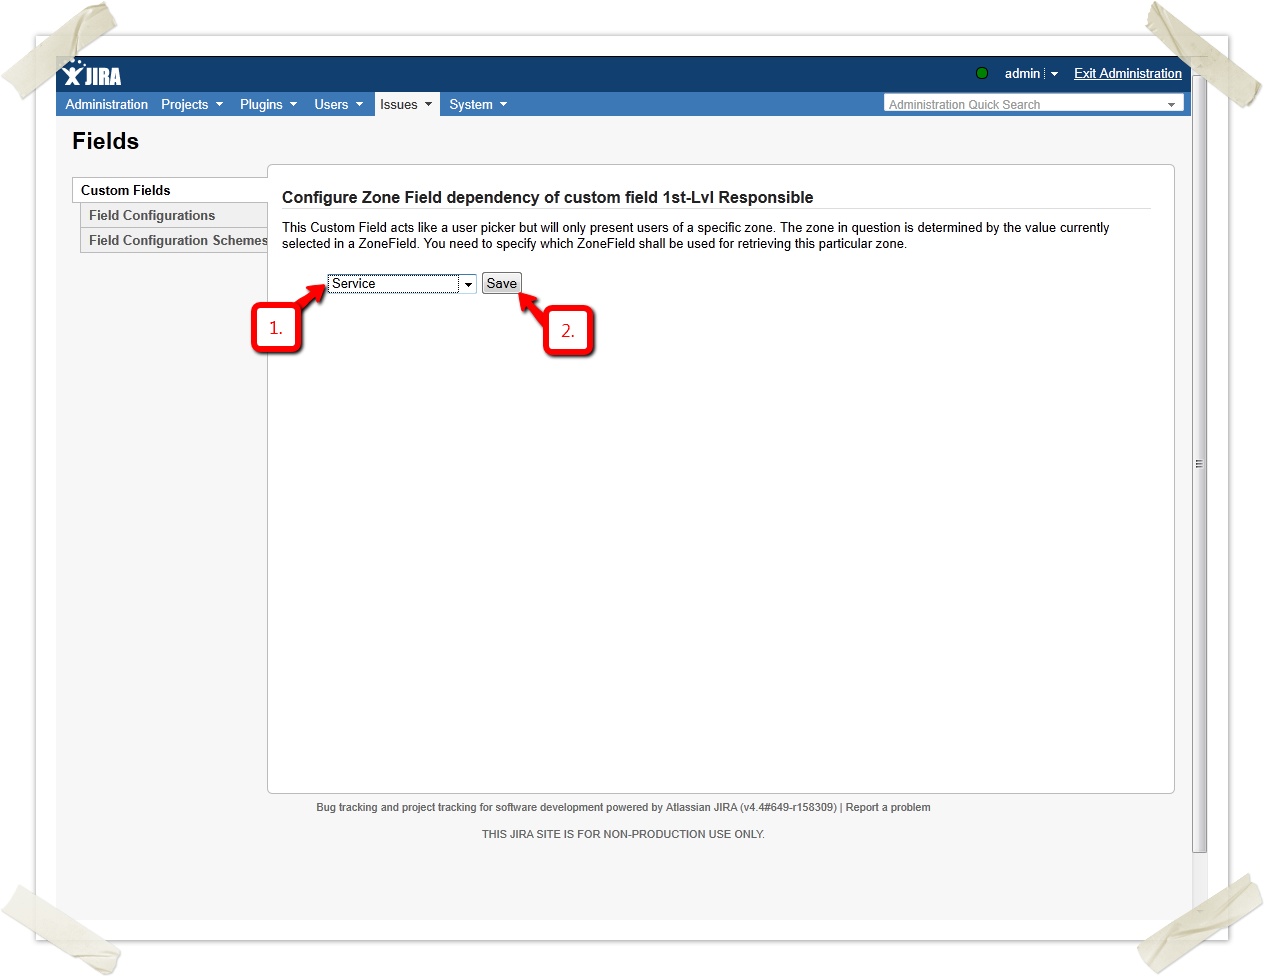
Configure now which "Zone Selection" custom field this is.
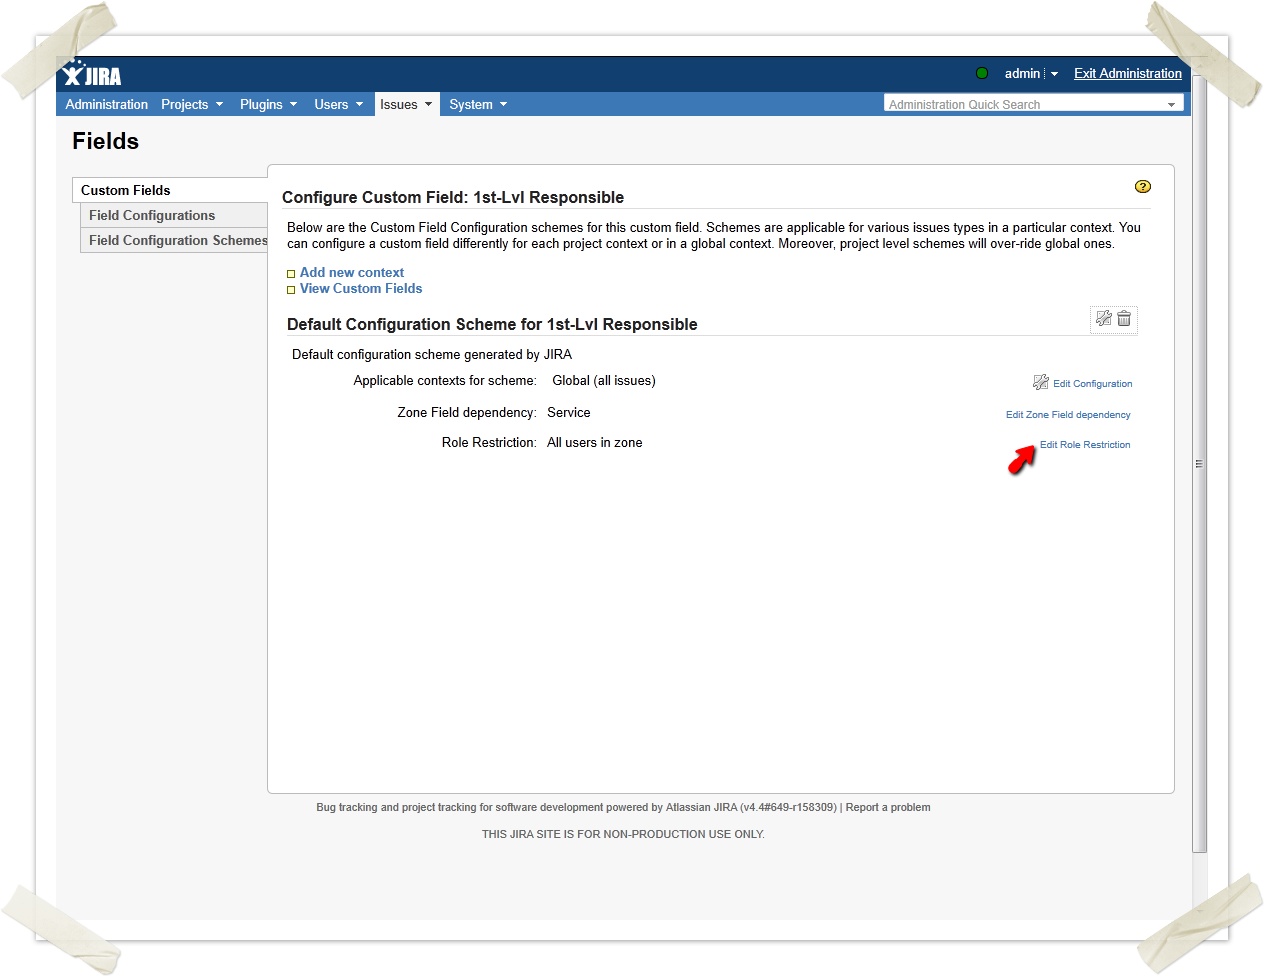
Define which users will appear in this user field.
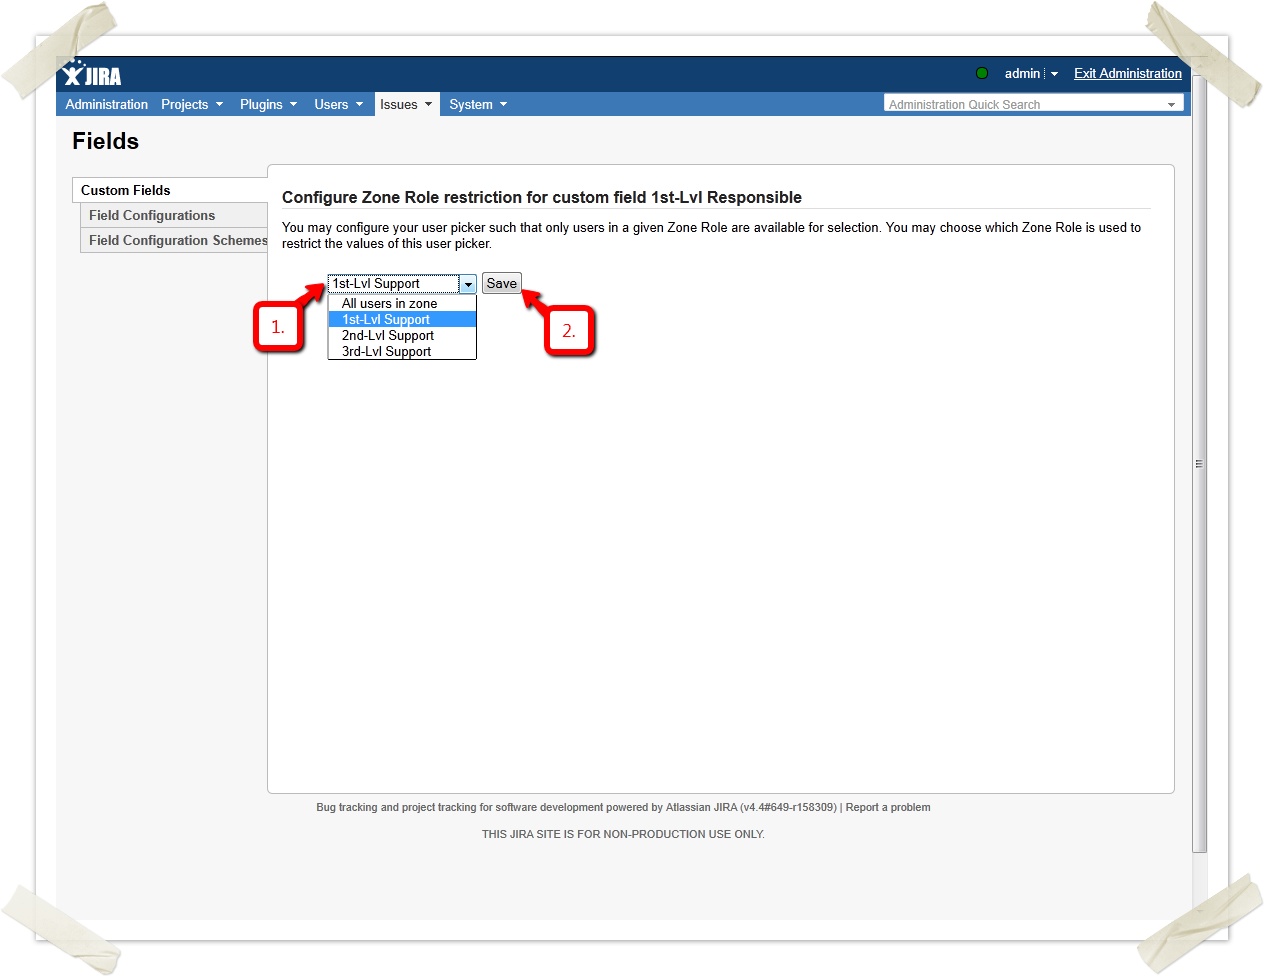
Choose a zone role. Notice that only users of this zone role will appear in this user field.
This procedure has to be done for all other custom fields as well.
You now restrict the field "2nd-Lvl Support" to the Zone role "2nd-Lvl Support" and the field "3rd-Lvl Support" to the Zone role "3rd-Lvl Support" respectively.
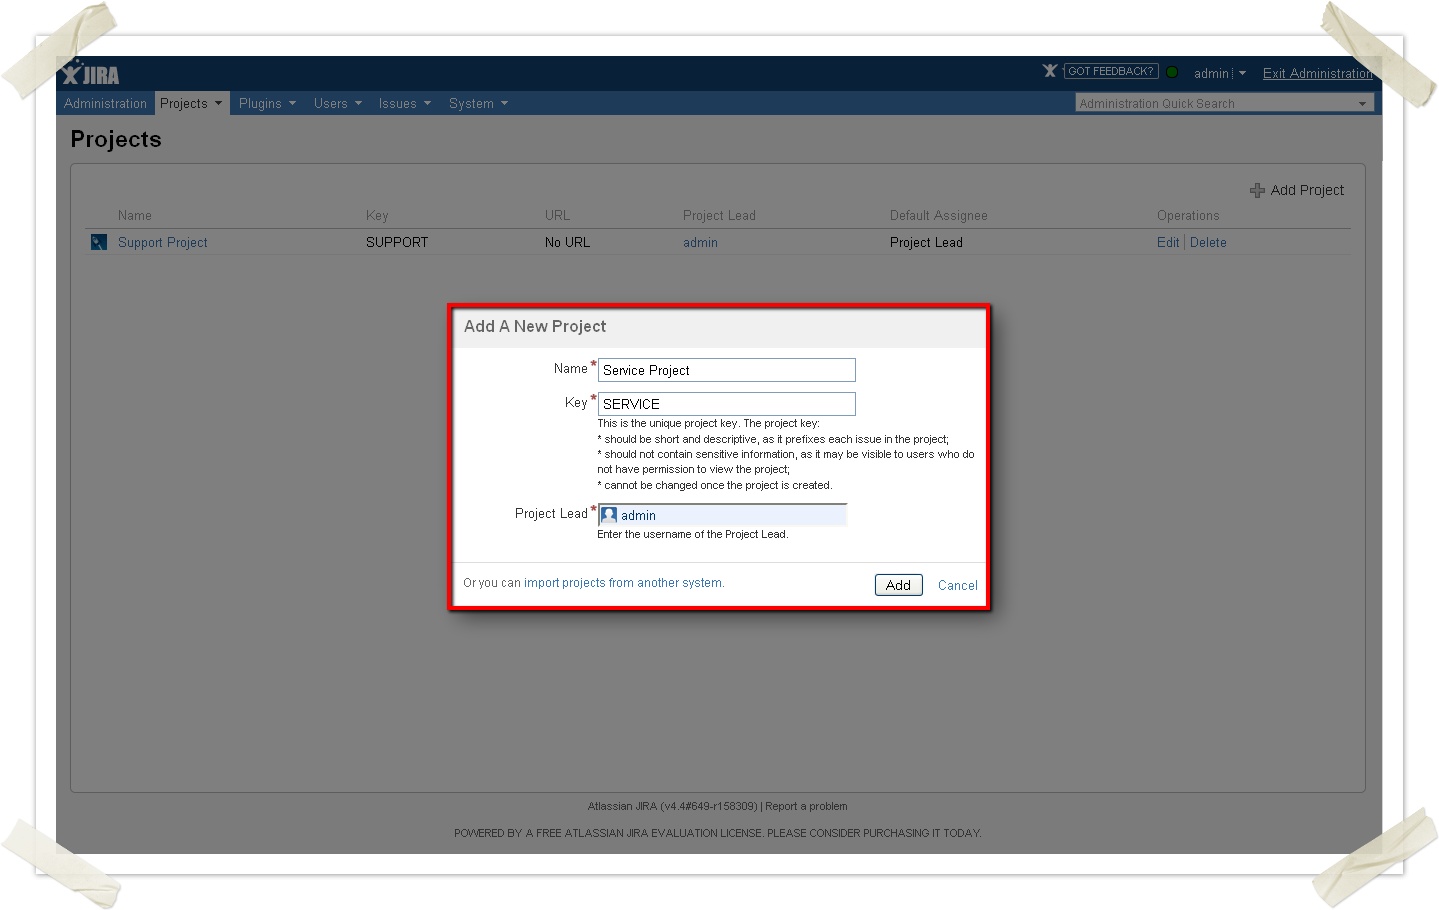
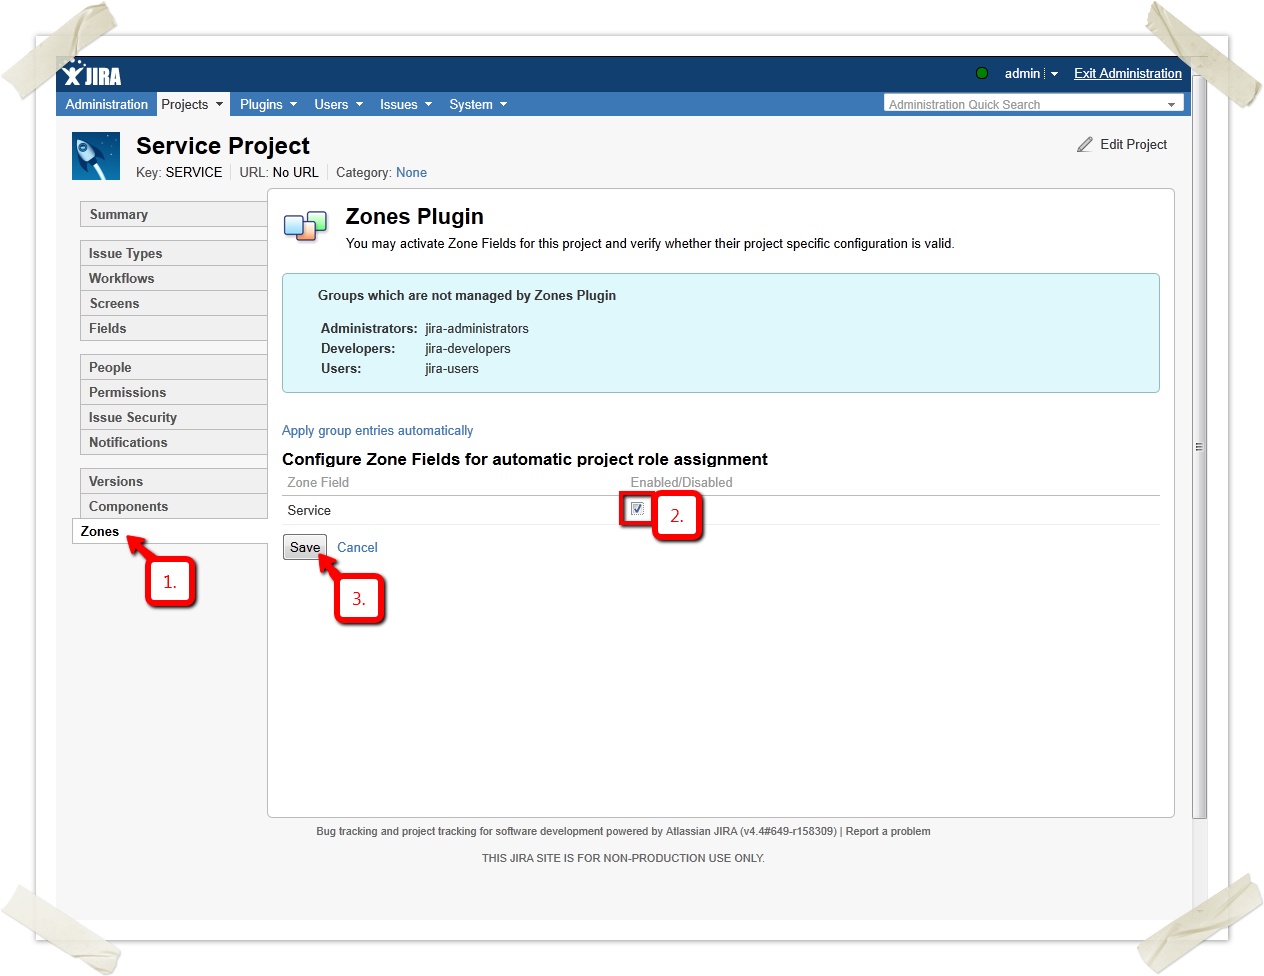
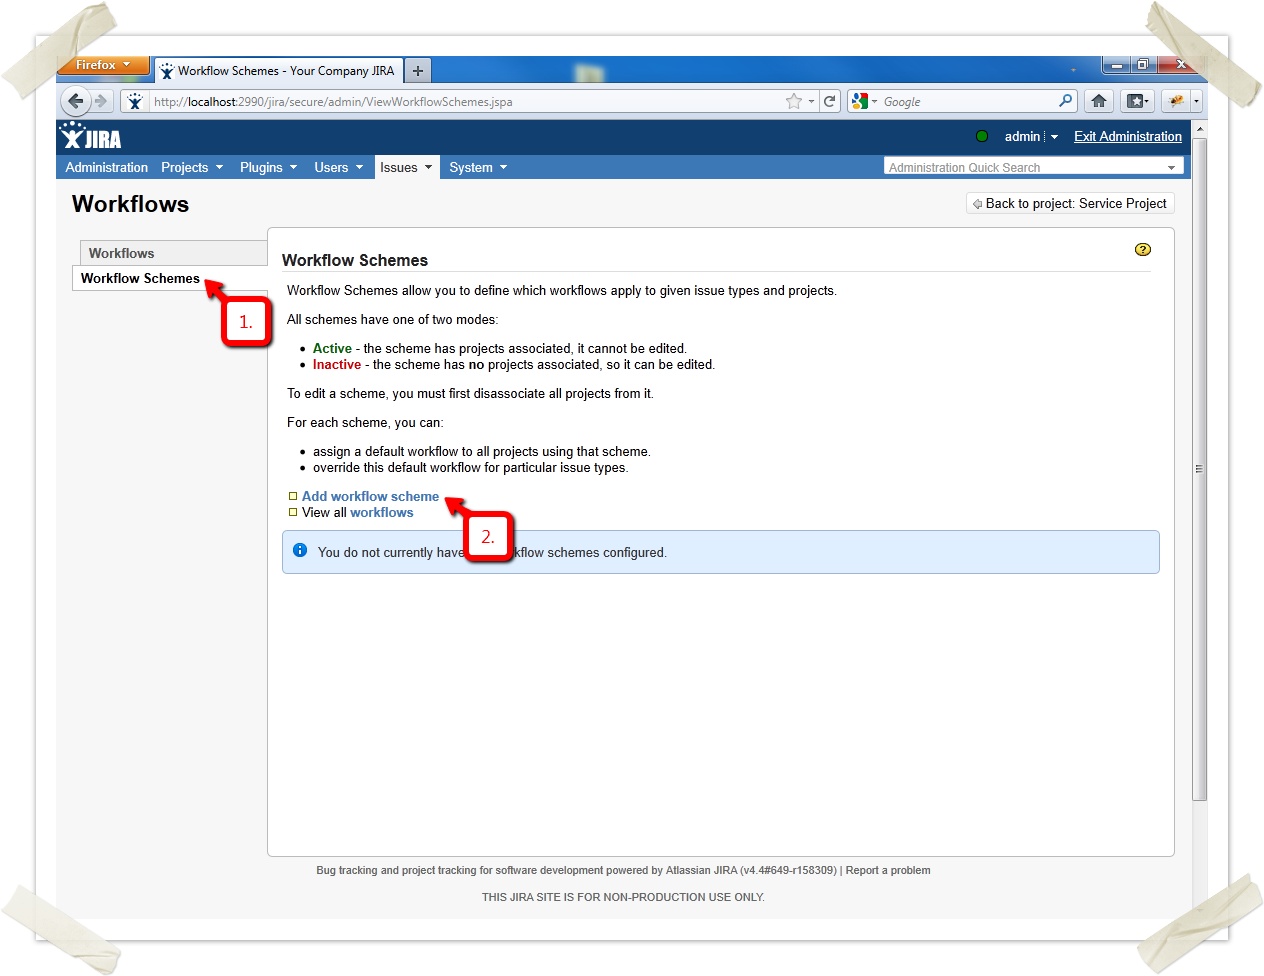
Creating the service project
Enable the service zone field in the zones tab.
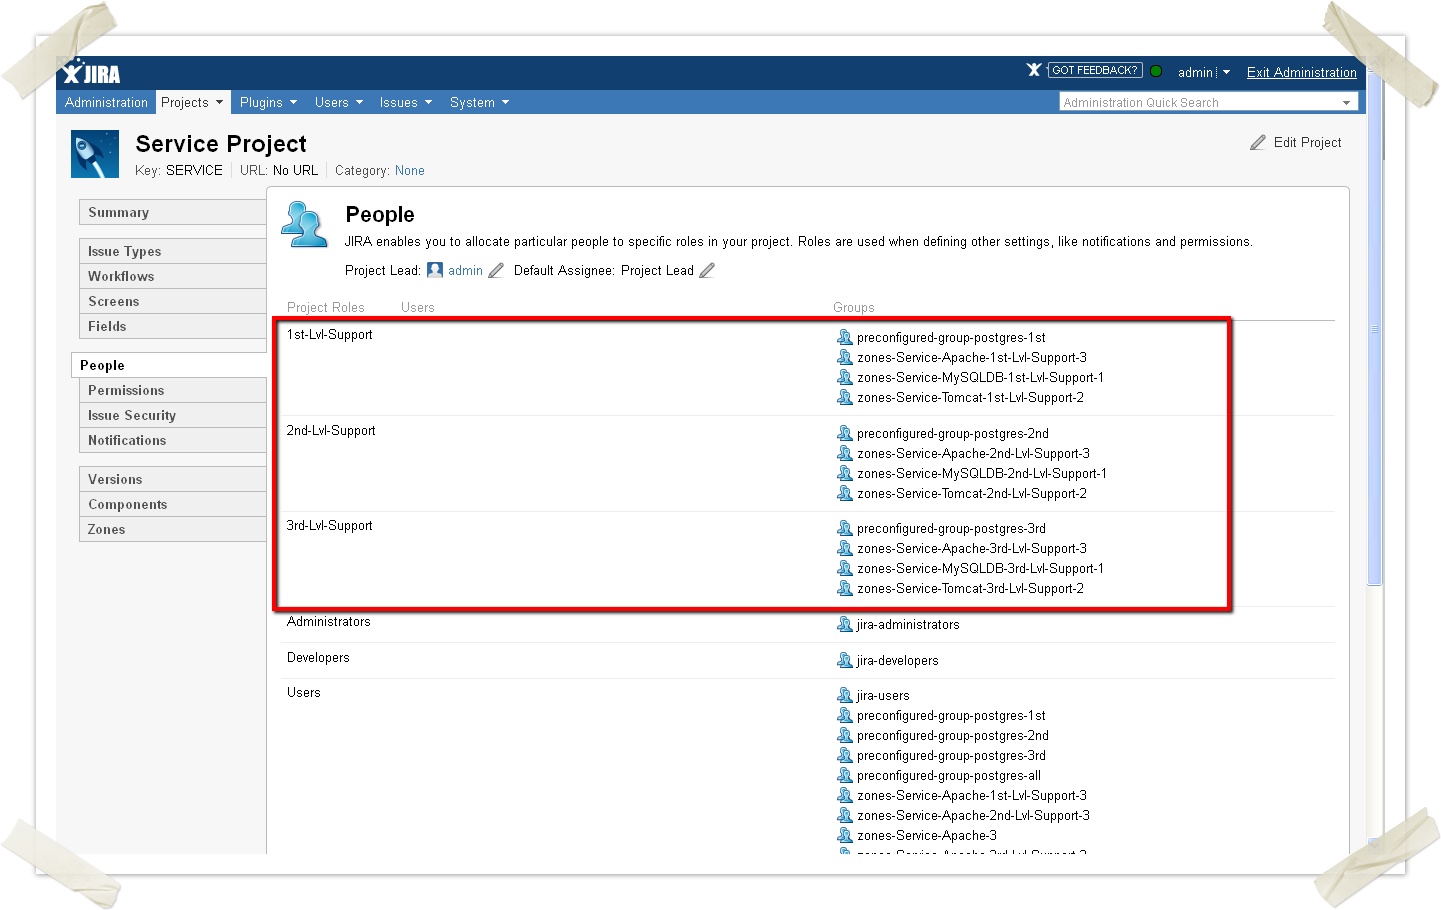
You can see the automatically assigned groups in the people tab.
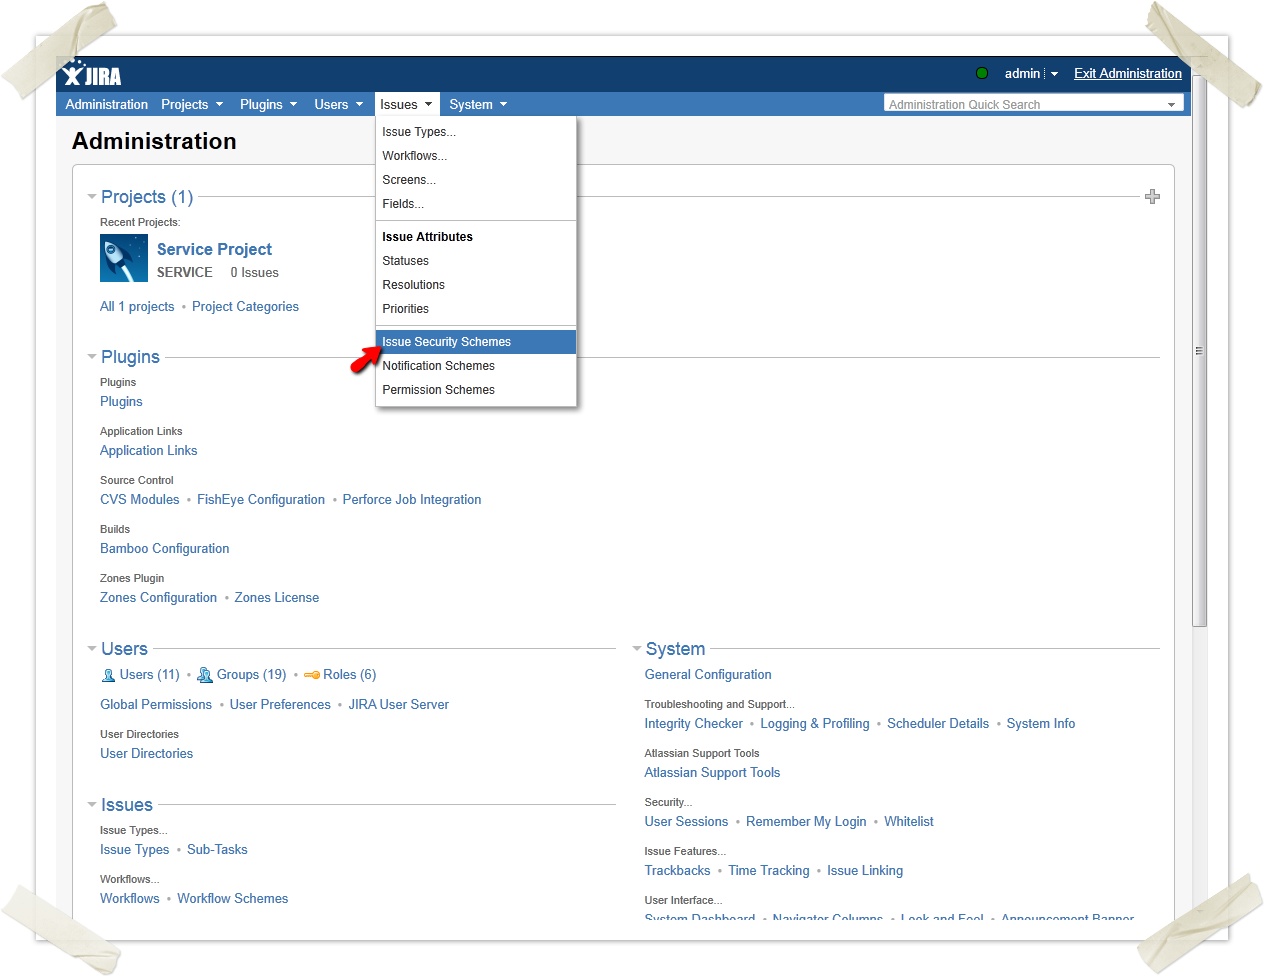
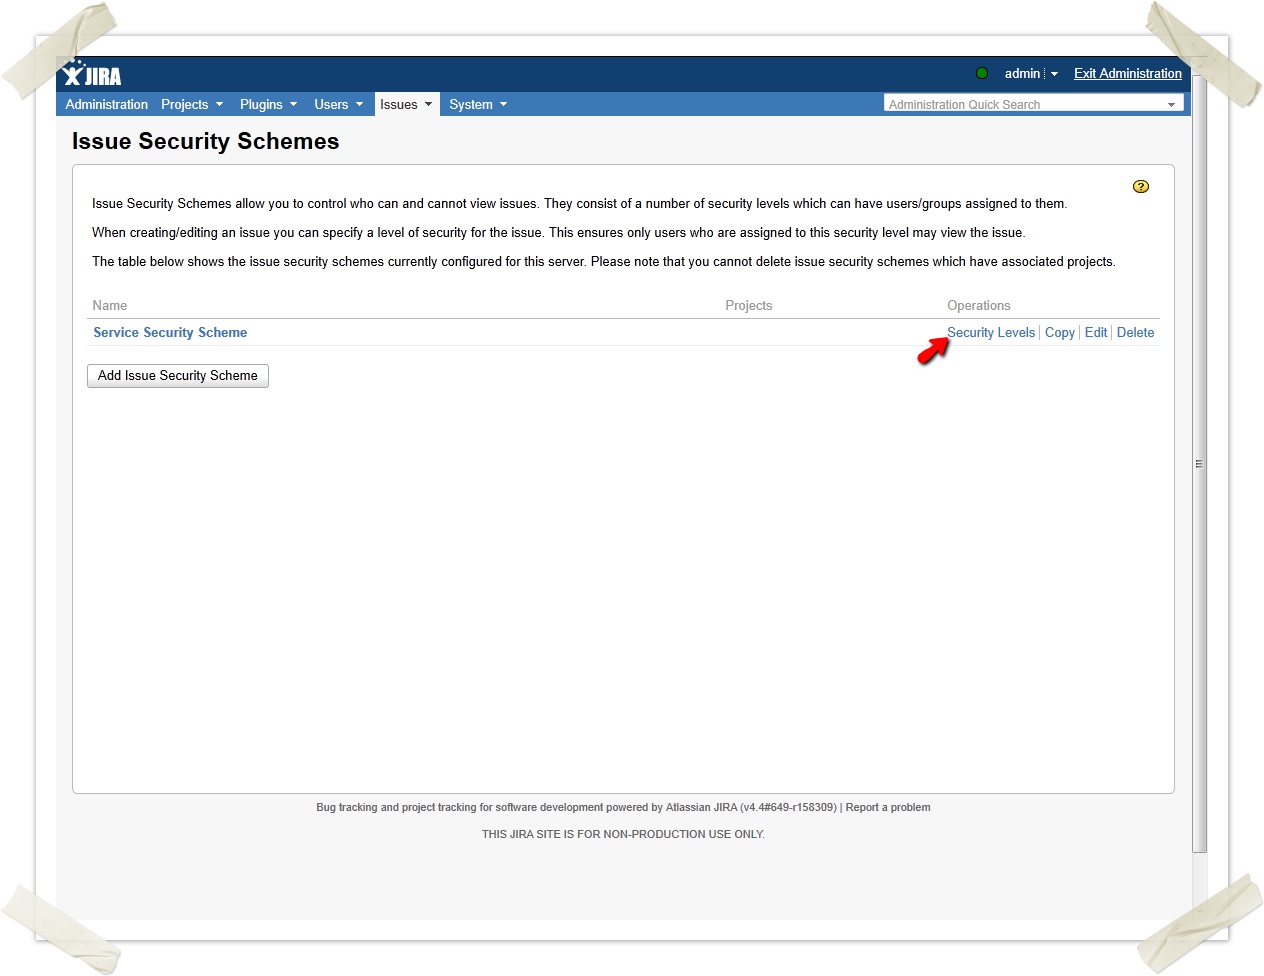
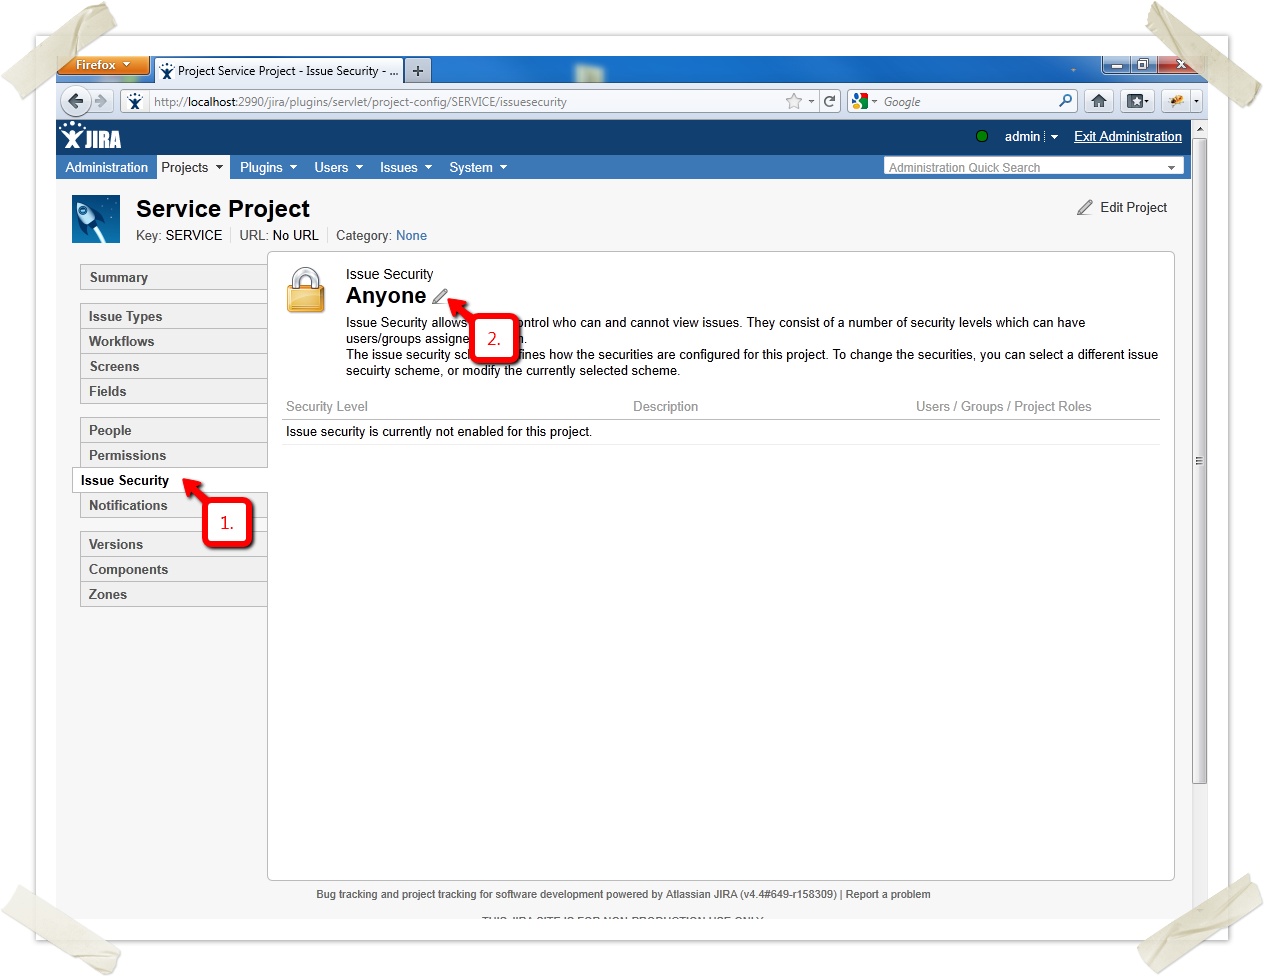
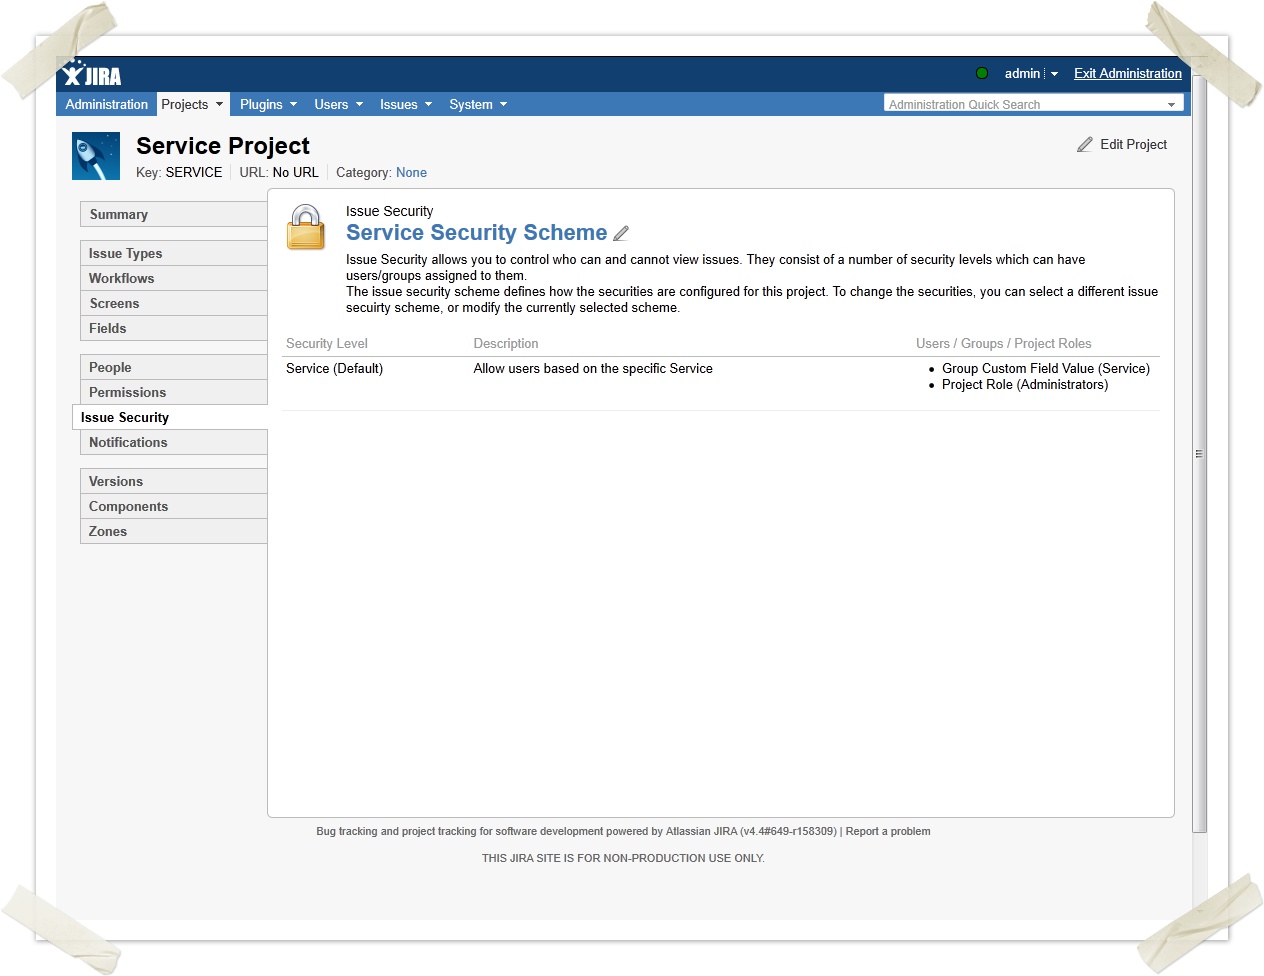
Using the custom field with an issue security scheme
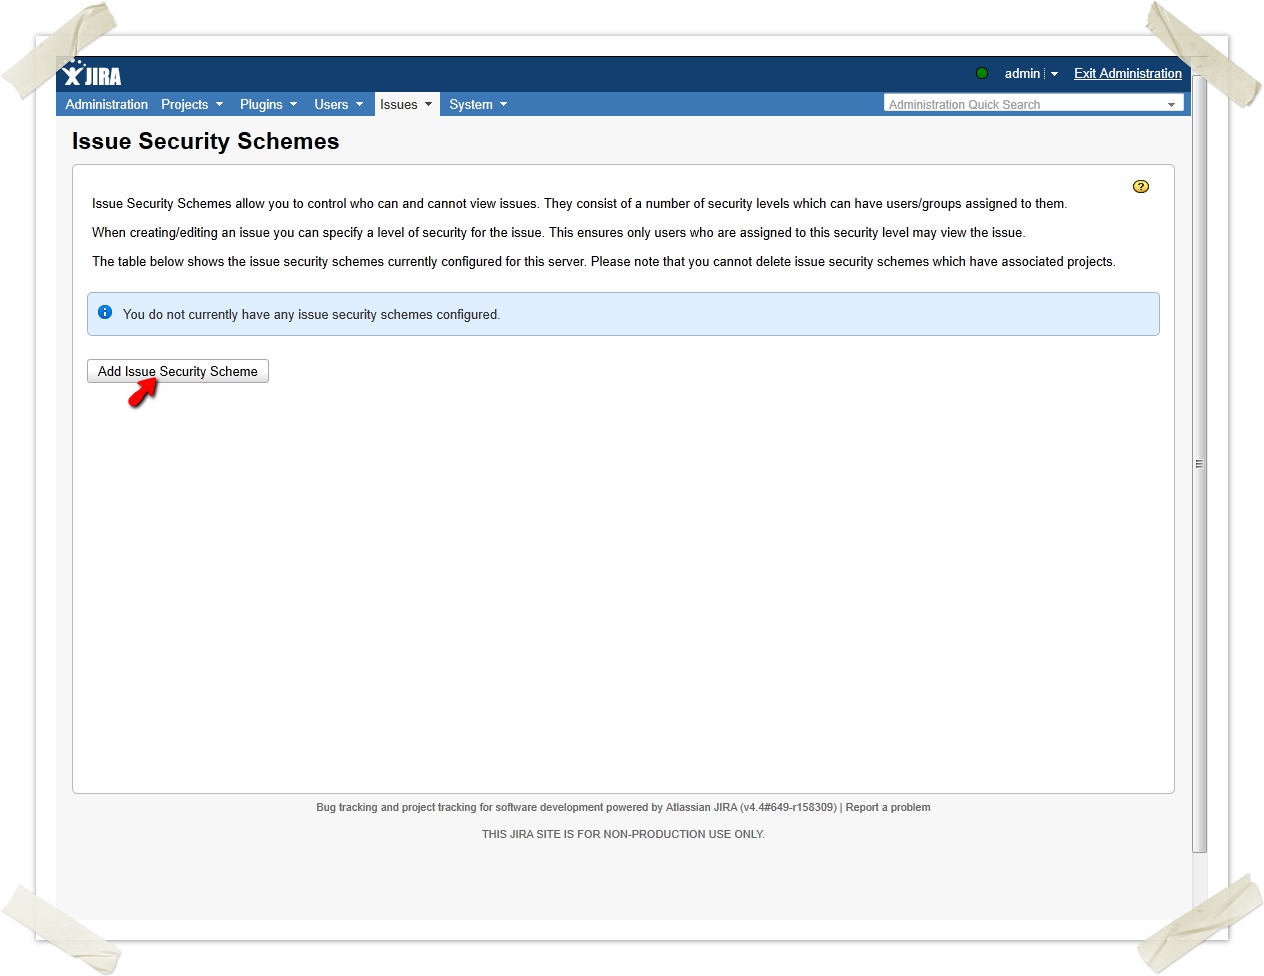
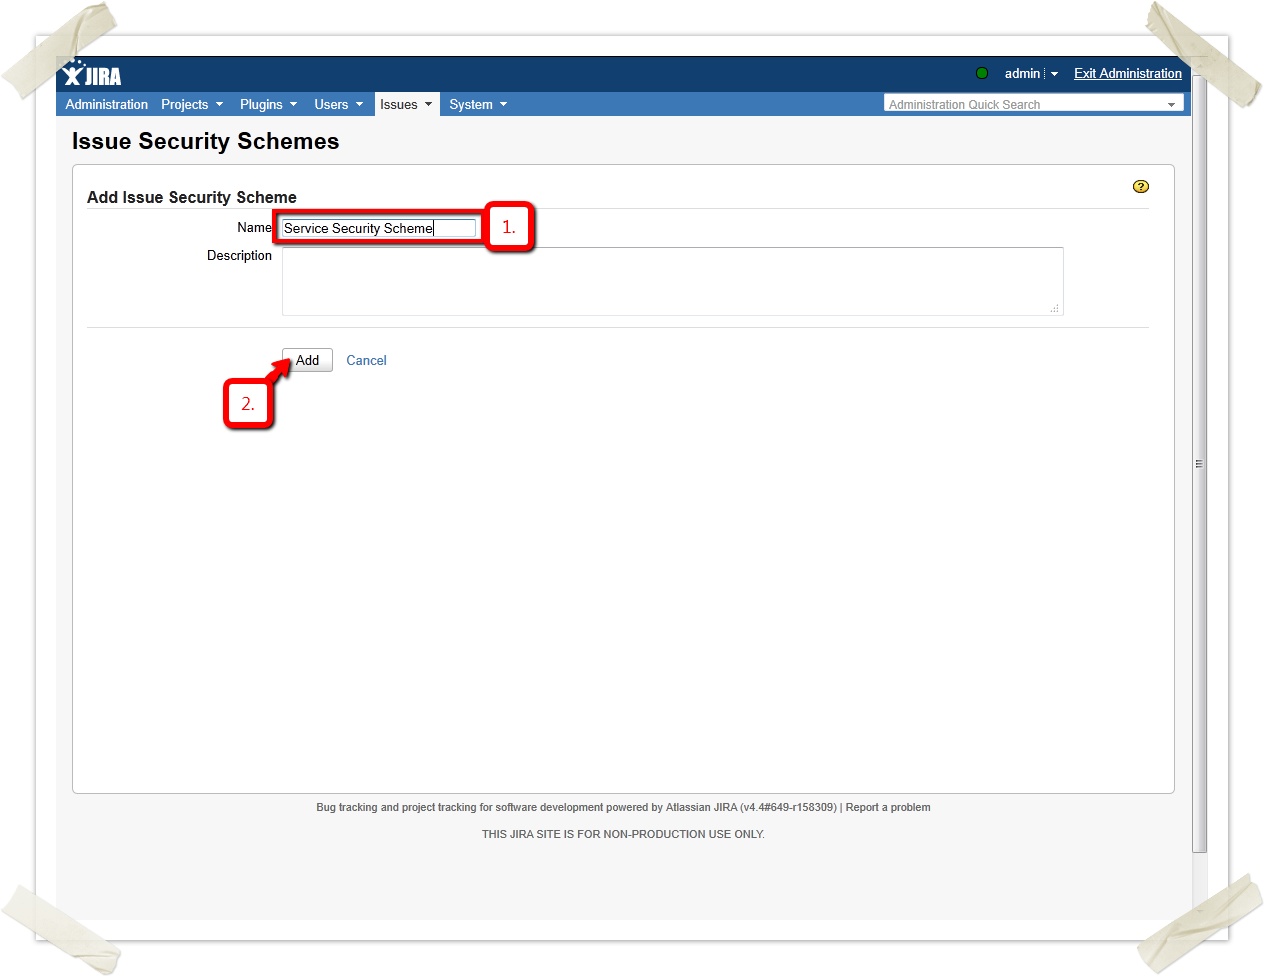
Create a new issue security scheme.
Add a new security scheme by clicking "Add Security Scheme".
Name the new security scheme "Service Security Scheme".
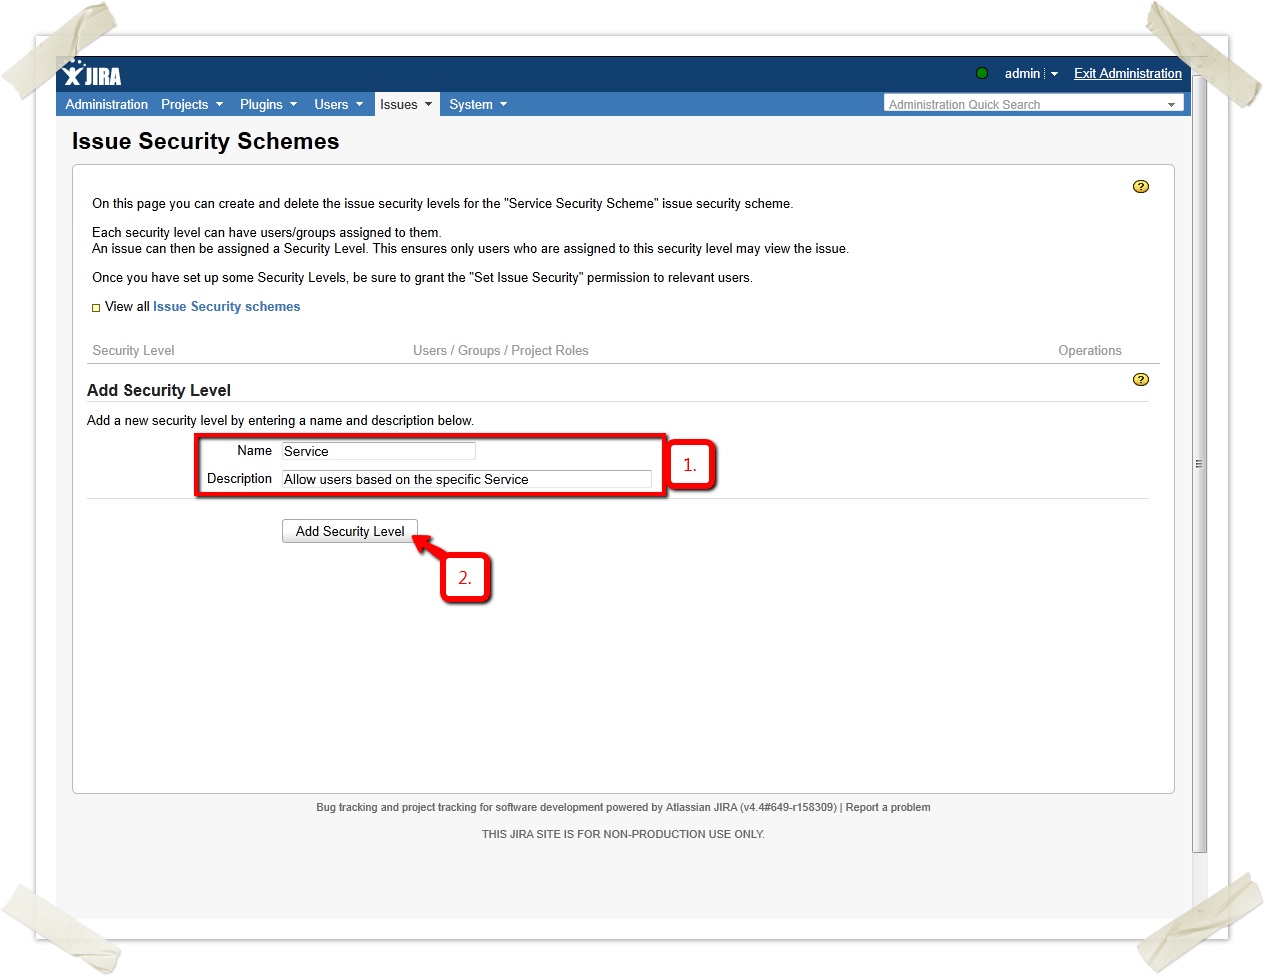
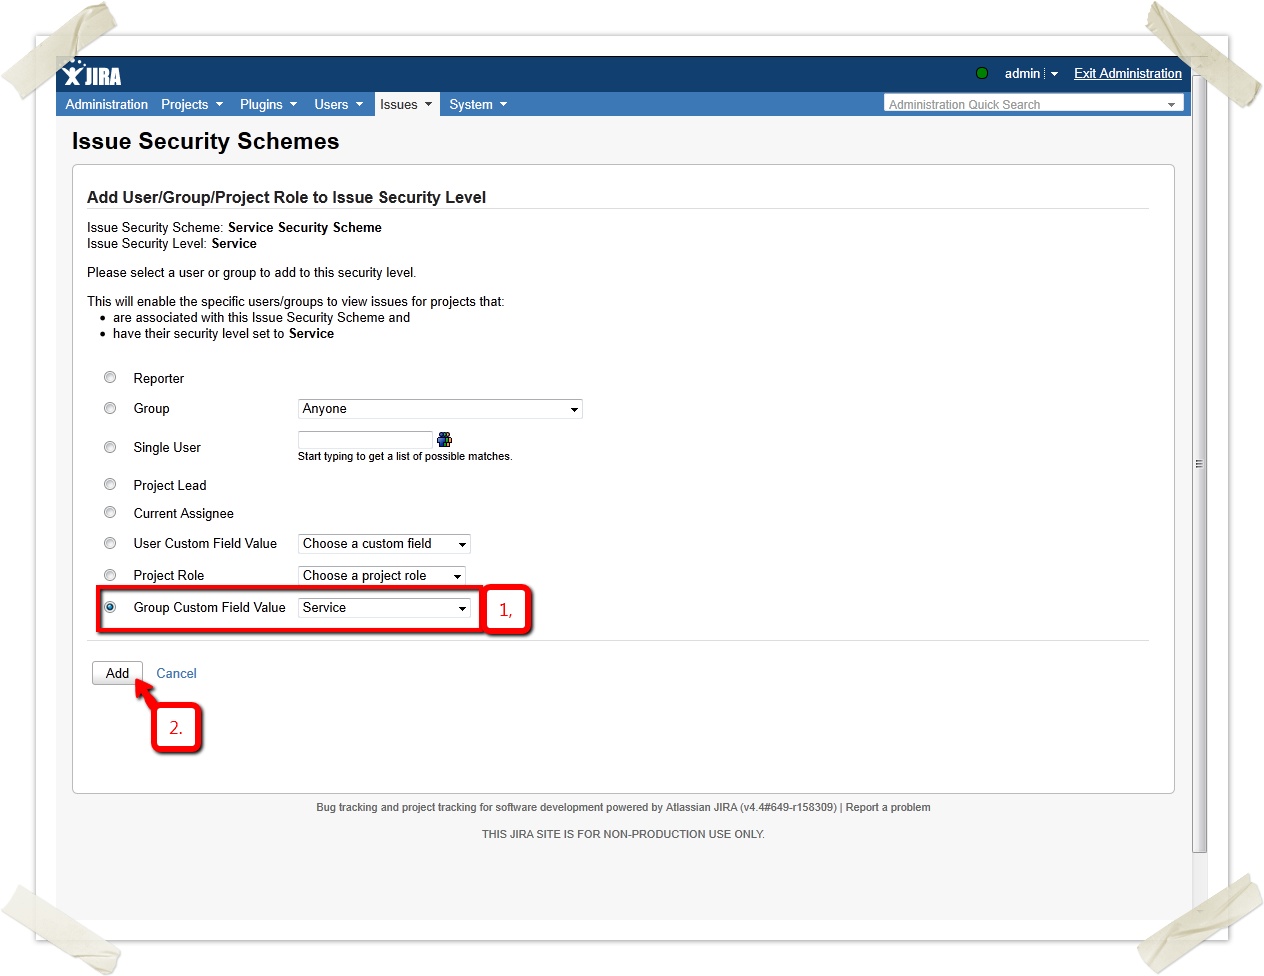
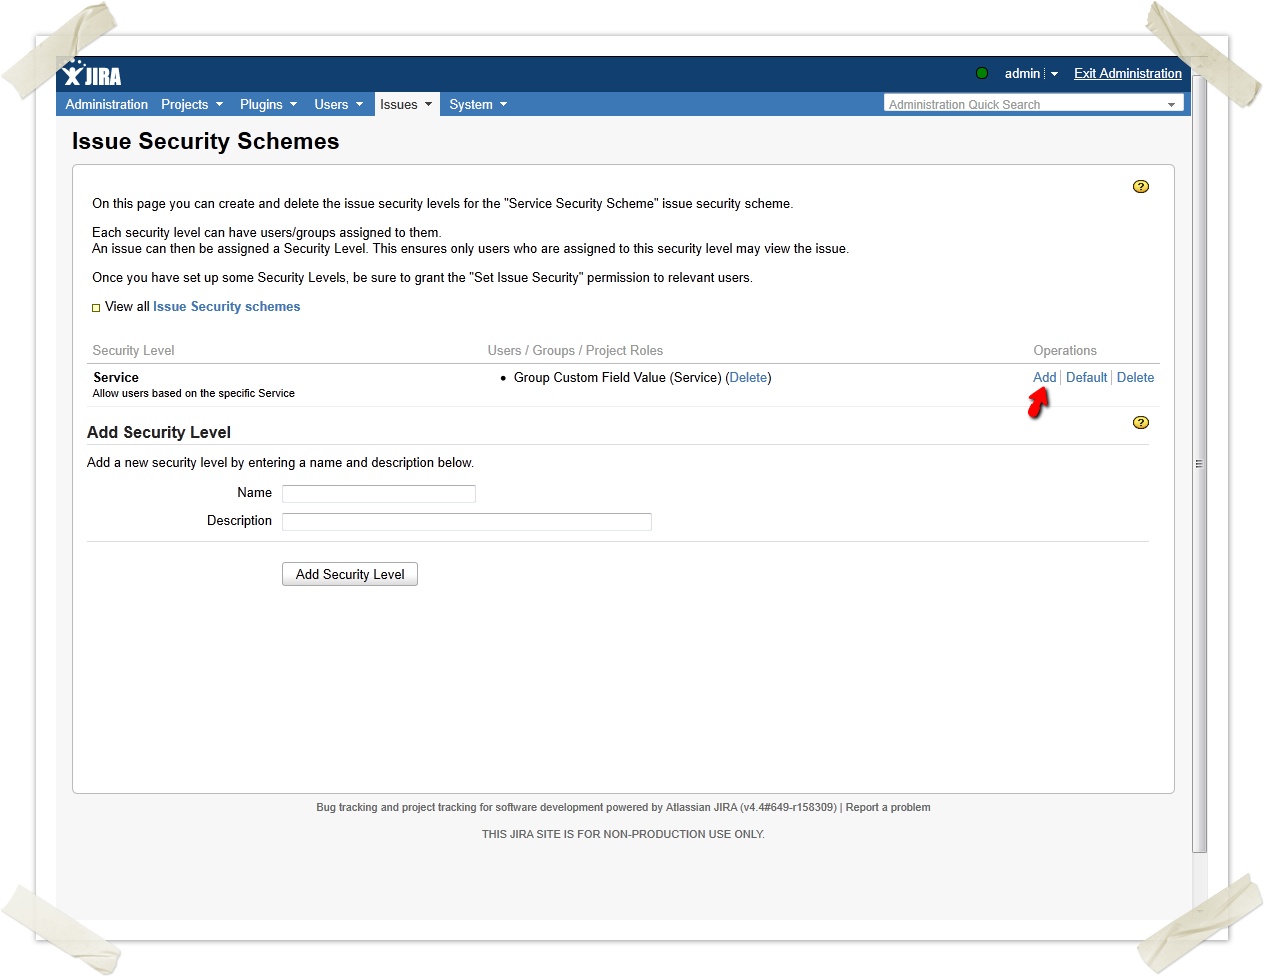
Now you need to add an operation allowing users to access the ticket based on the configured service:

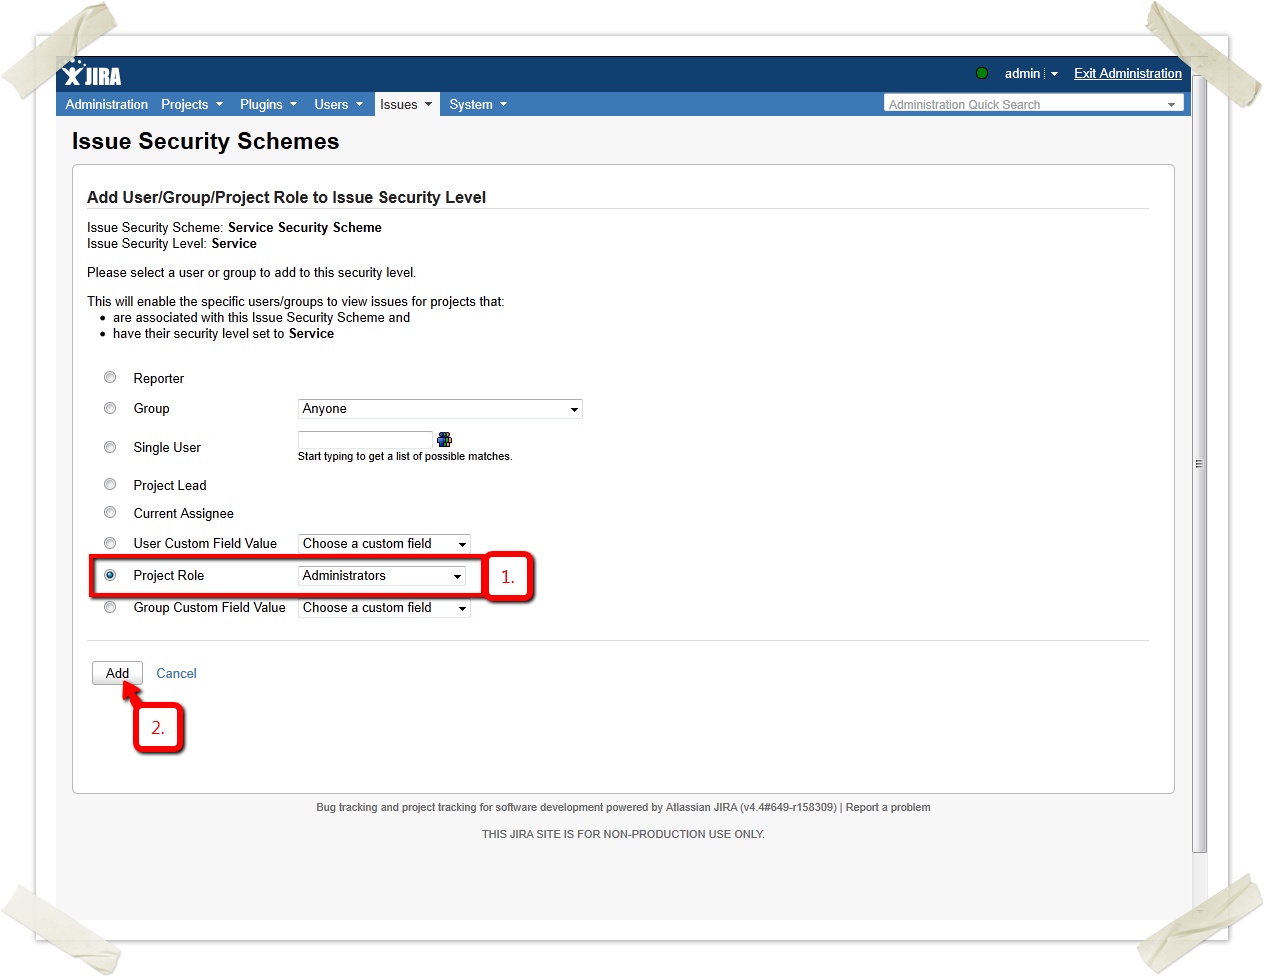
Then you additionally allow the administrator to view these tickets independent from the service:
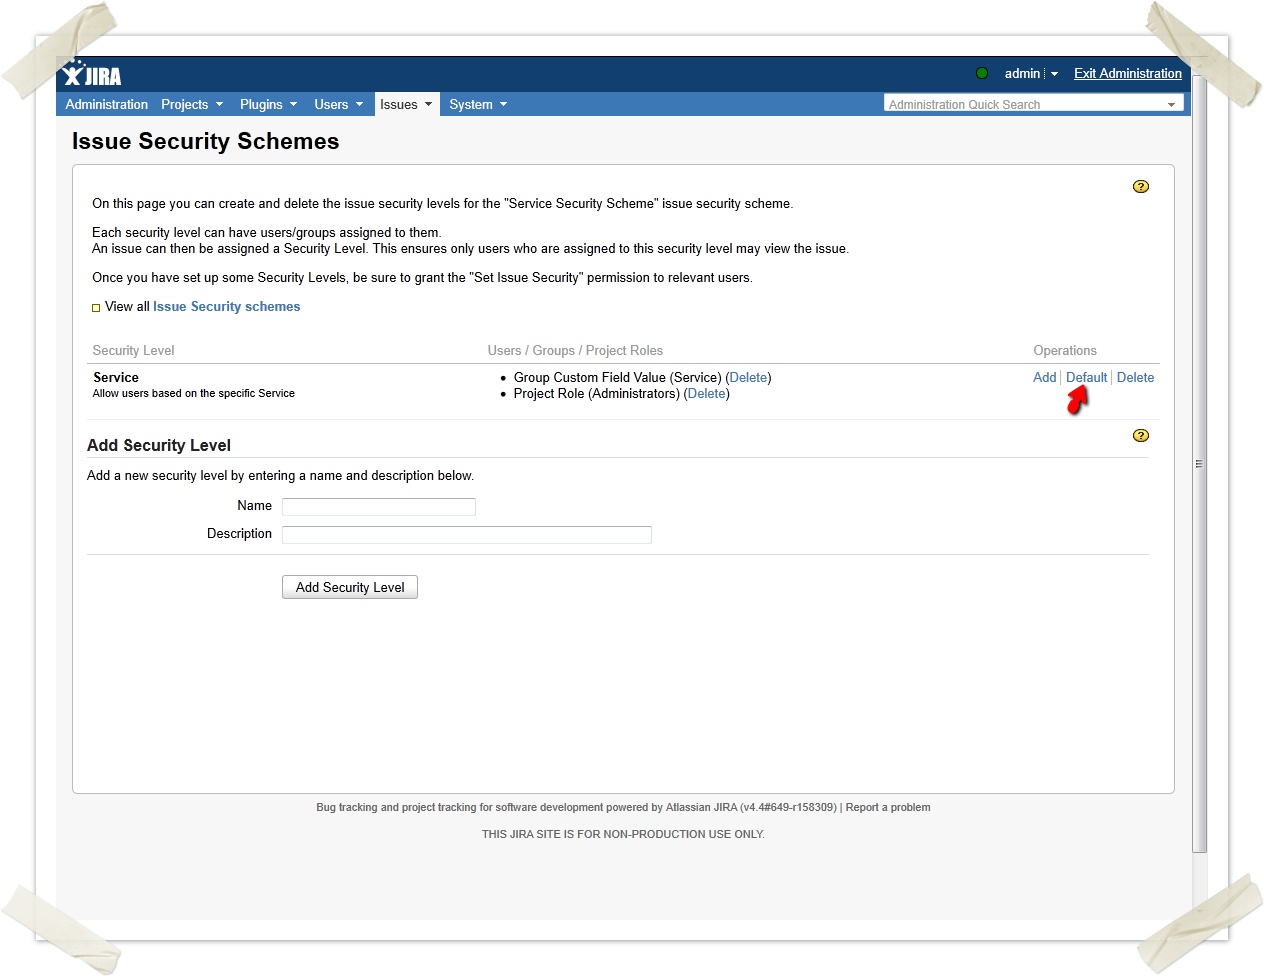
You can also set this level as default level:
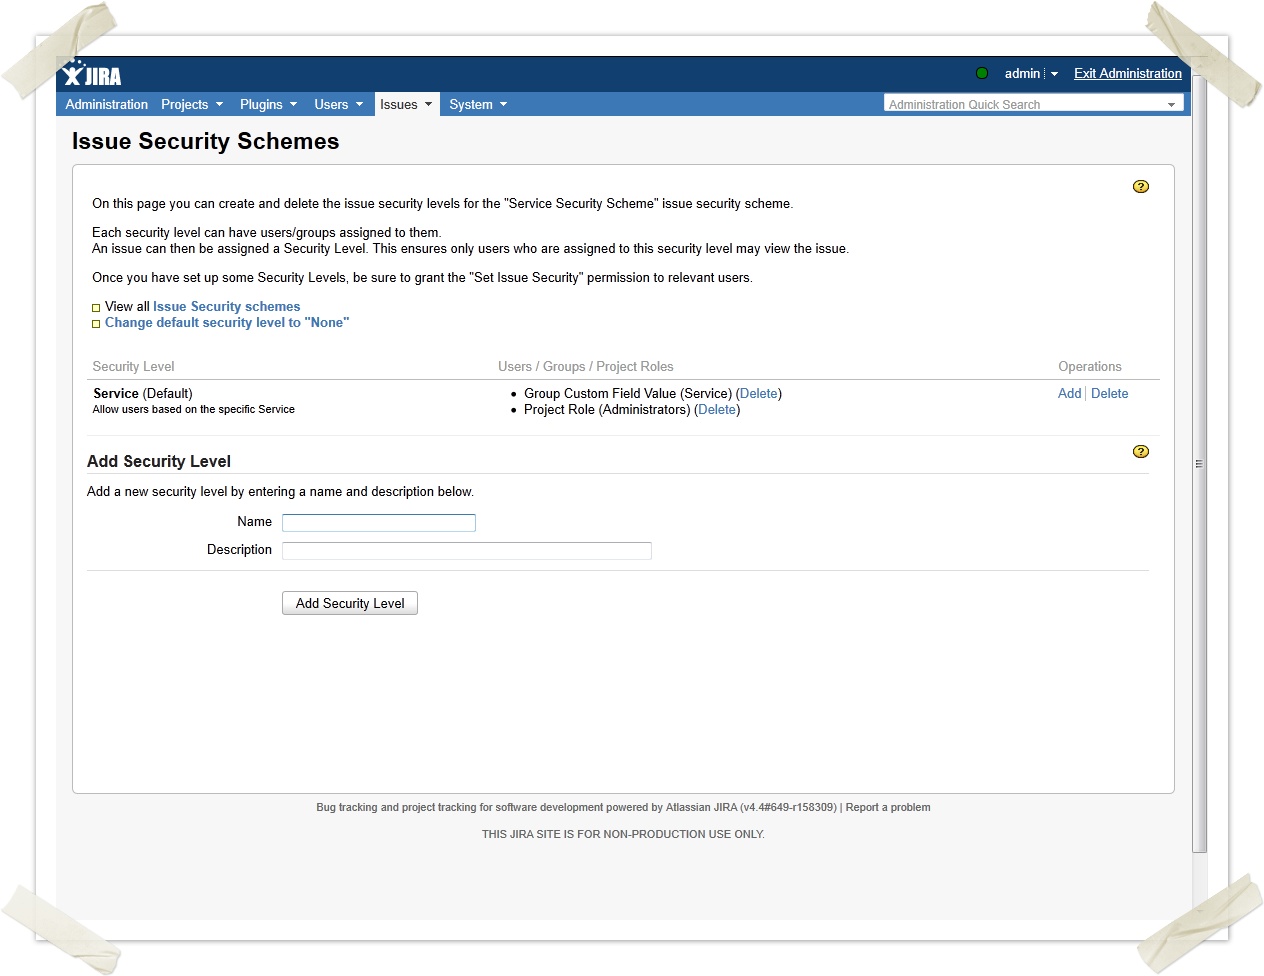
Finally, your configuration looks like this:
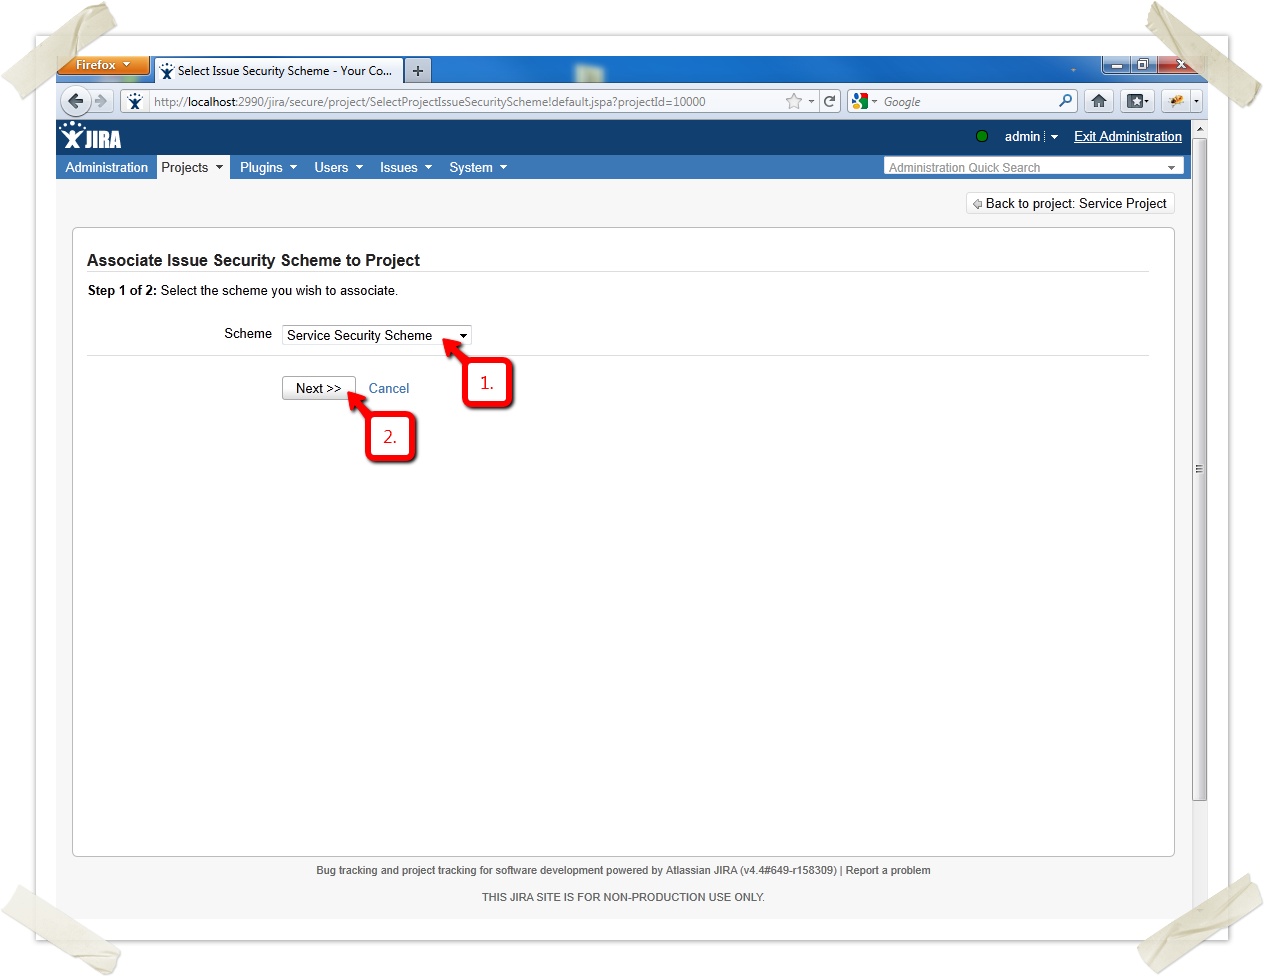
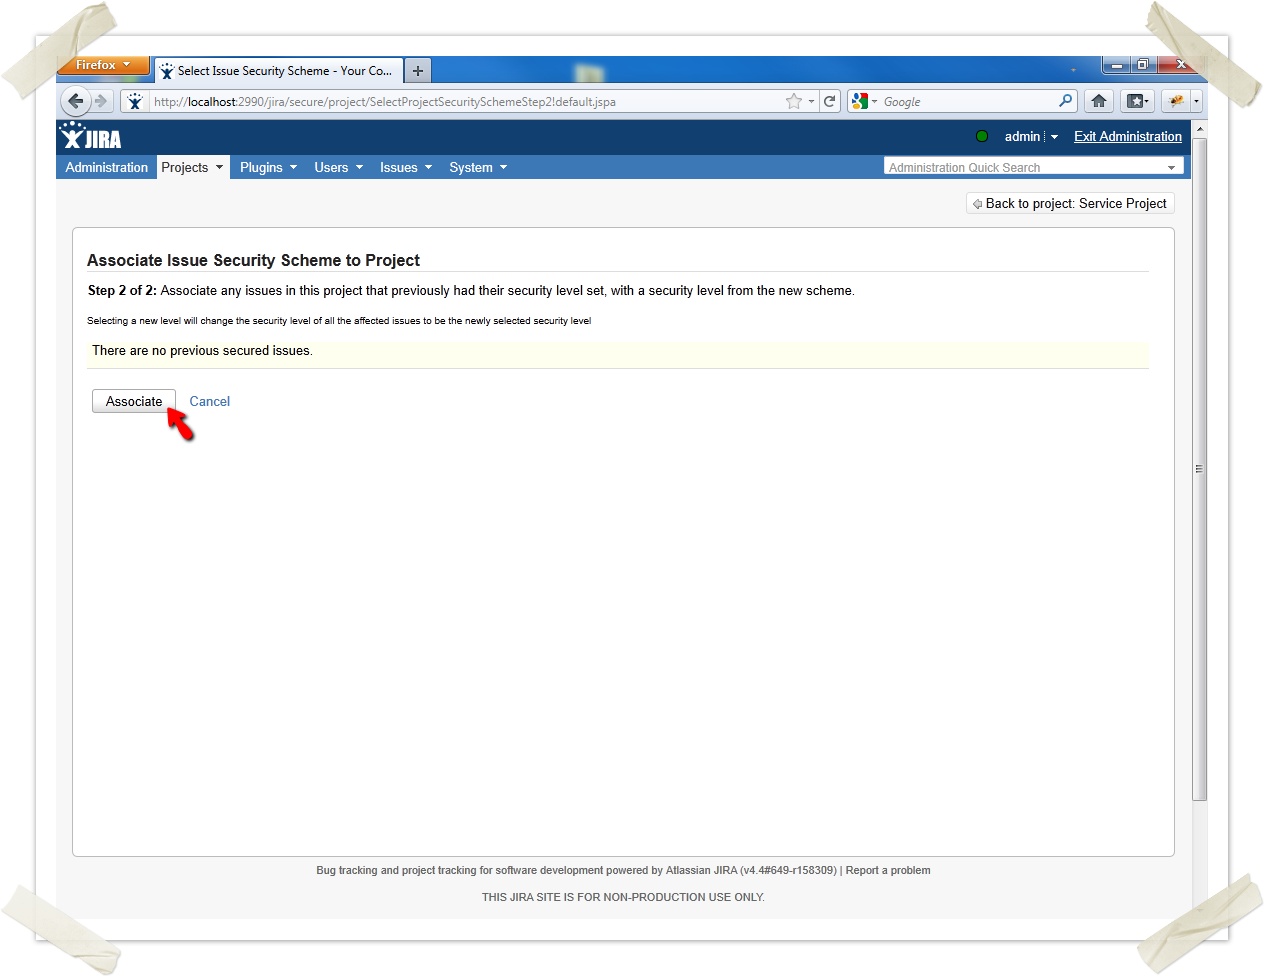
The only thing left is to enable the issue security scheme in the SERVICE project. (depending on your JIRA version, you may not have a pencil-icon to click, but a drop down menu named "Actions", where you can choose "Select a scheme".)
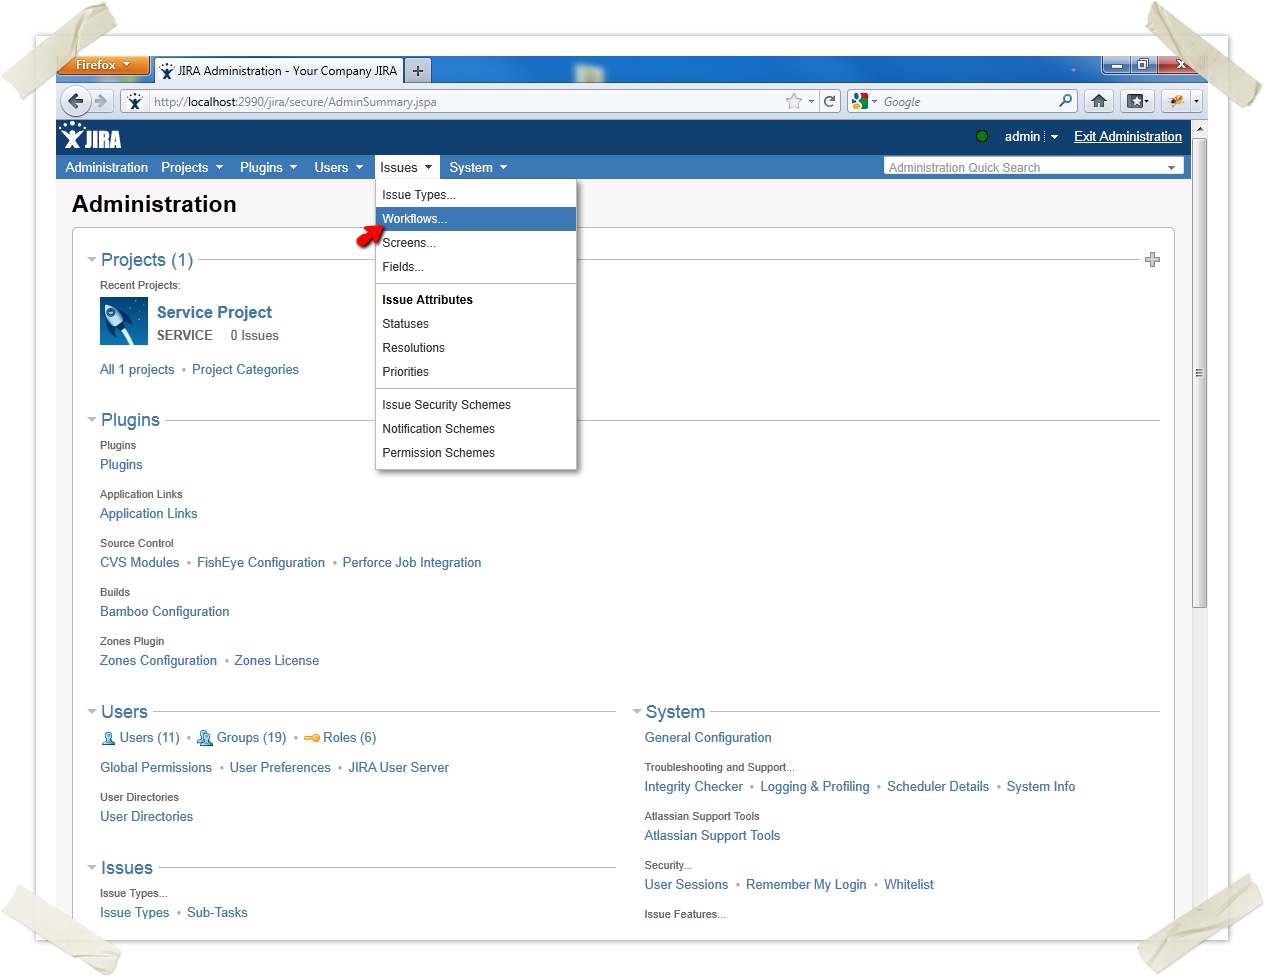
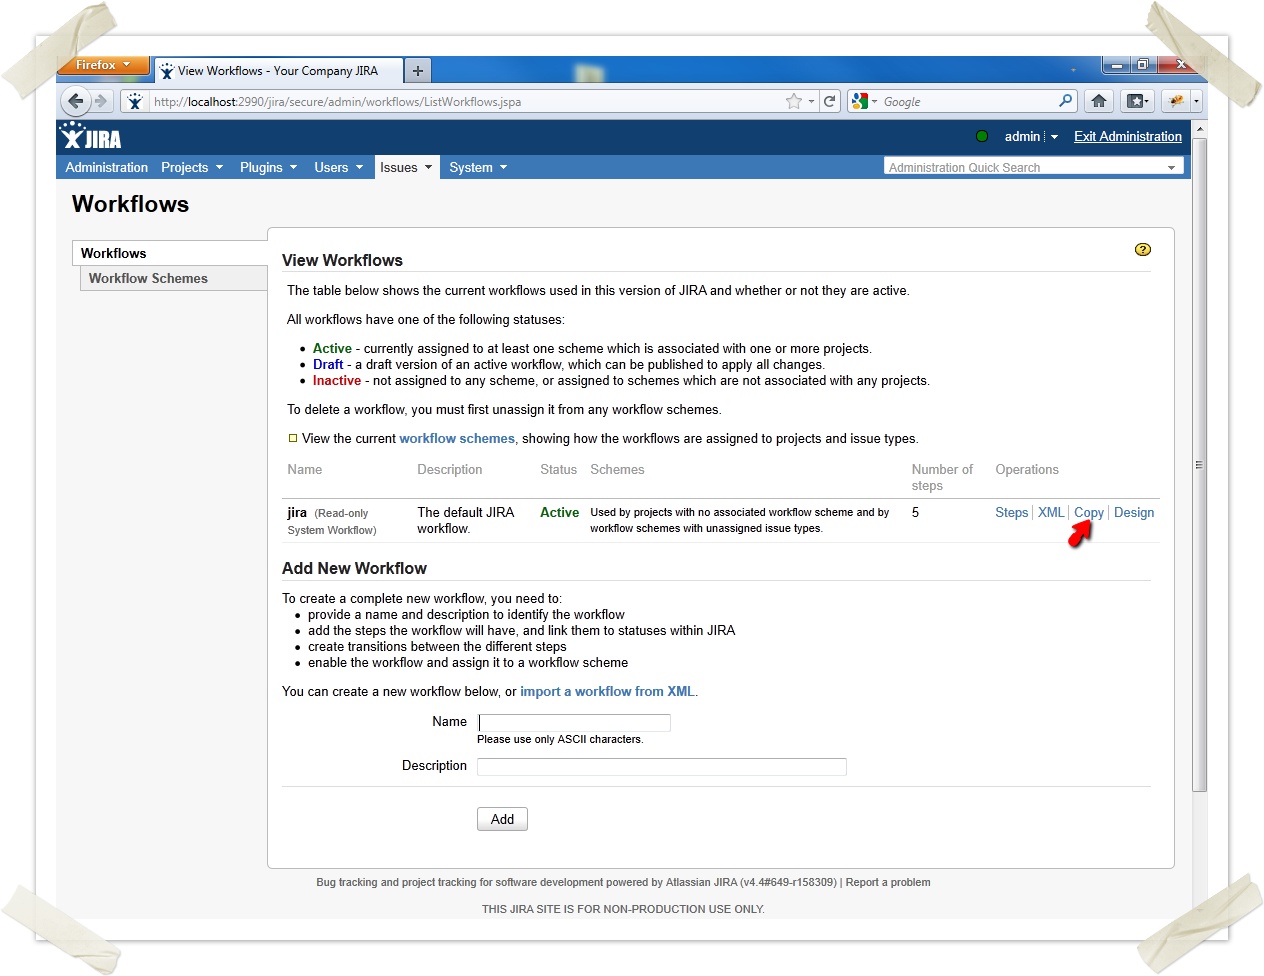
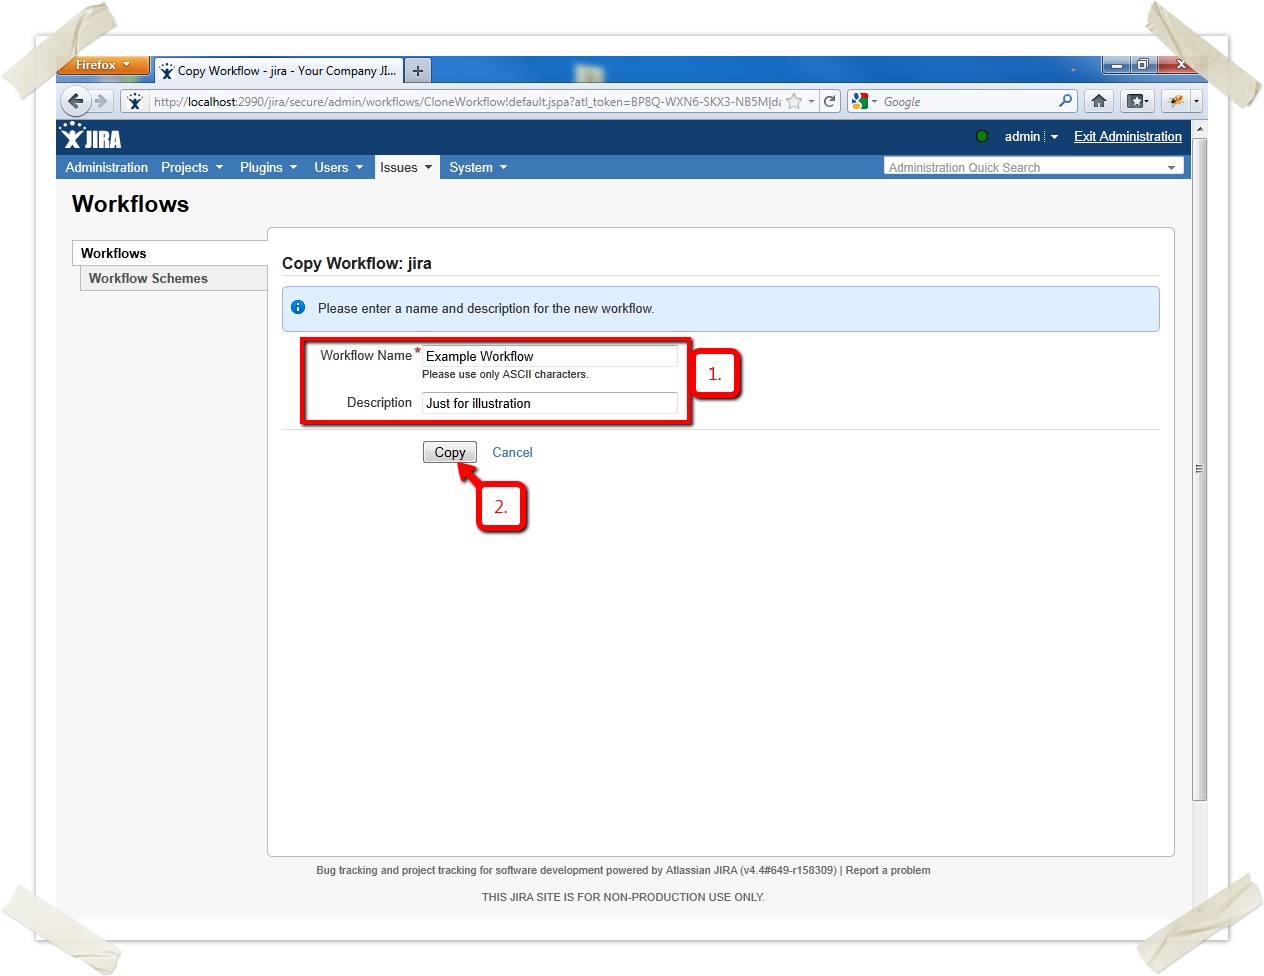
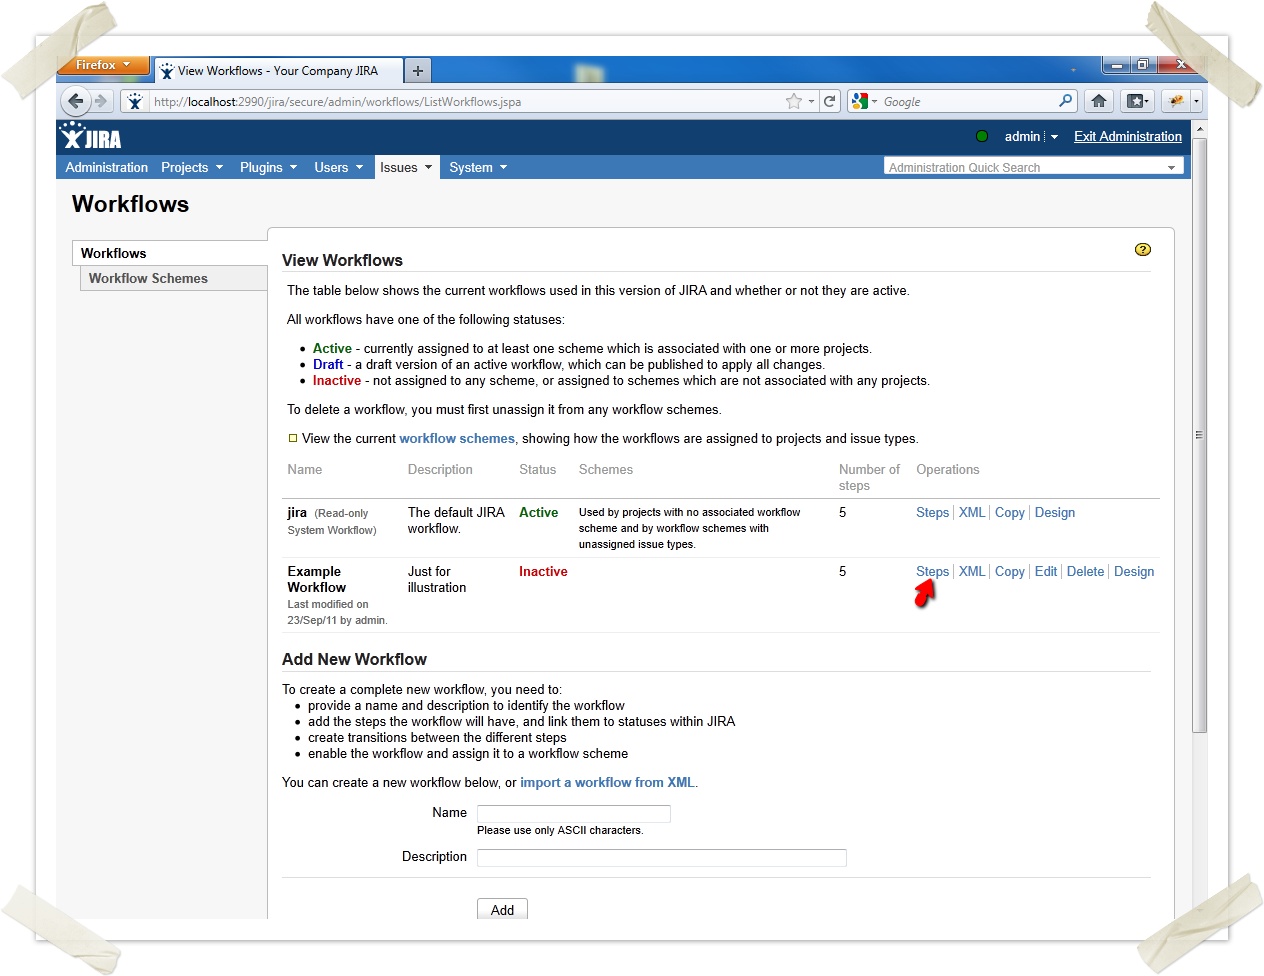
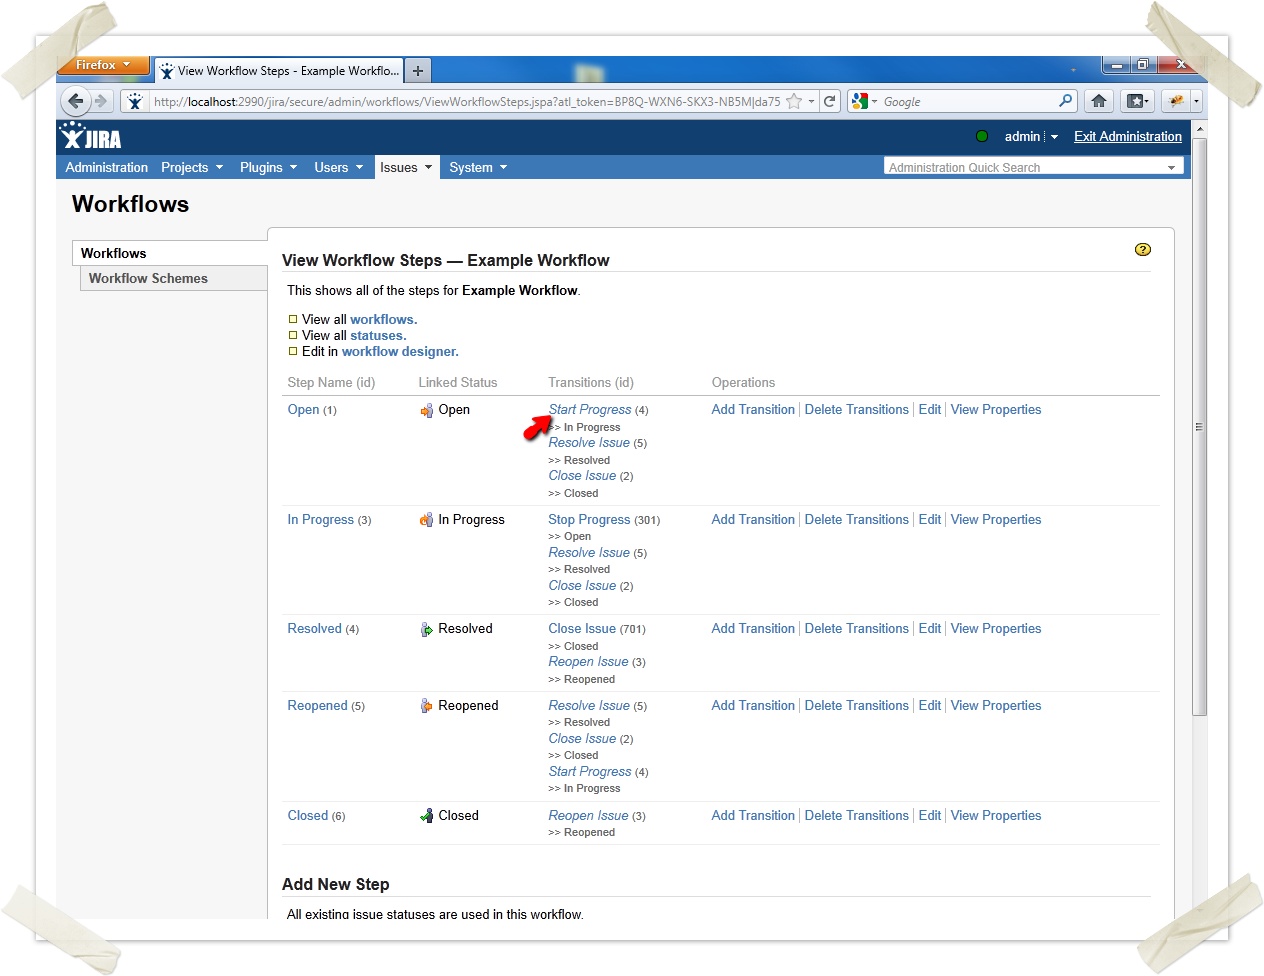
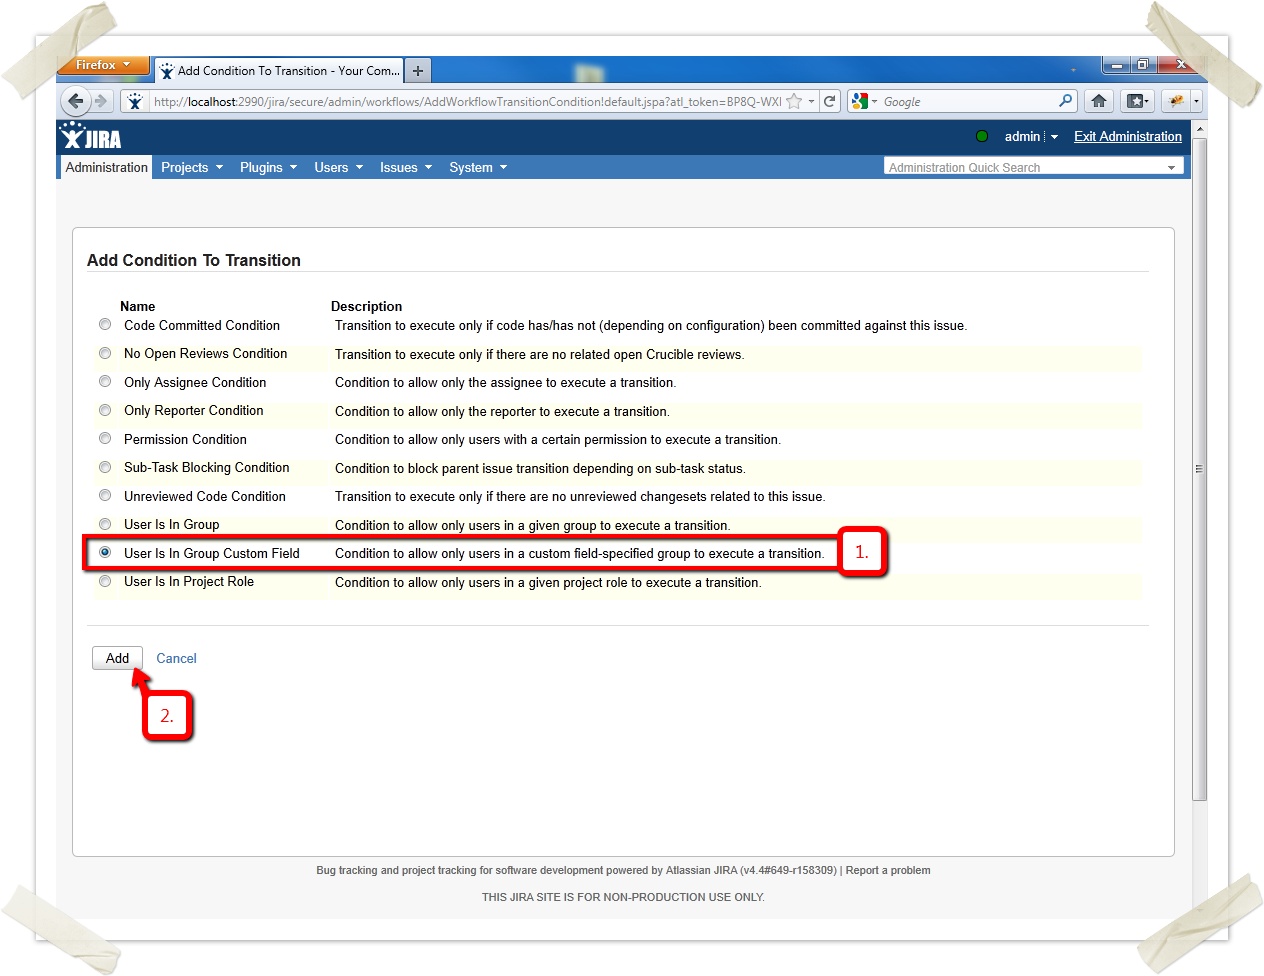
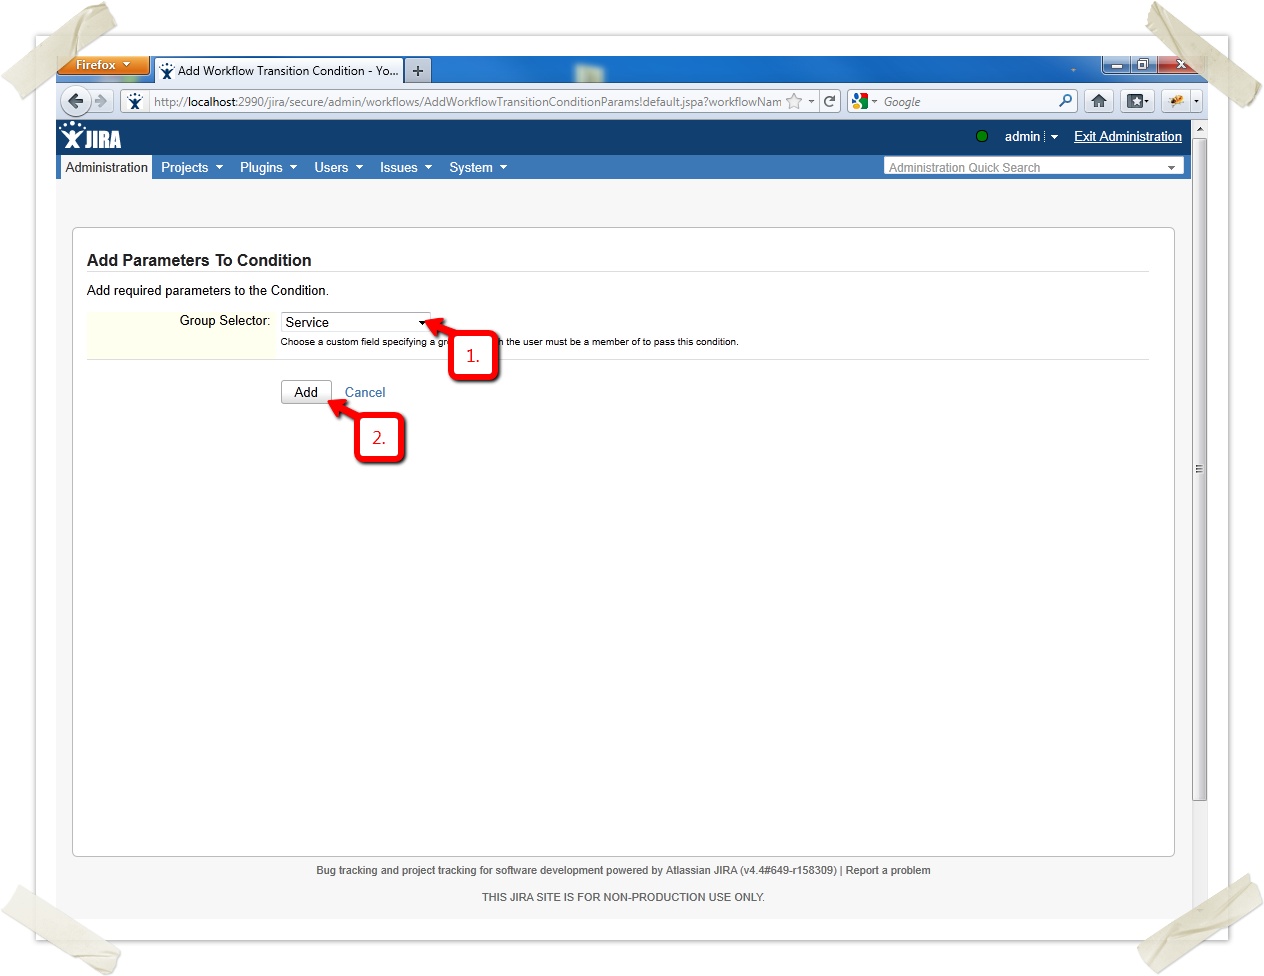
Using the custom field with a workflow condition
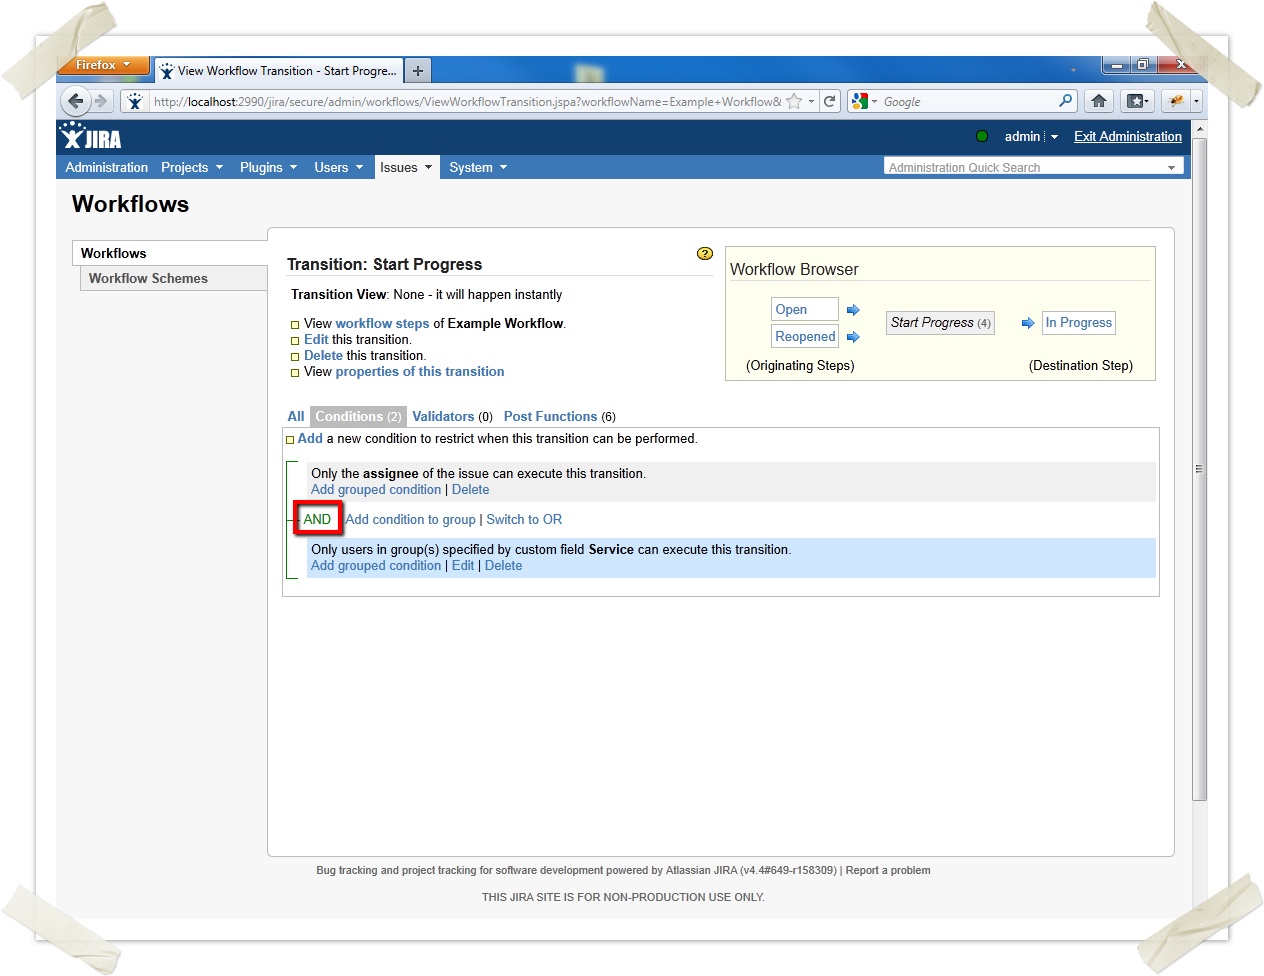
You can also user the zone field in a workflow condition. Following an example configuration where the Start-Progress transition is restricted by a custom field:

Ensure that the mode of combining all conditions is AND (implying you must be assignee AND user of the configured zone):
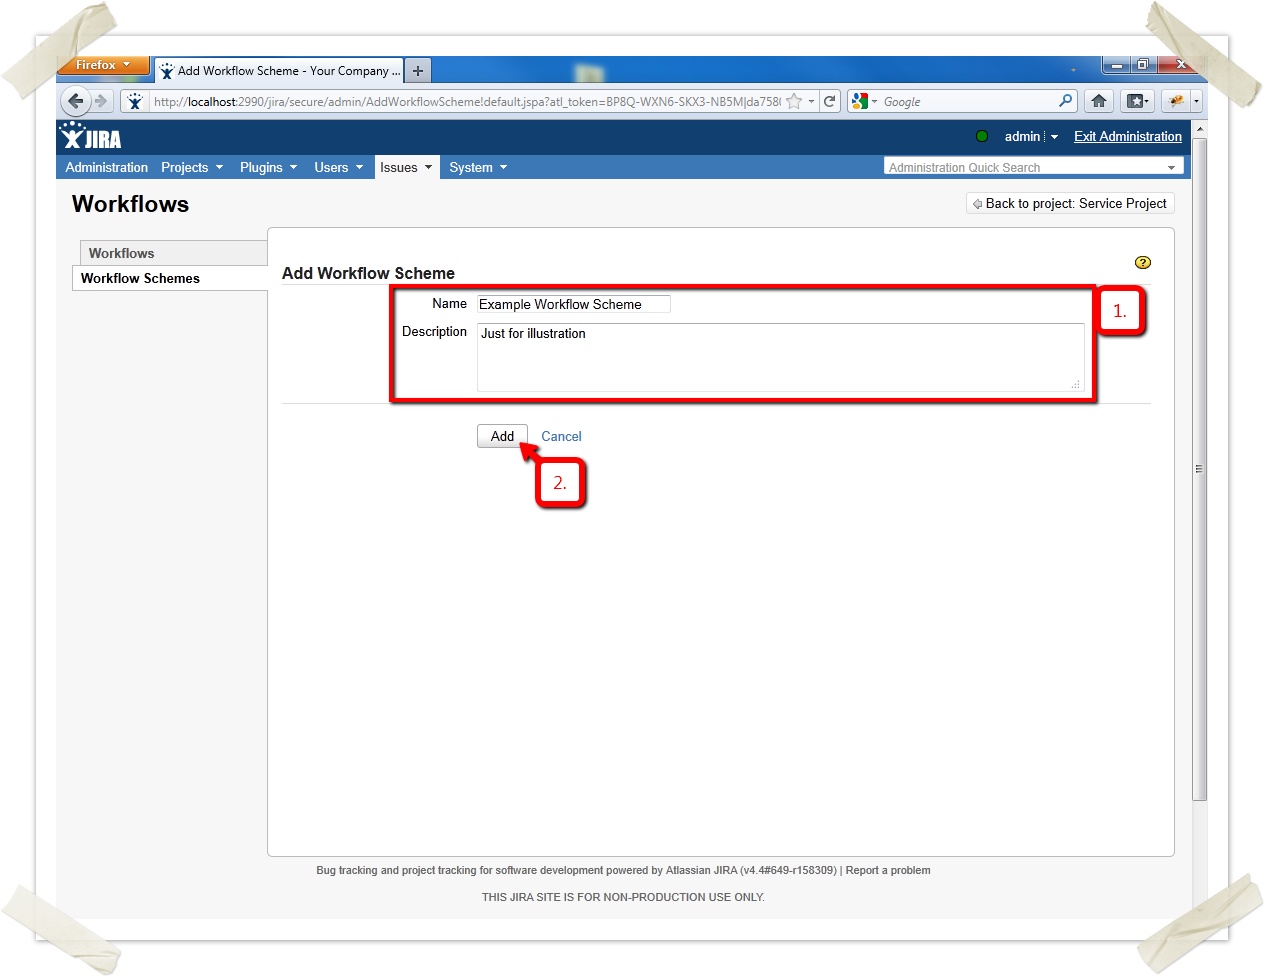
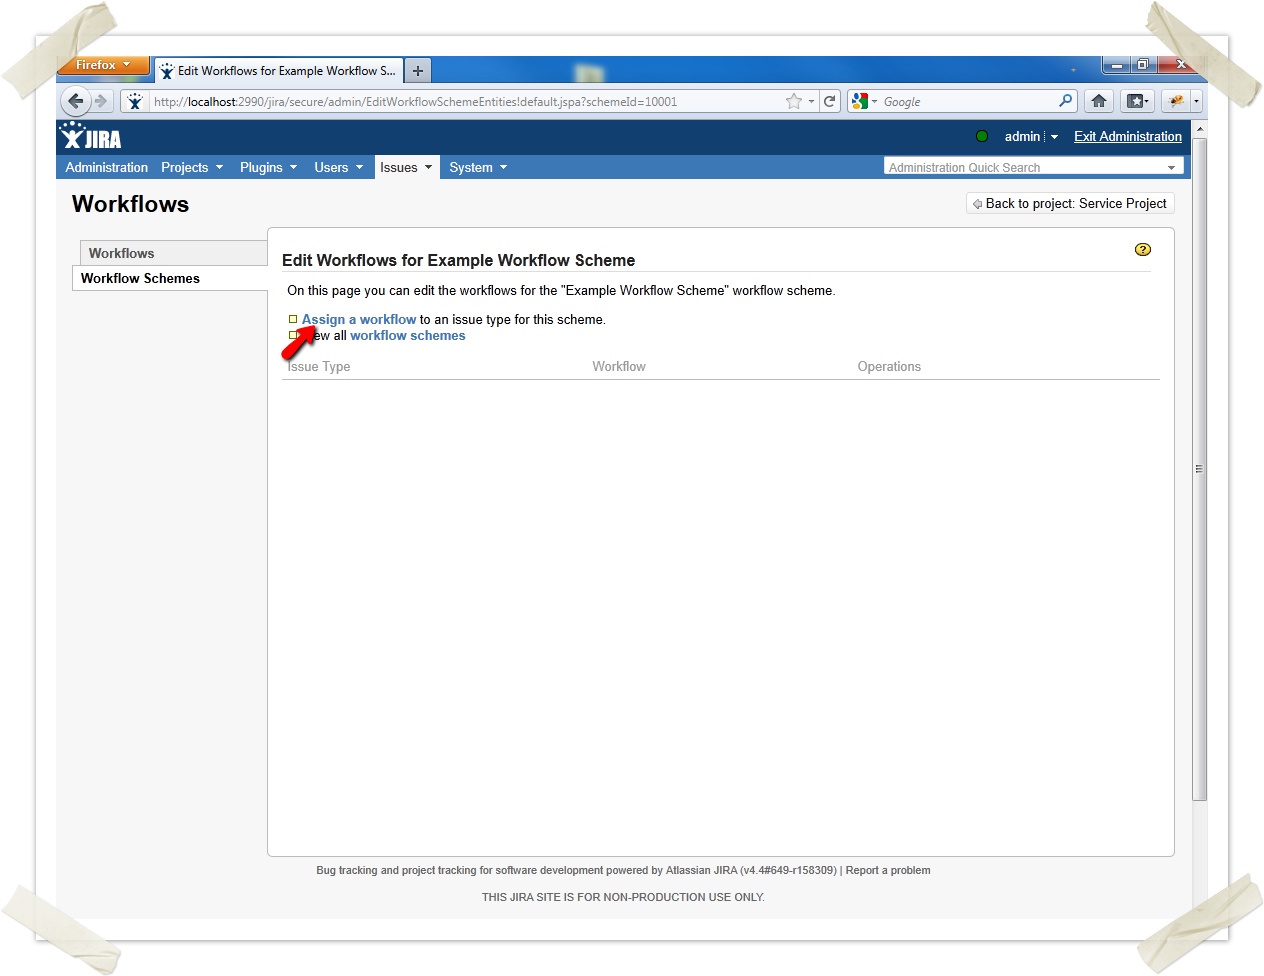
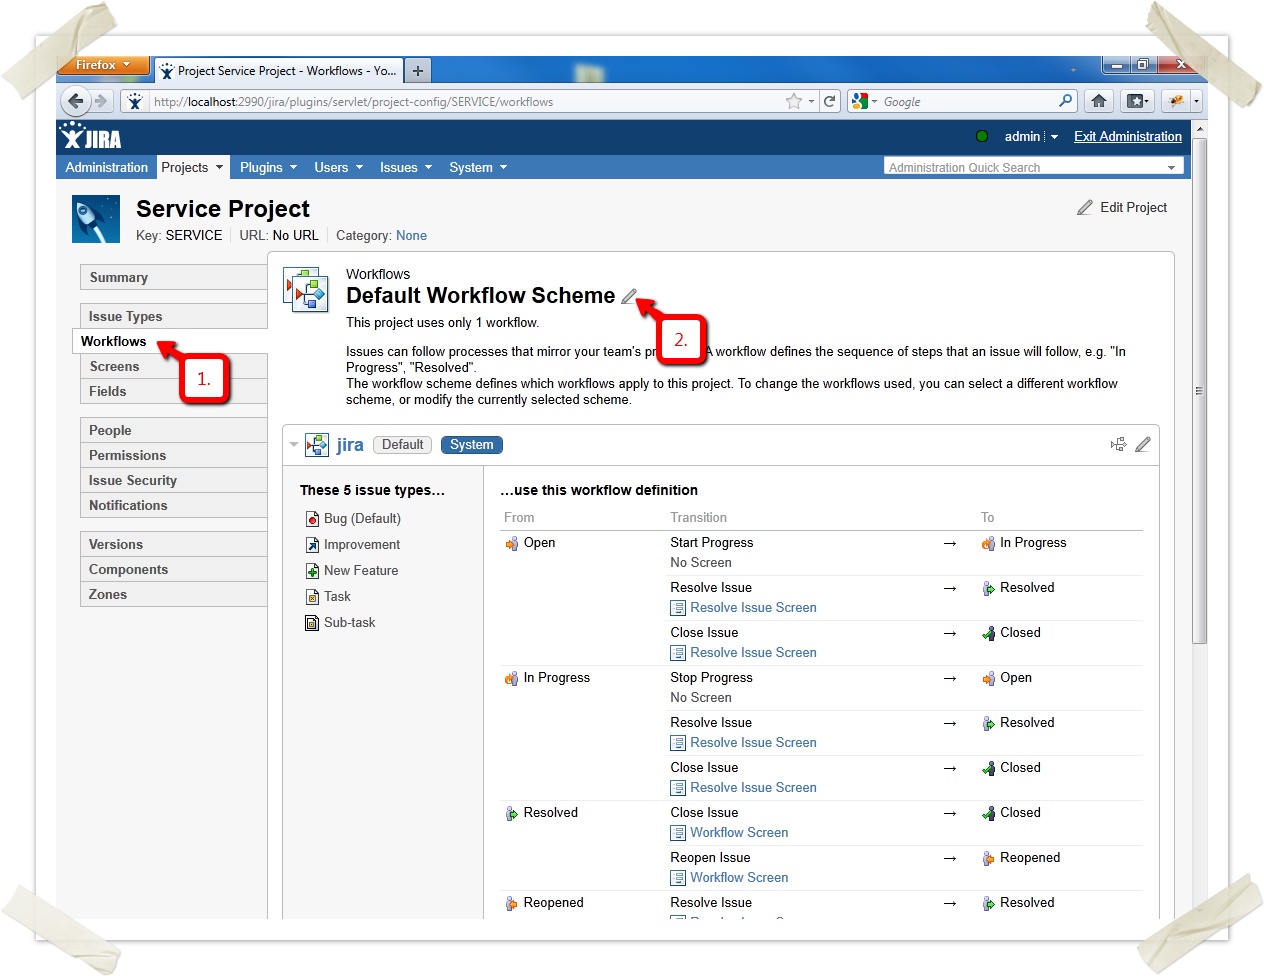
You now create a workflow scheme for the project:
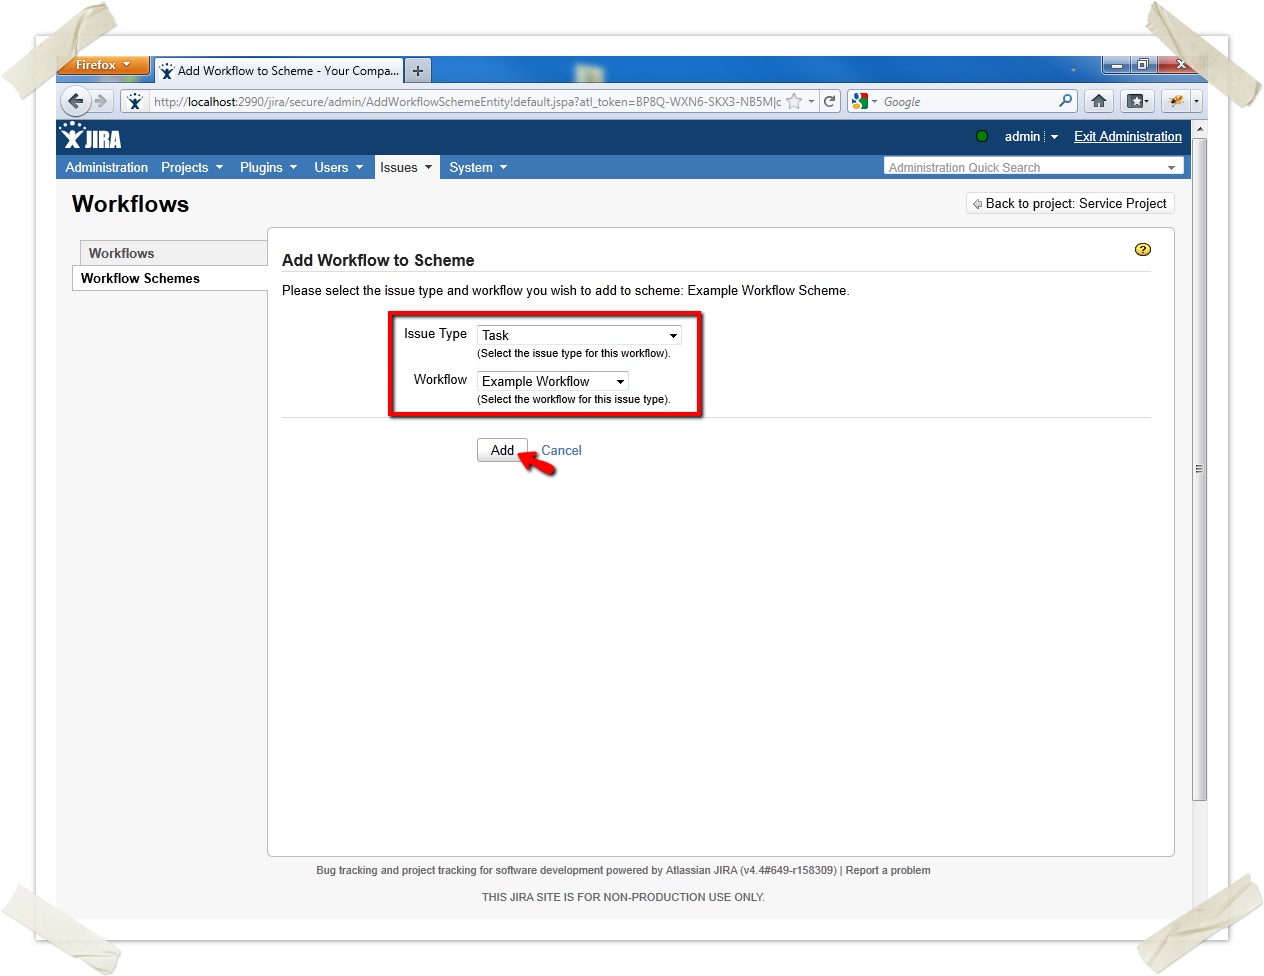
Assign the previously created workflow (for the sake of simplicity only the workflow for the issue type "Task" will be configured):
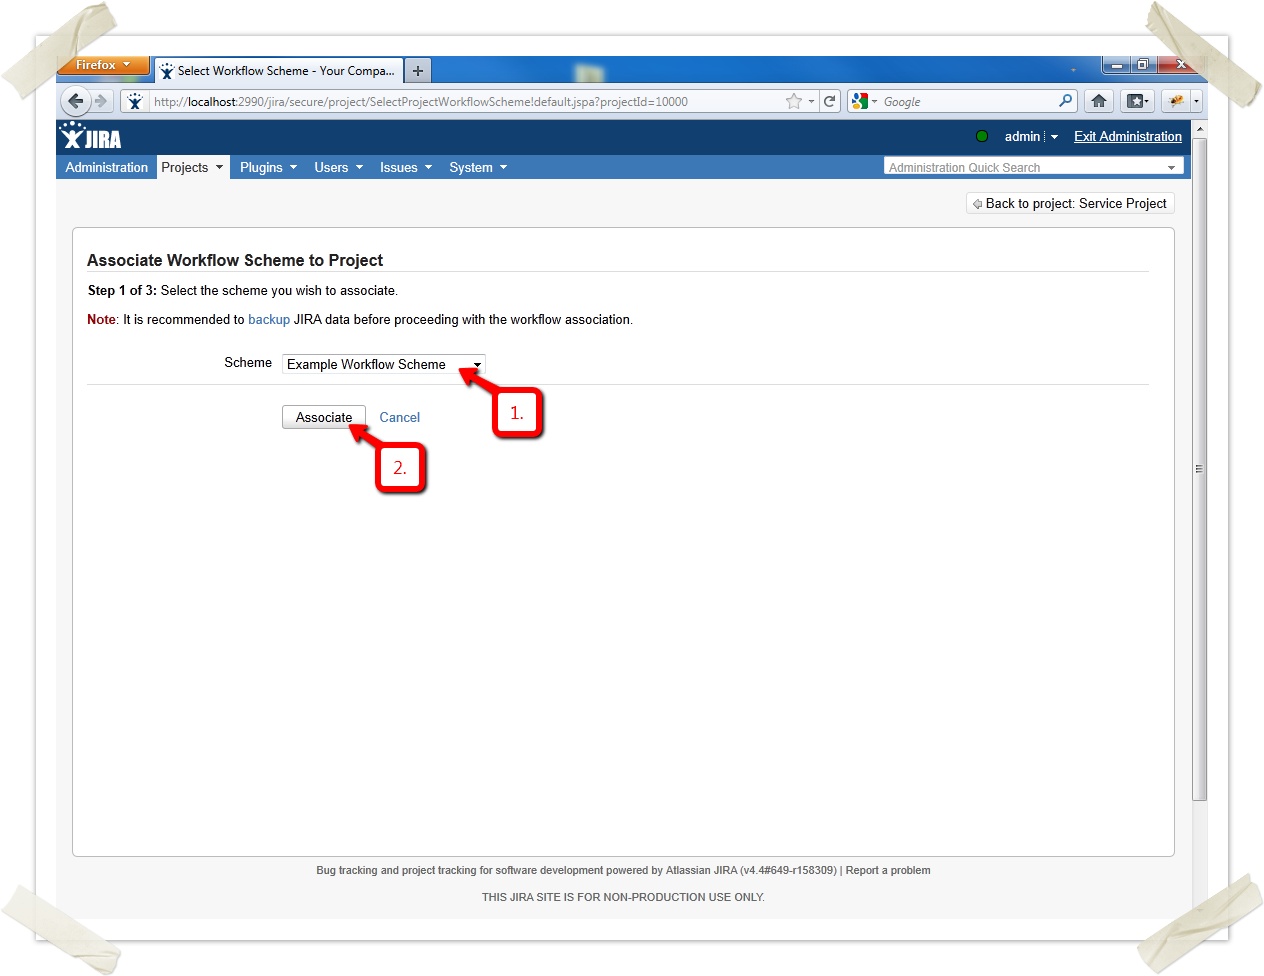
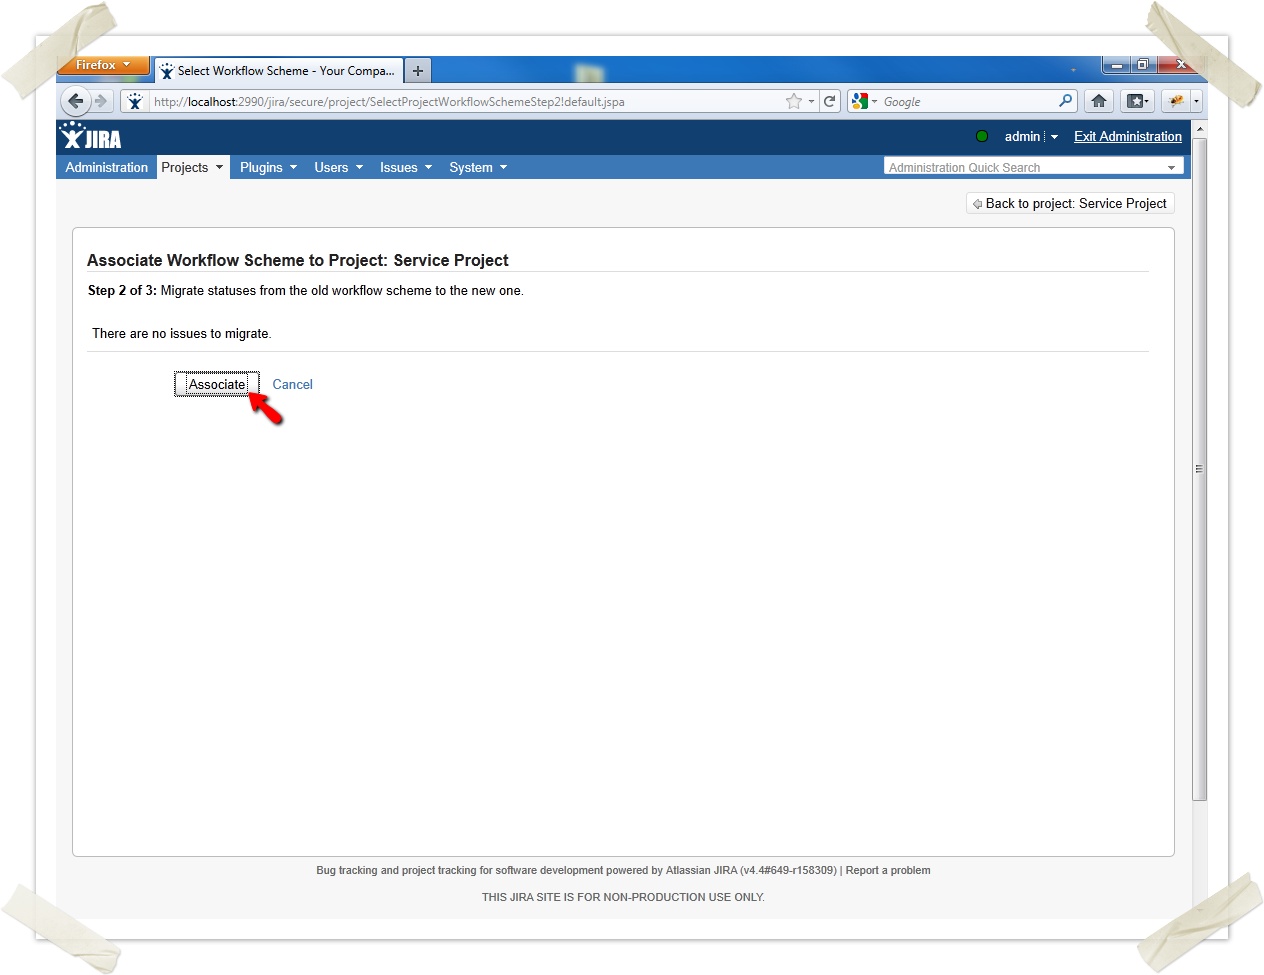
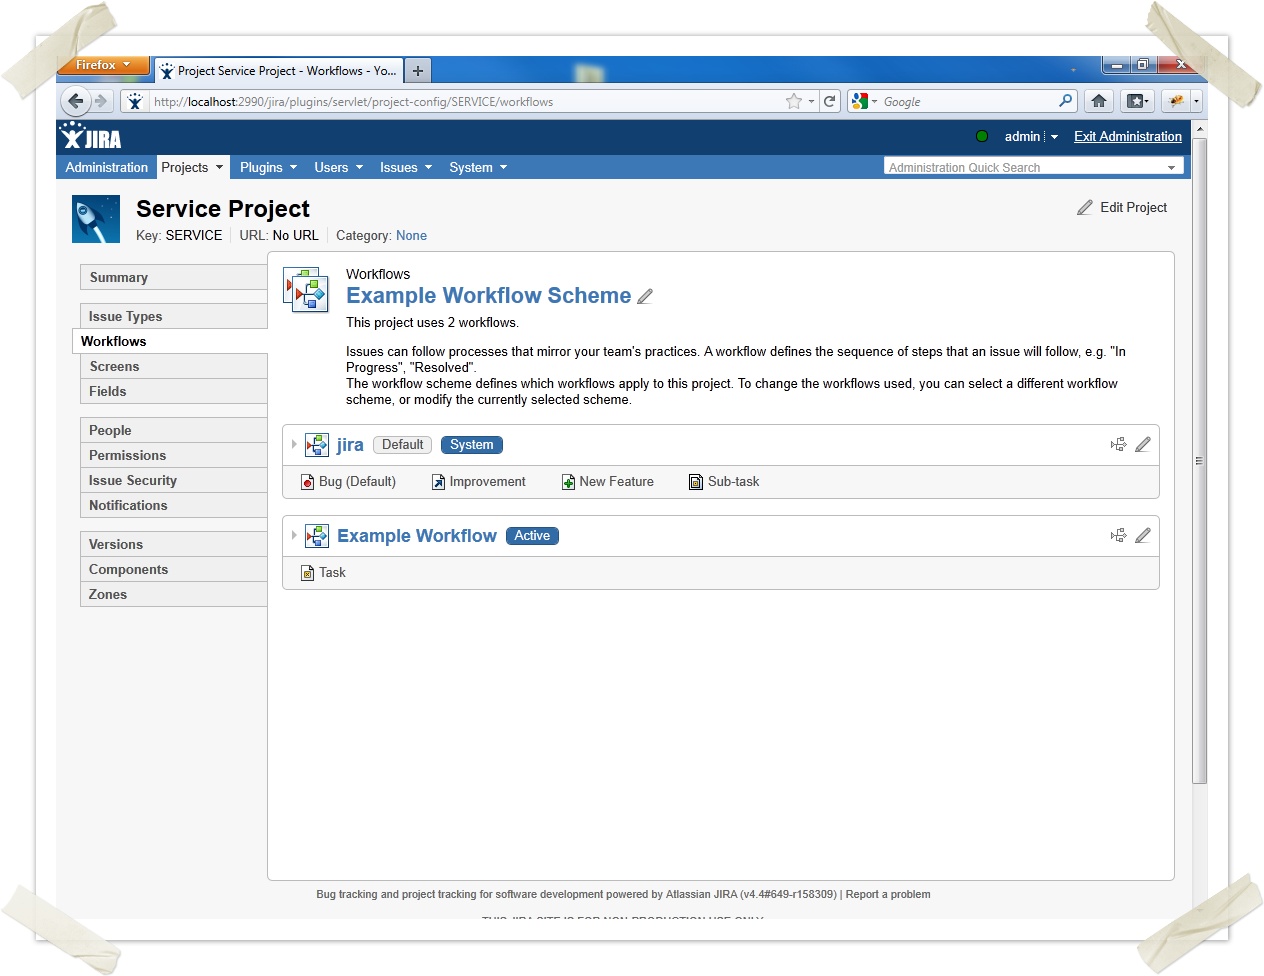
What is still left is to associate the workflow scheme to the SERVICE project (again - depending on your JIRA version you might have to click the "Actions"-Drop Down menu and click "Select a Scheme" instead of clicking a pencil-icon)
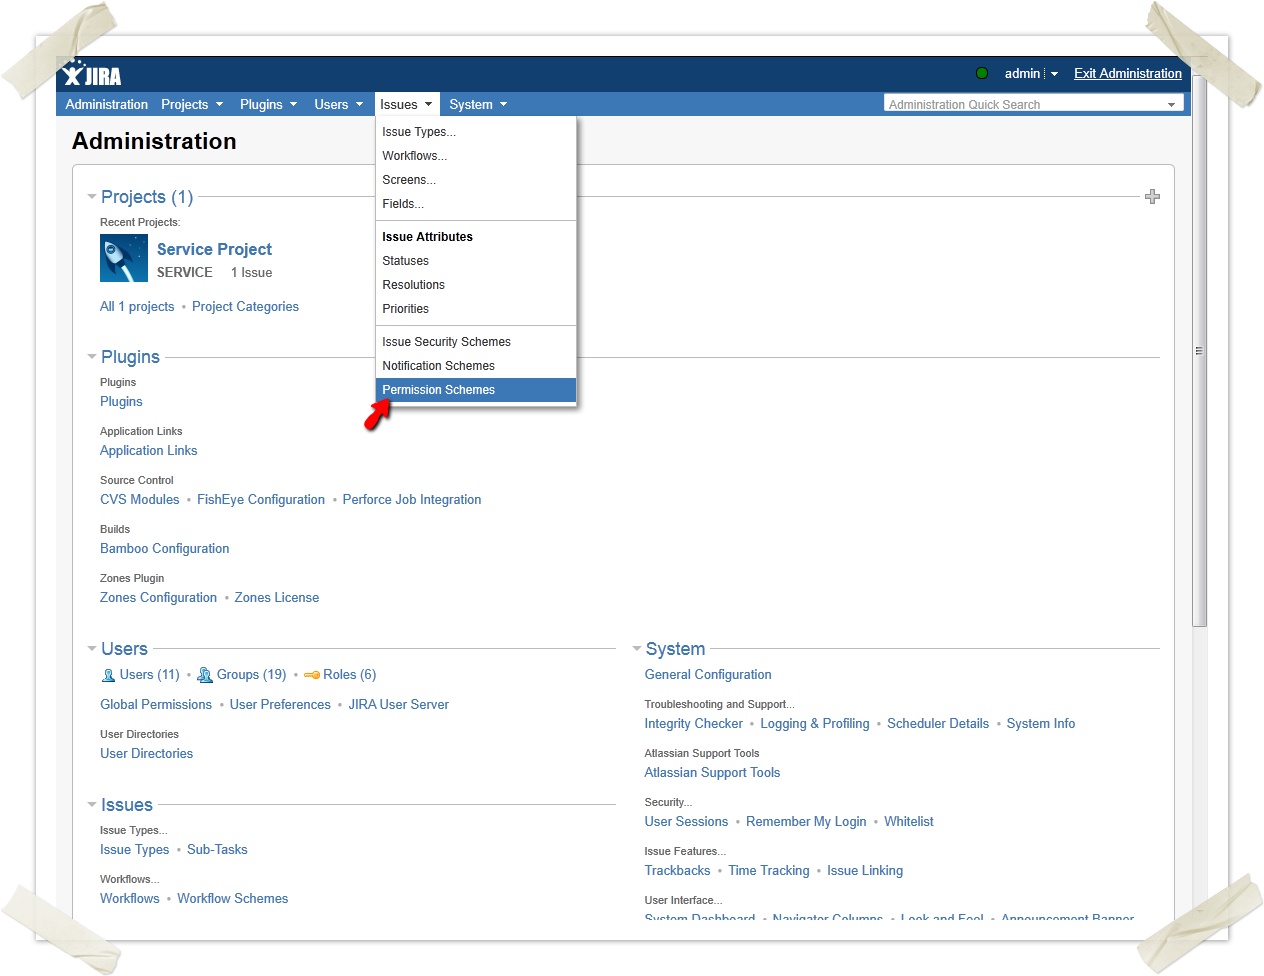
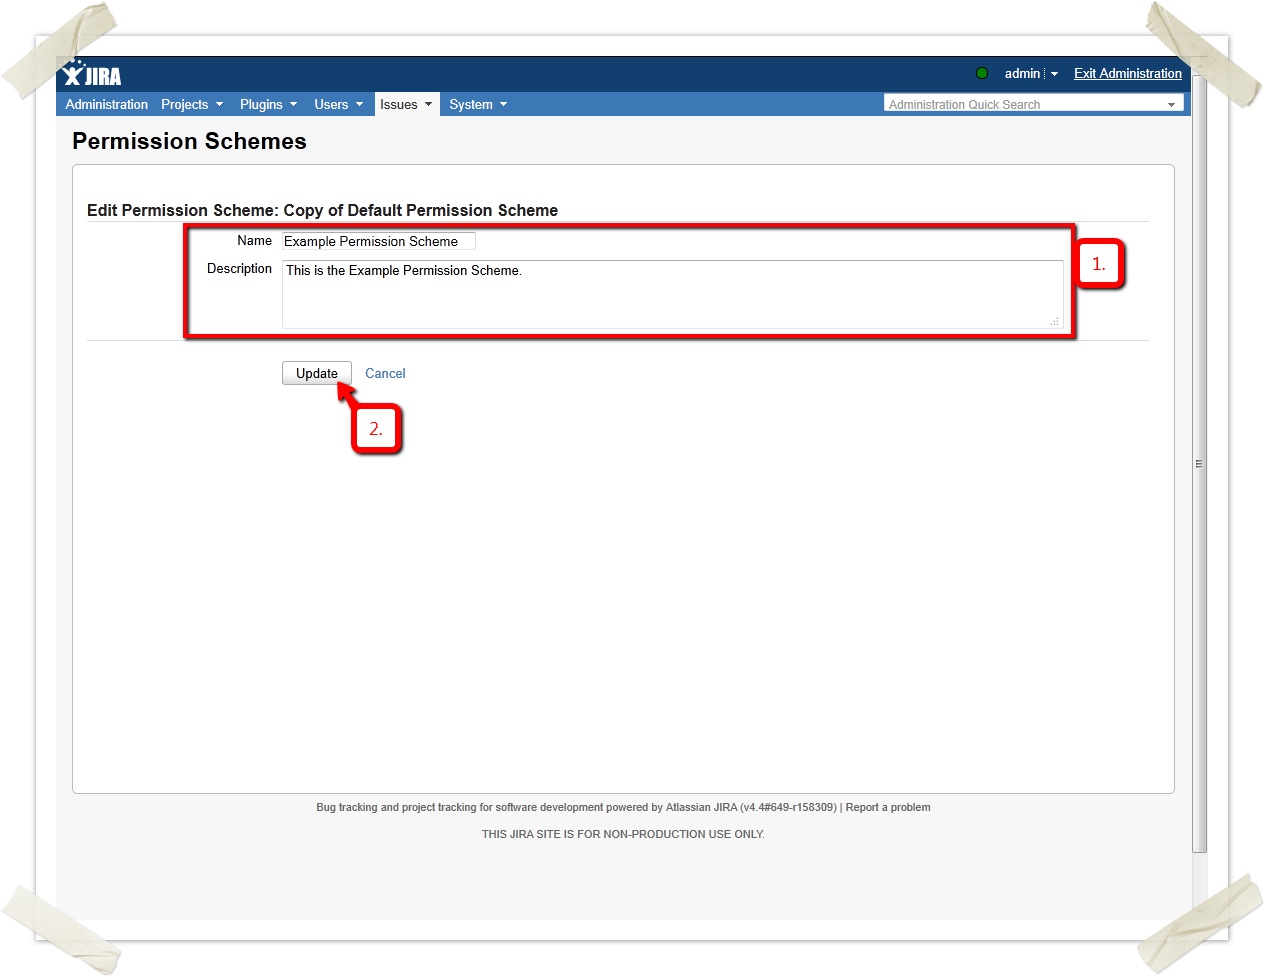
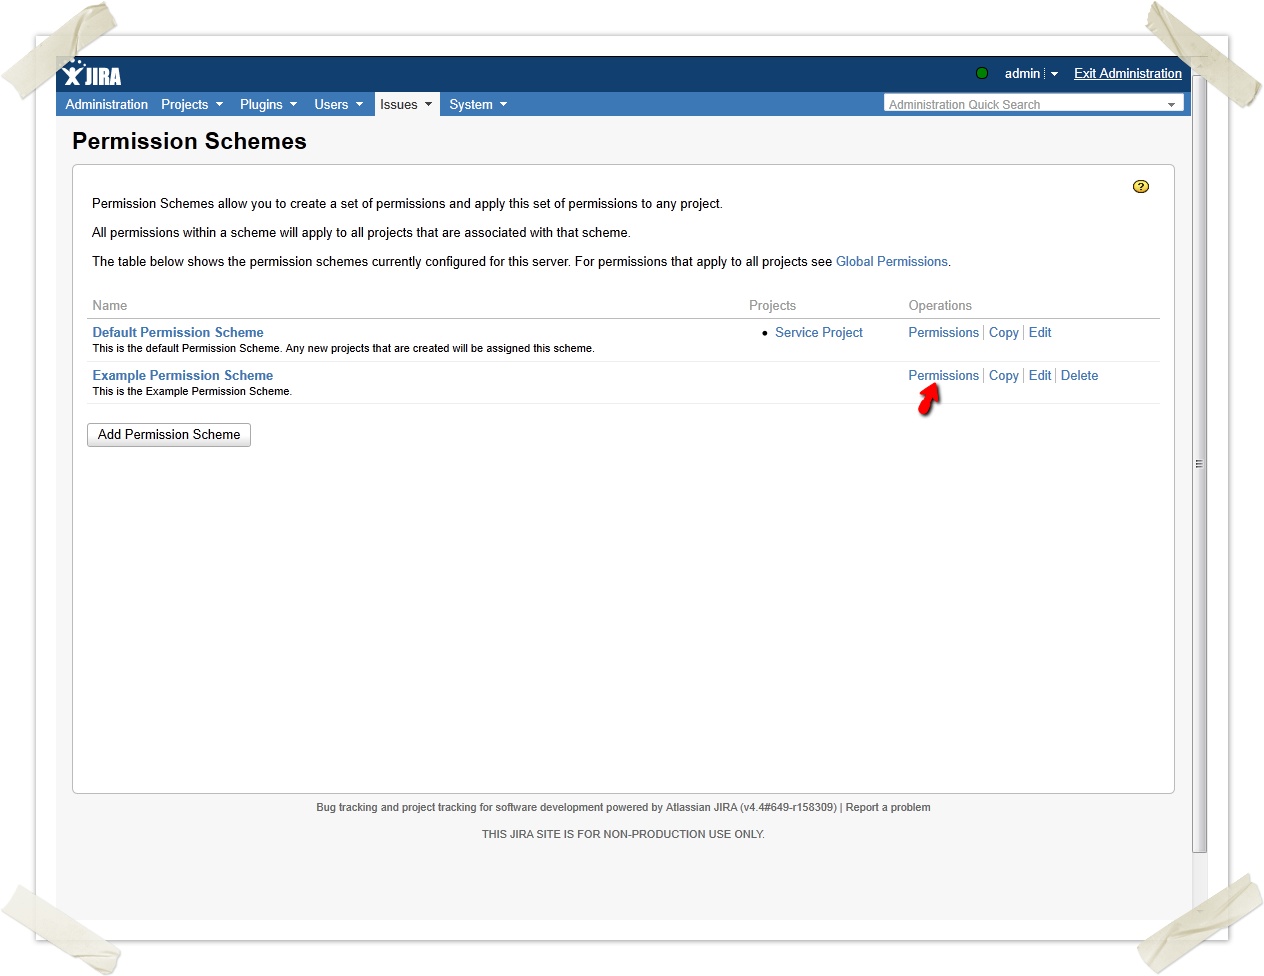
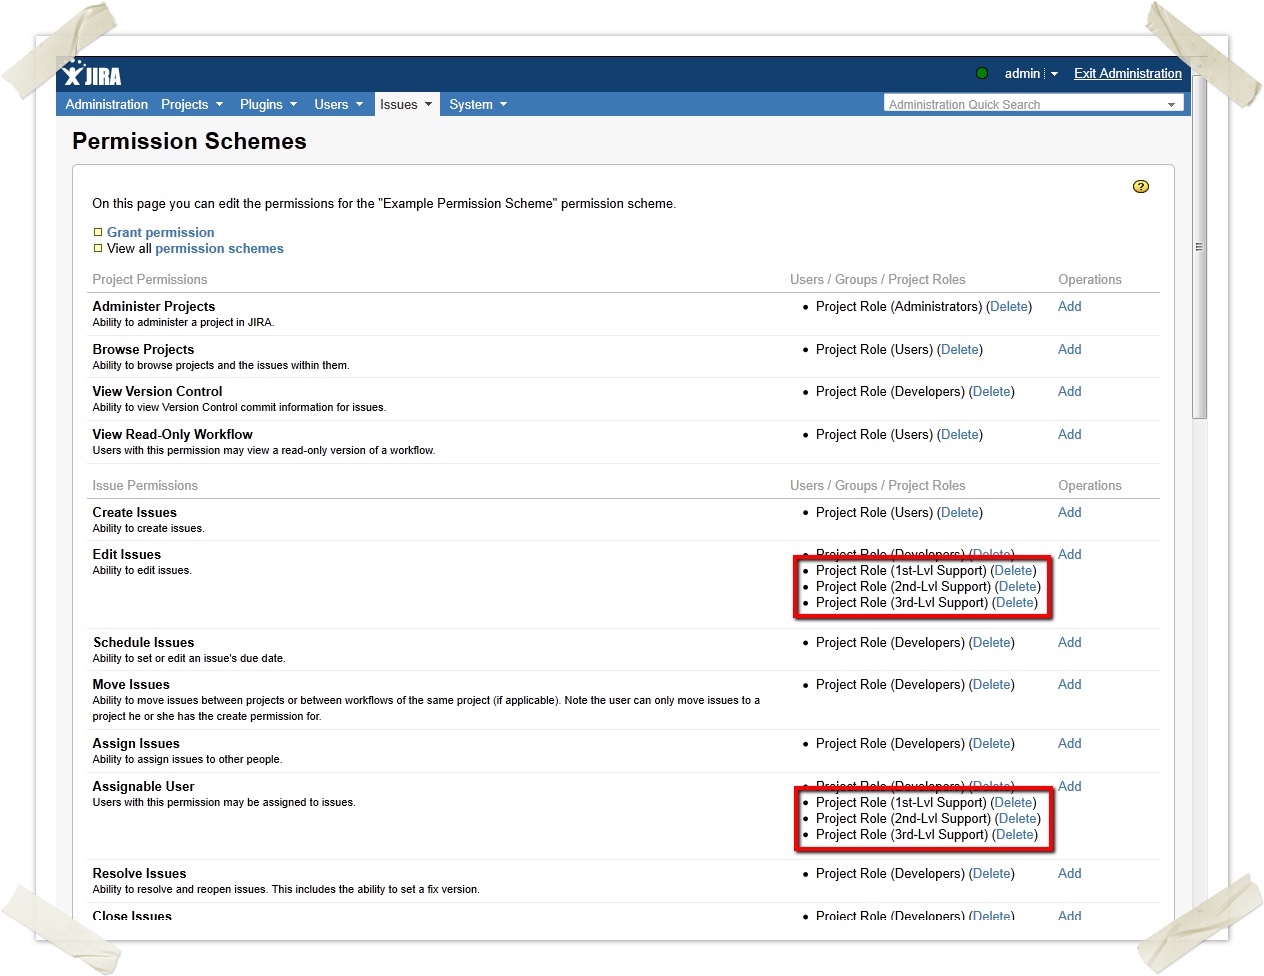
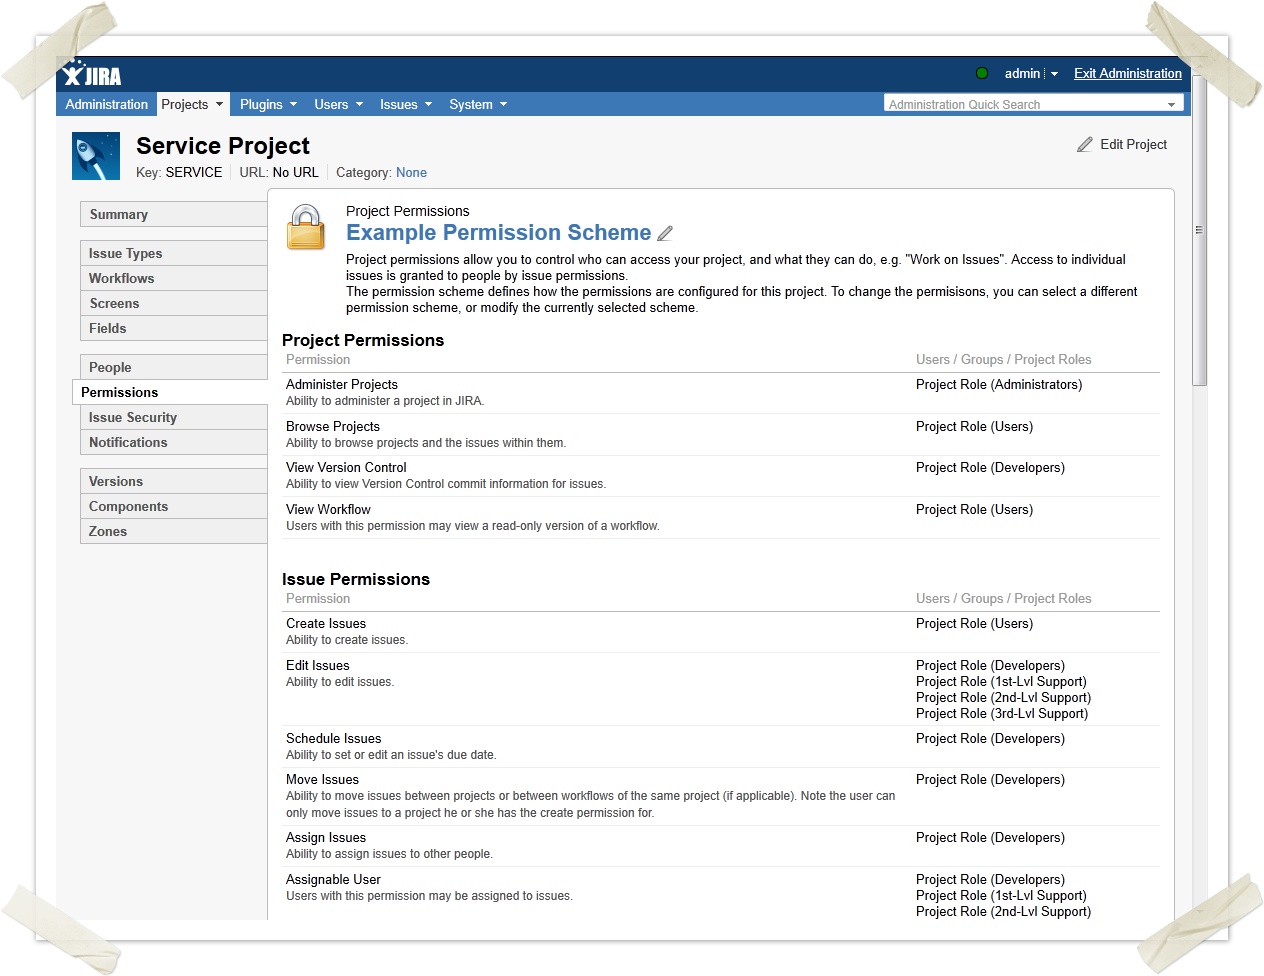
Creating and enabling a permission scheme for our example
For this example you can grant the Service-Lvl users rights to edit an issue and to be the assignee of an issue. Thus you create an appropriate permission scheme:

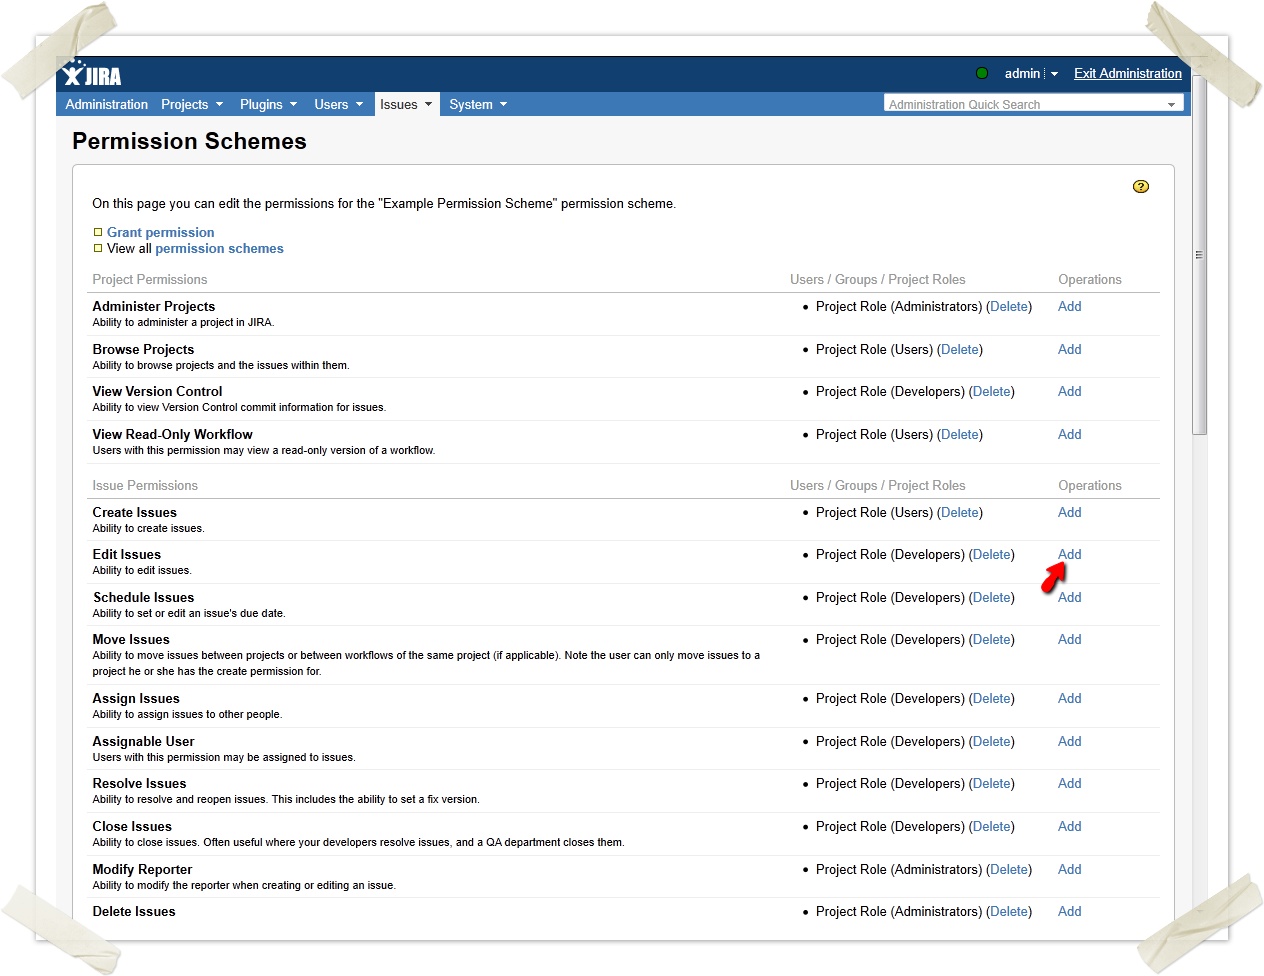
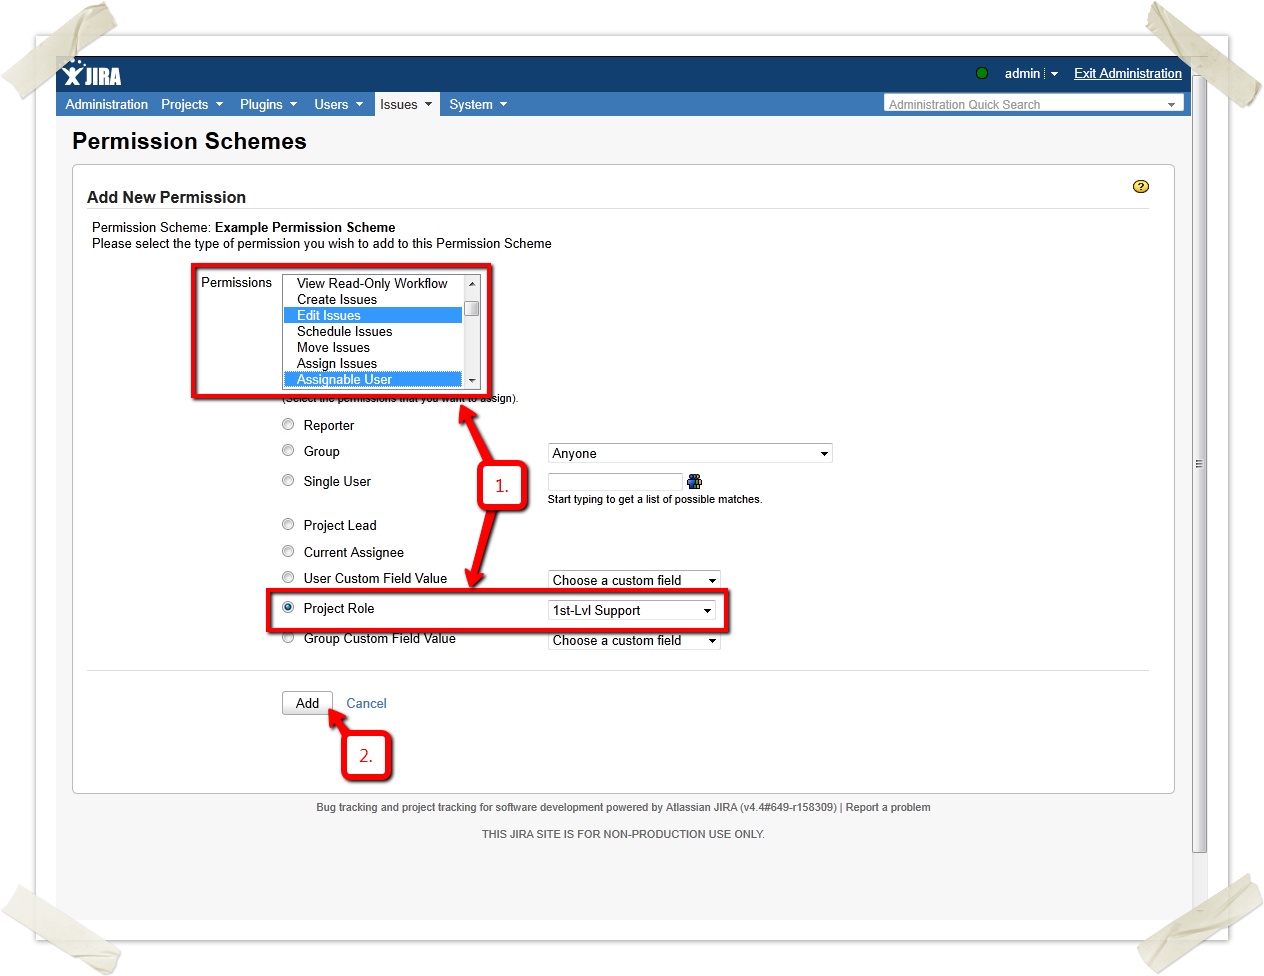
repeat for "2nd-Lvl" Support and "3rd-Lvl Support"
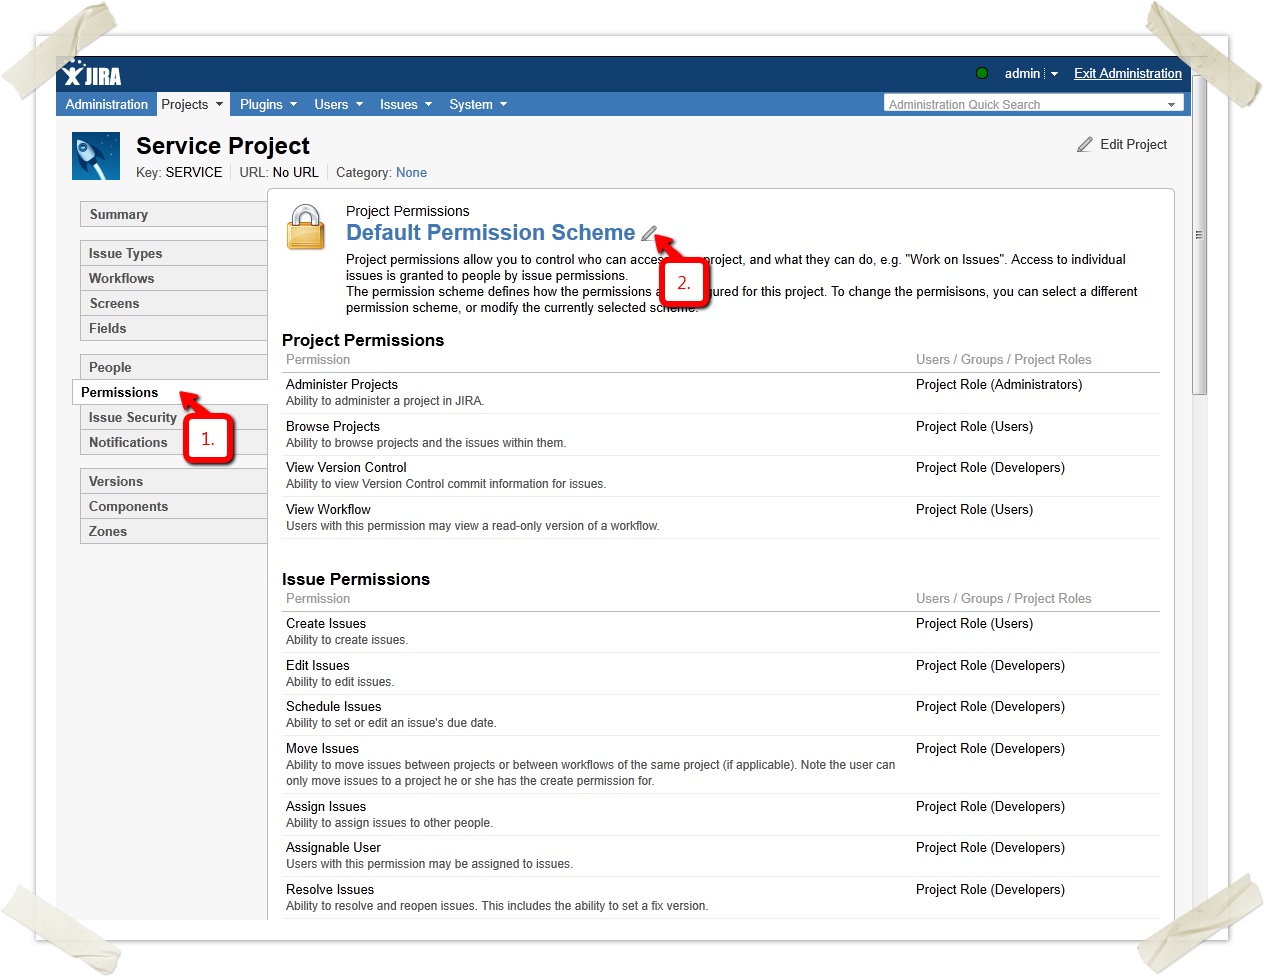
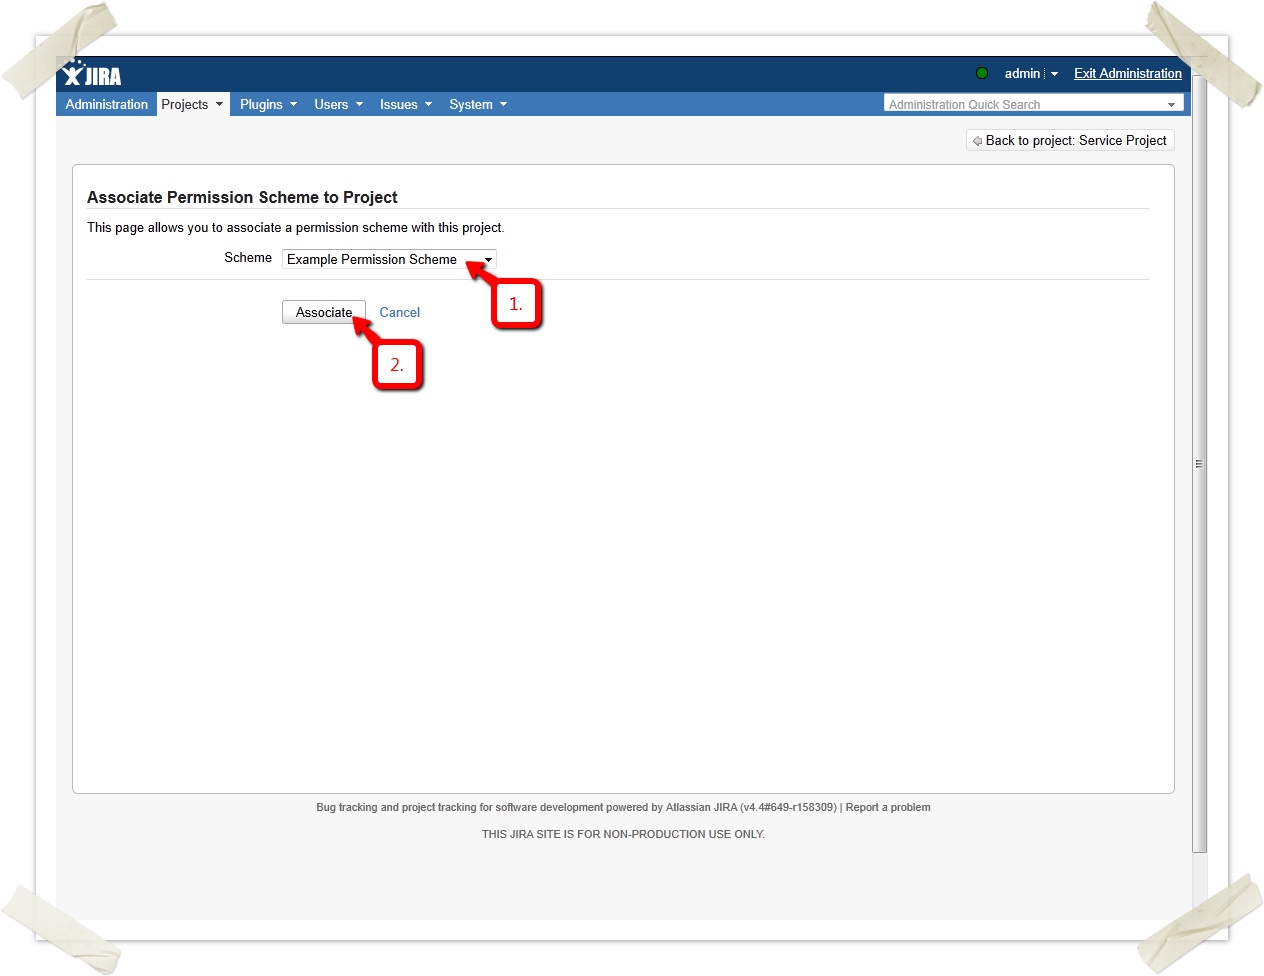
Now you need to enable the permission scheme in the SERVICE project (again - depending on your JIRA version you might have a drop-down menu "Actions" instead and then select "Use different Scheme"):
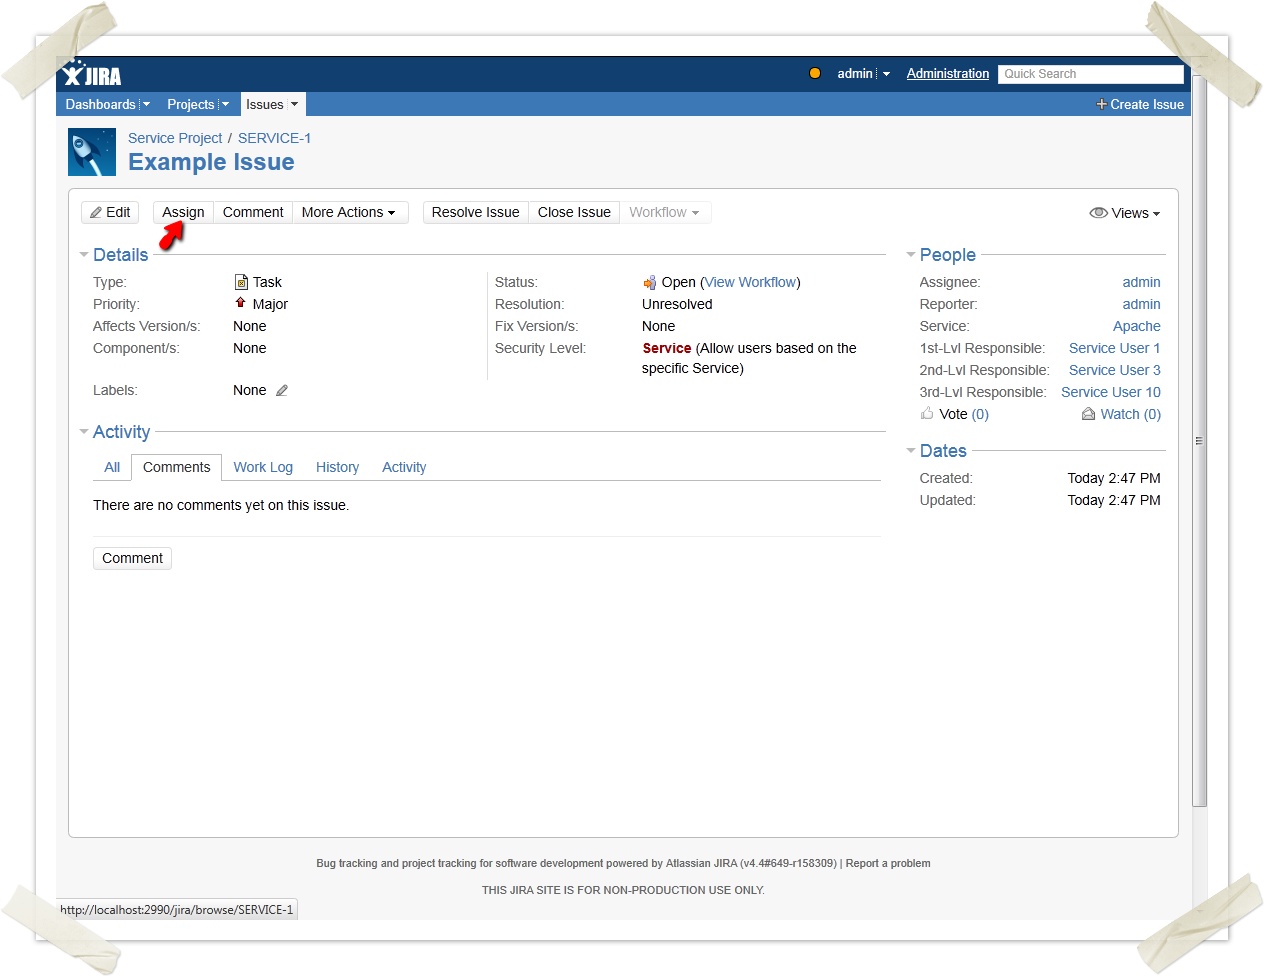
Scenario in Use
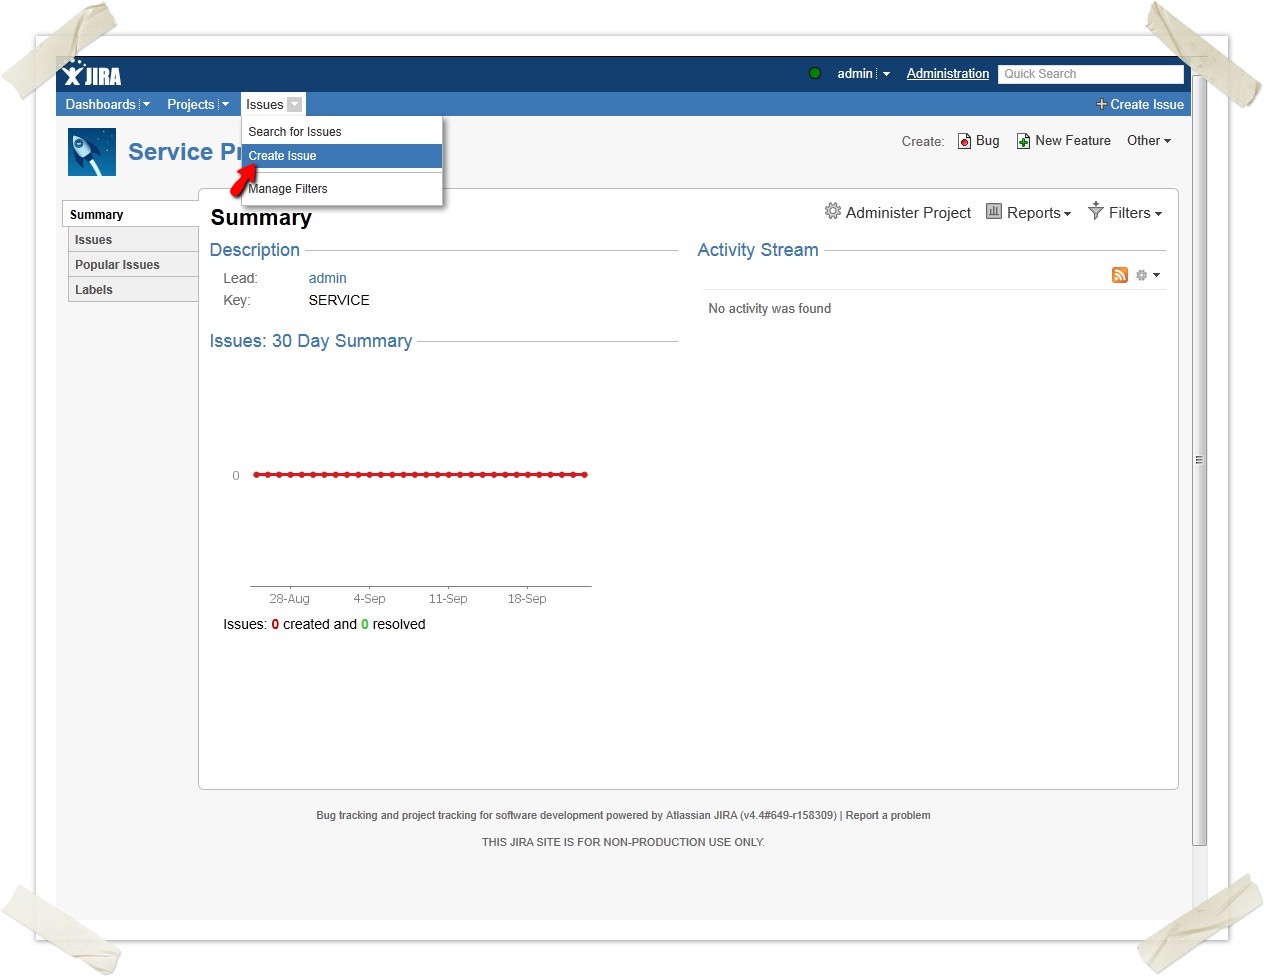
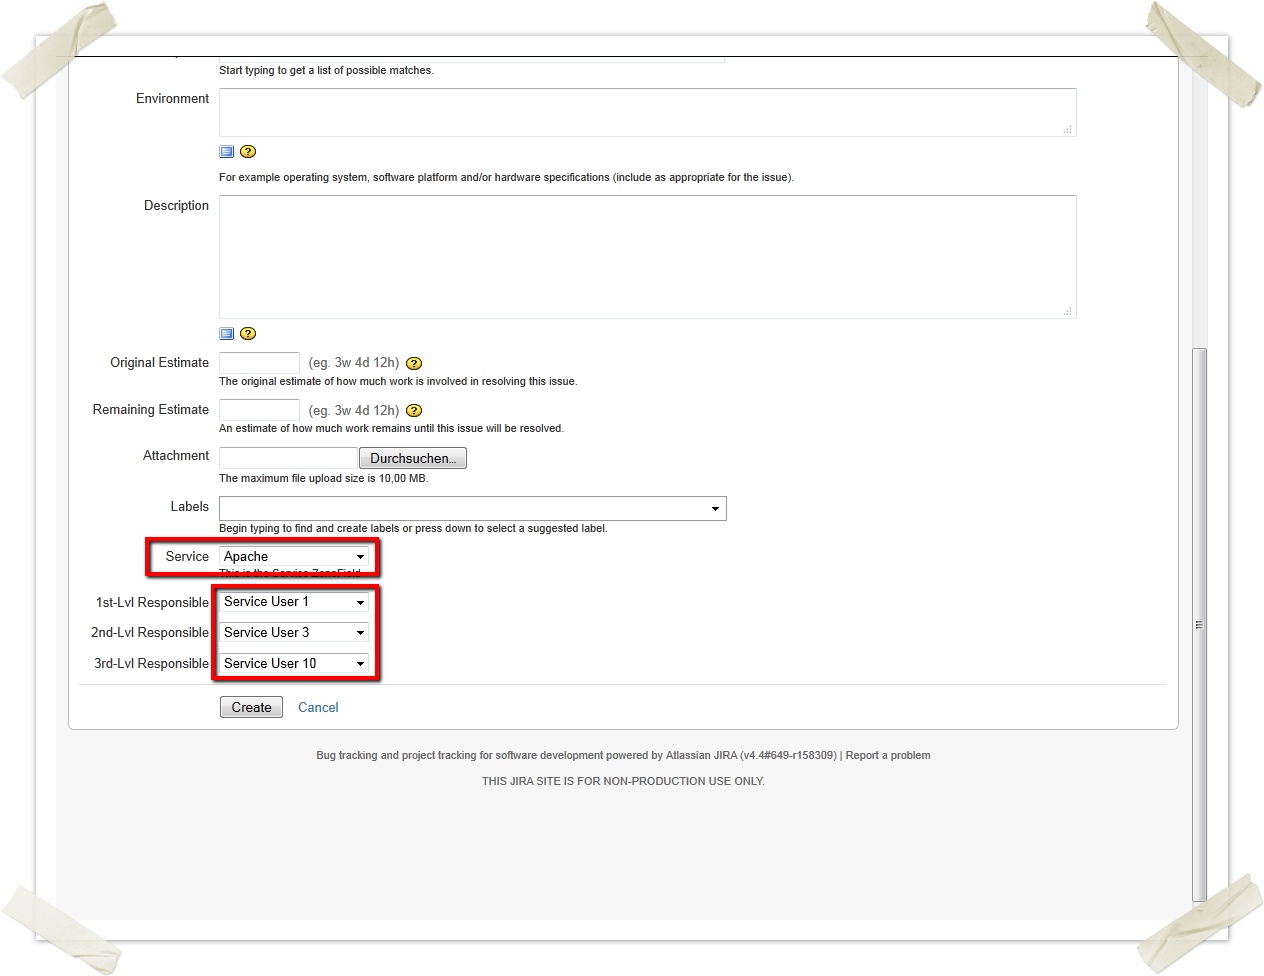
Now you create a new issue (as admin):
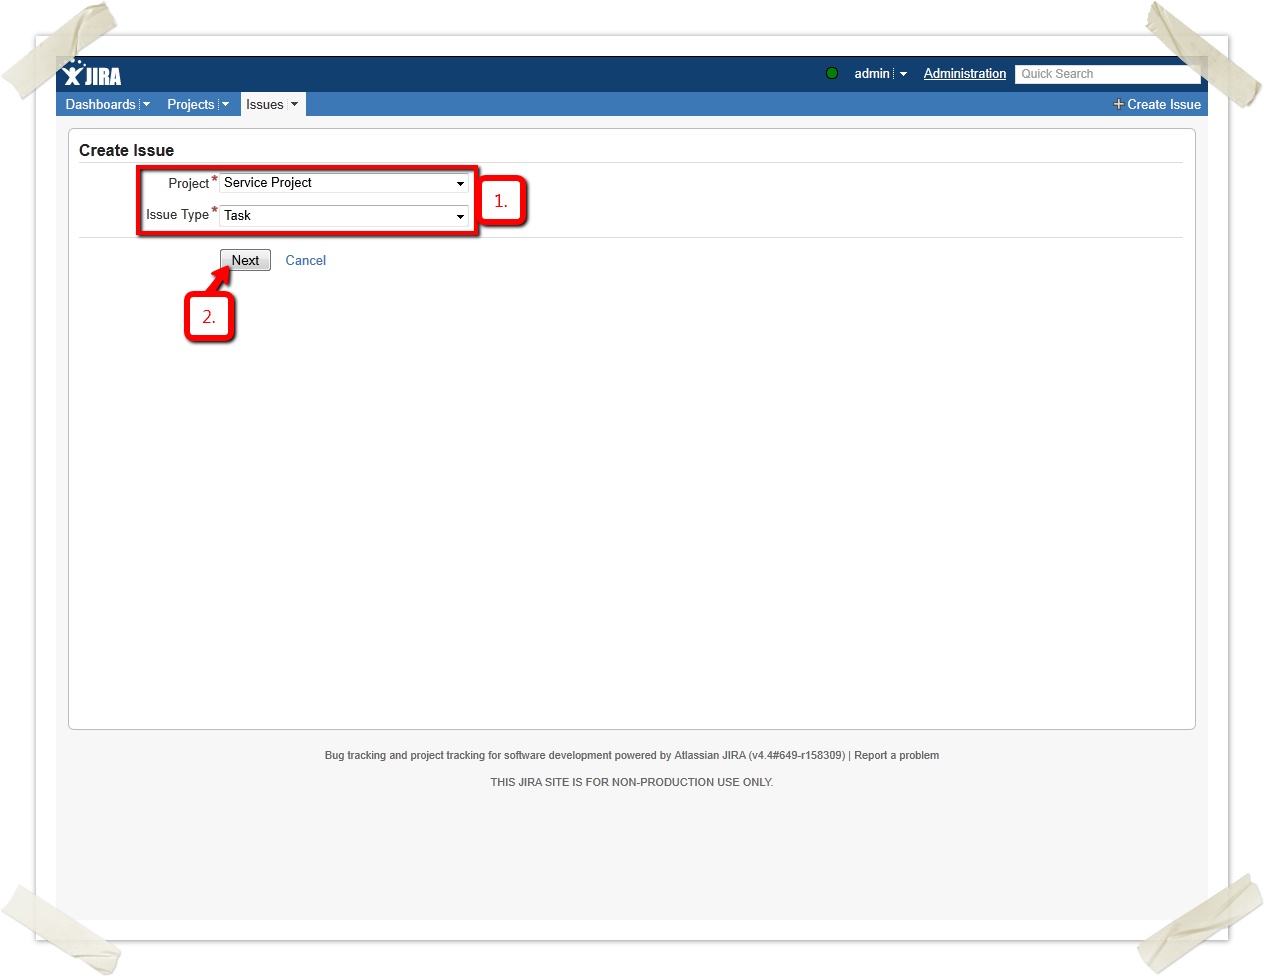
Use "Task" as type (remember: this was the type with our customized workflow):
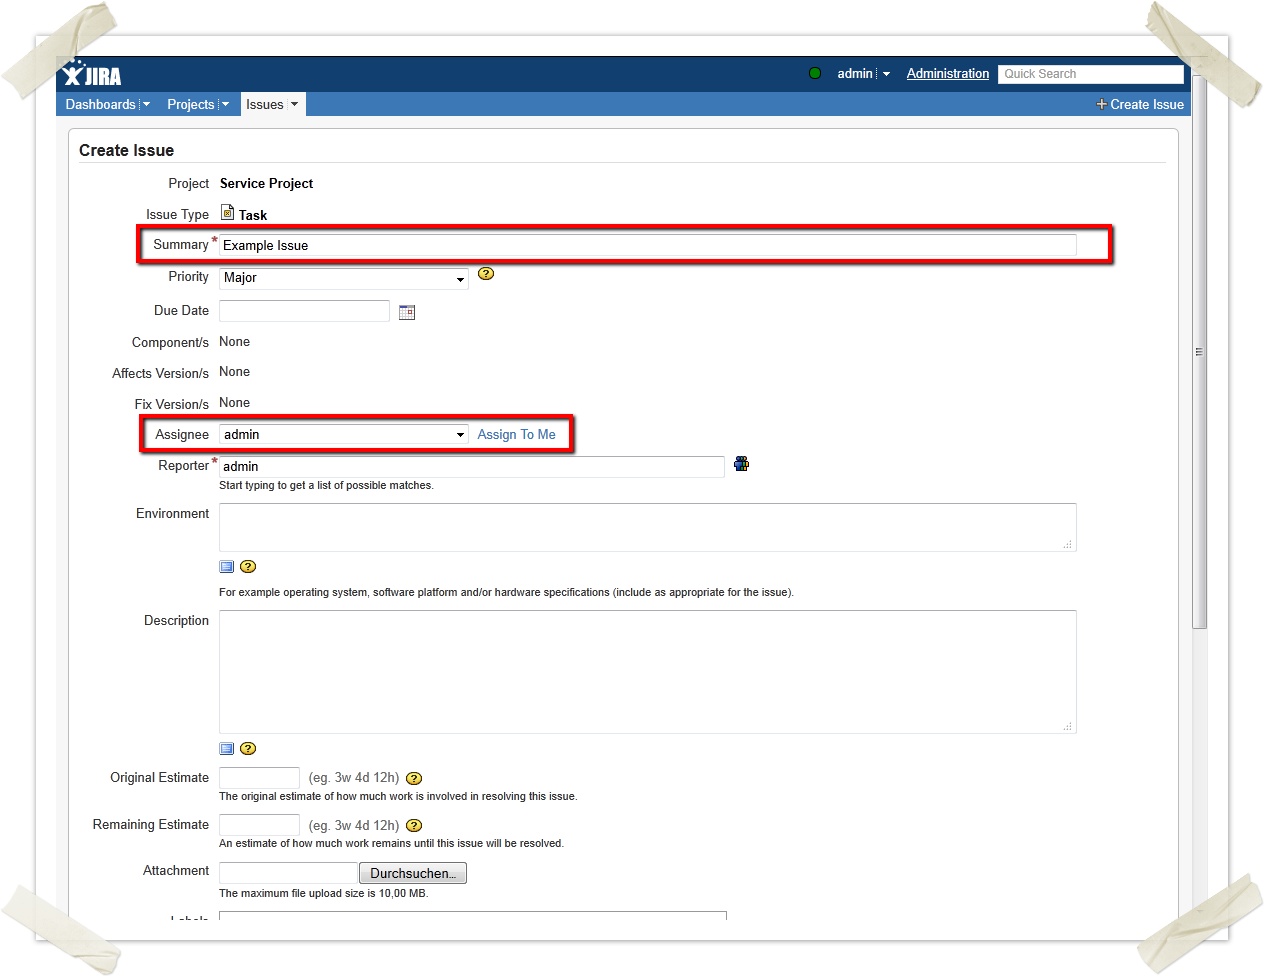
Note: You assign the issue to the Administrator (ie. yourself):
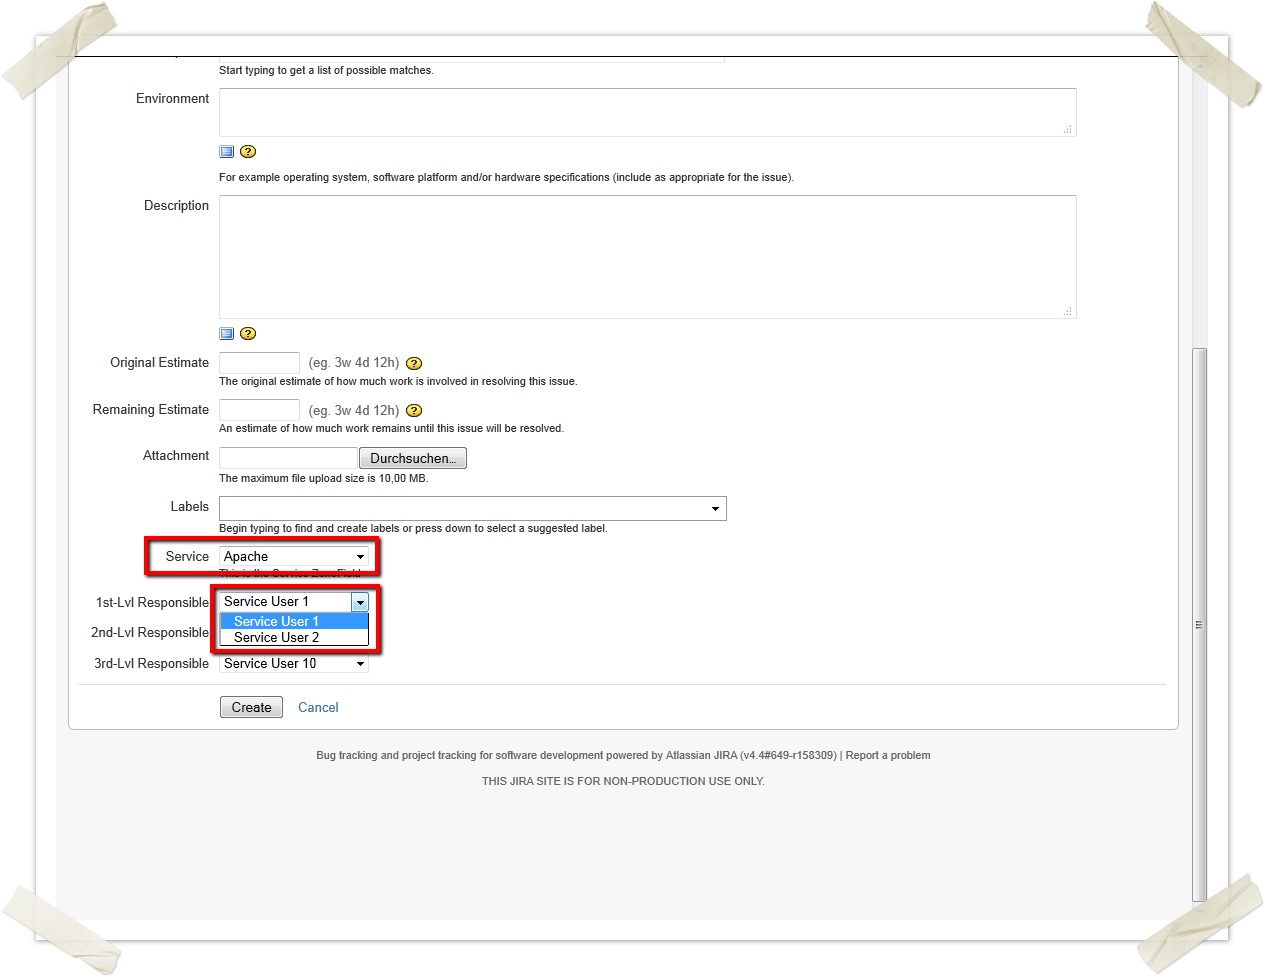
Lets now examine how the fields behave: depending on the selected value in our "Service" fields the available options in the user picker fields change accordingly:

The user picker only show the users which belong to the zone role configured via the role restriction of the field:
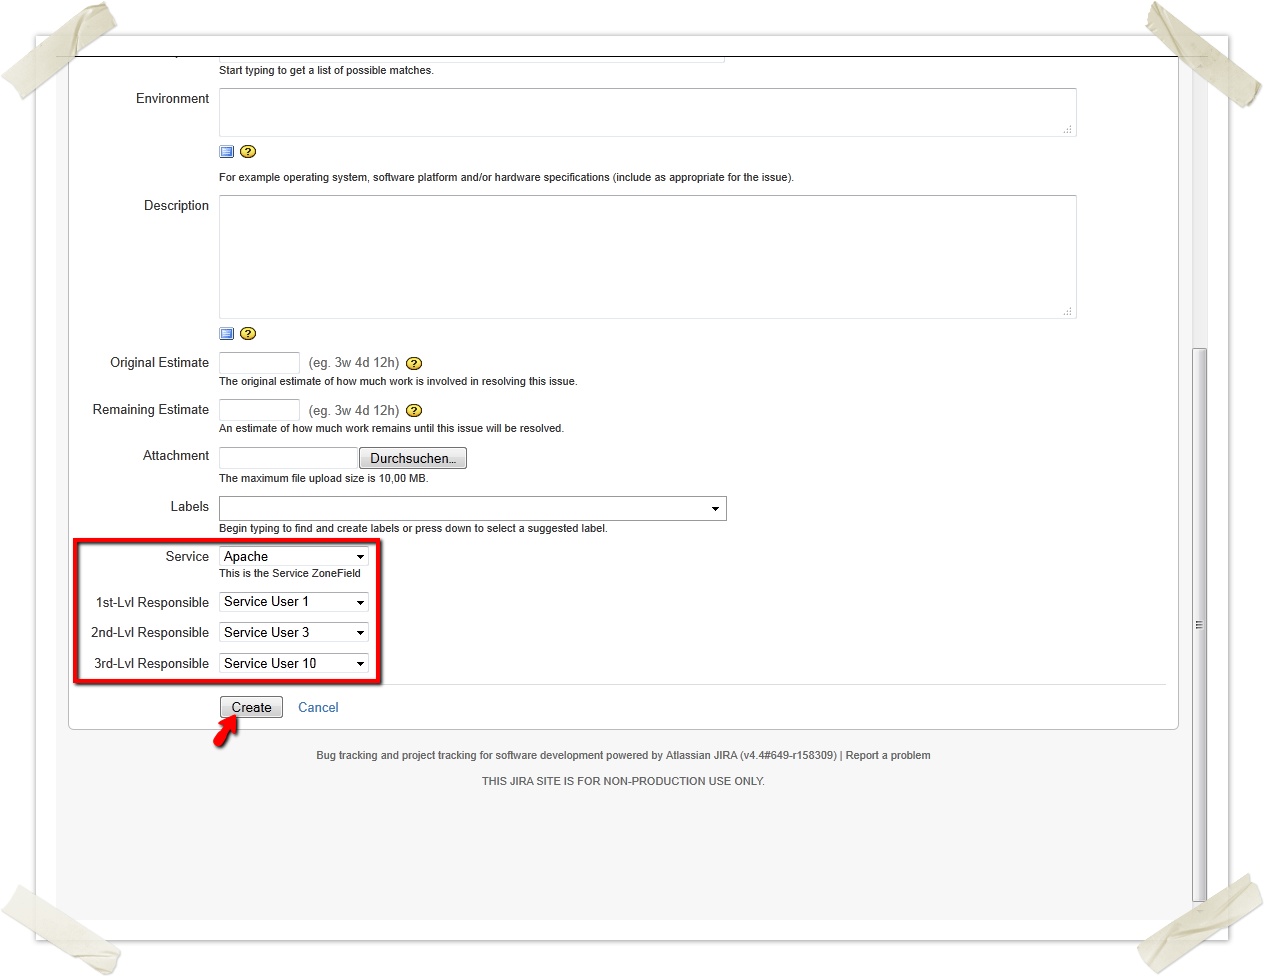
Now finish the creation of the issue:
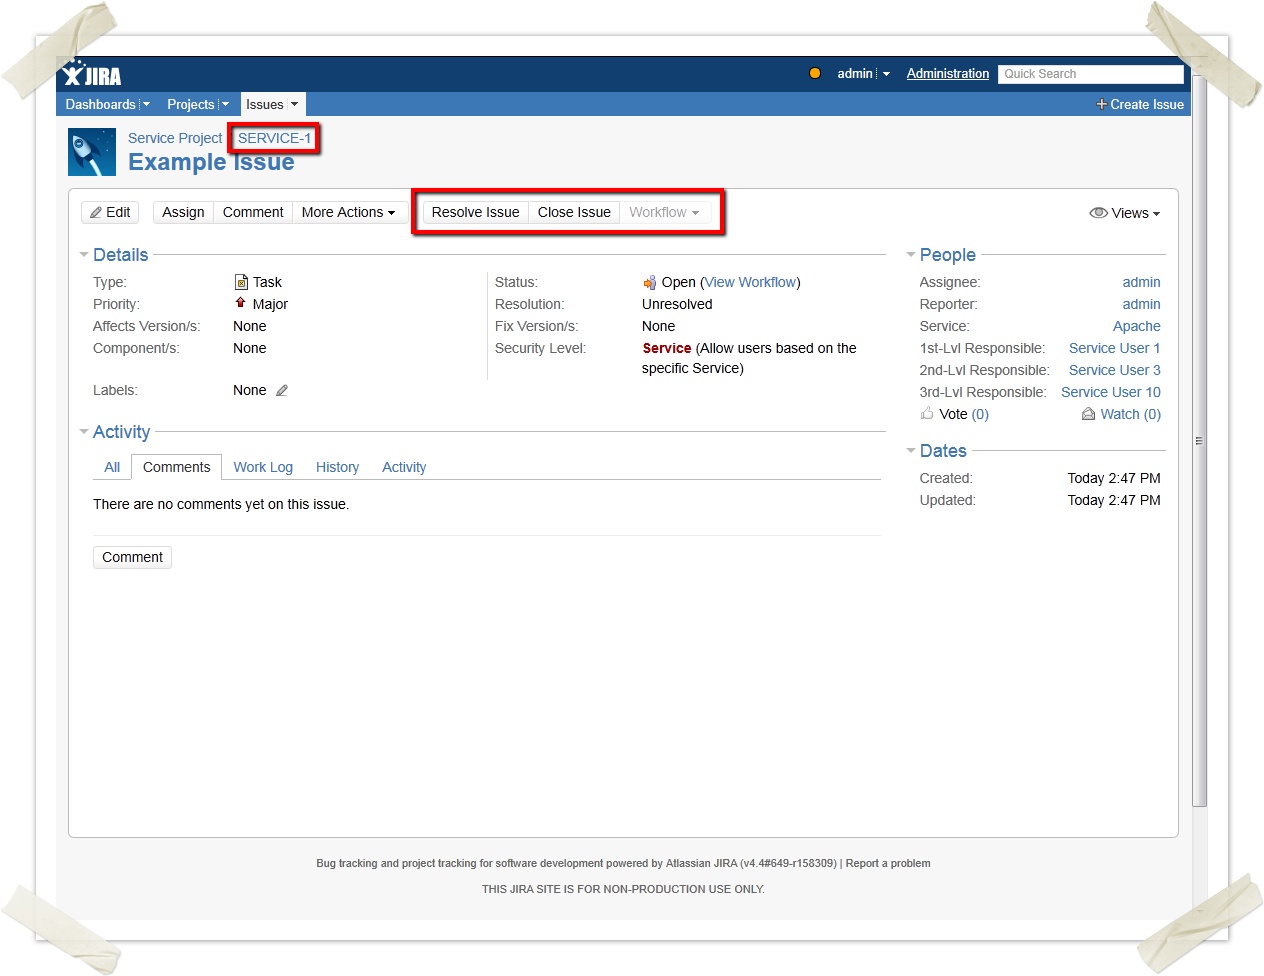
You have now successfully created the issue "SERVICE-1". Note that you don't have an option to "Start progress" (since by your configuration you must be the assignee AND the user of the service - in this particular case user of the "Apache" service - the admin user is assignee but not a user of the "Apache"-service!)
Thus you assign the ticket to a user of the "Apache"-service:

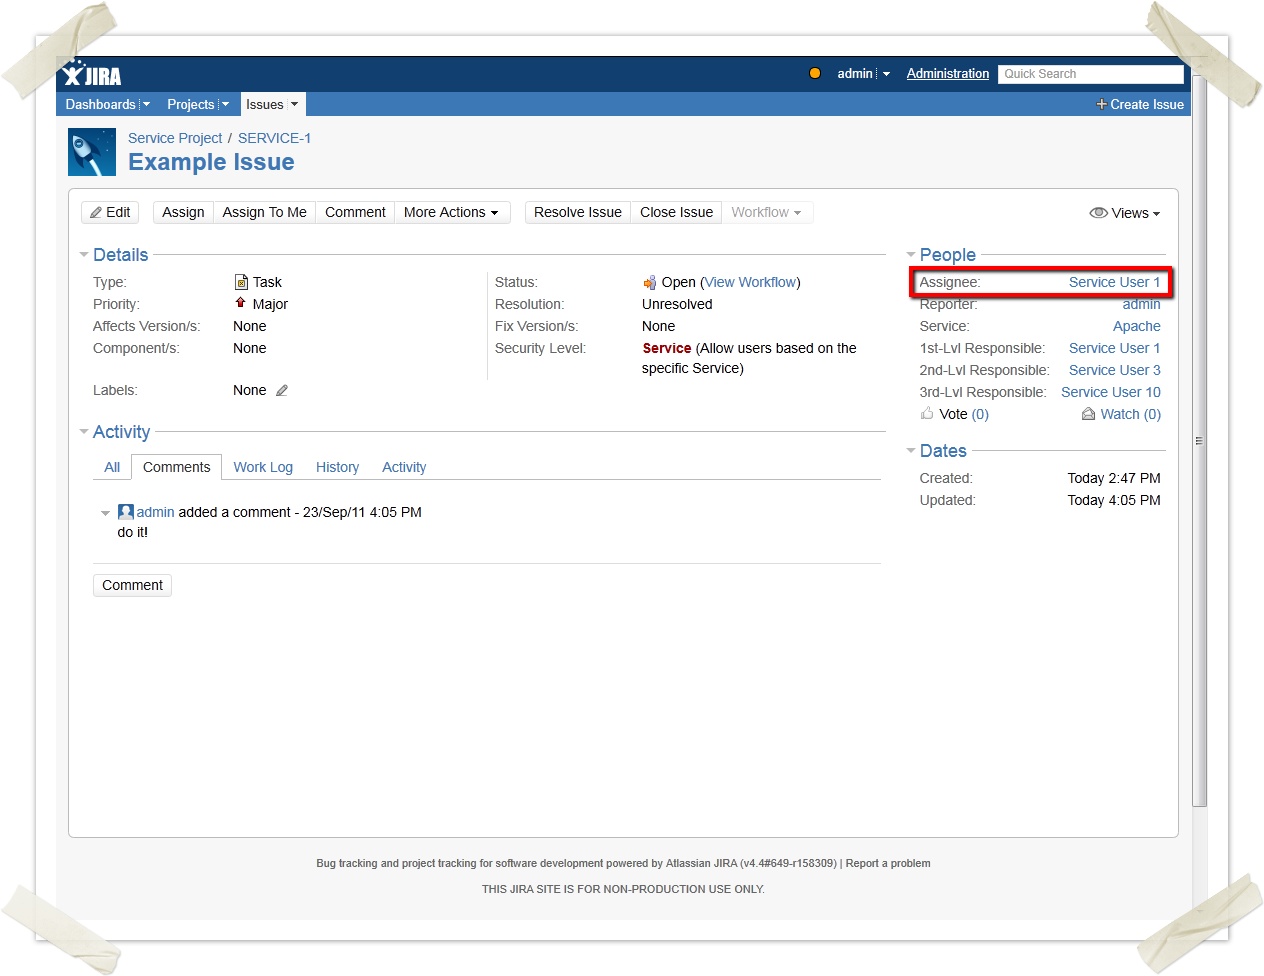
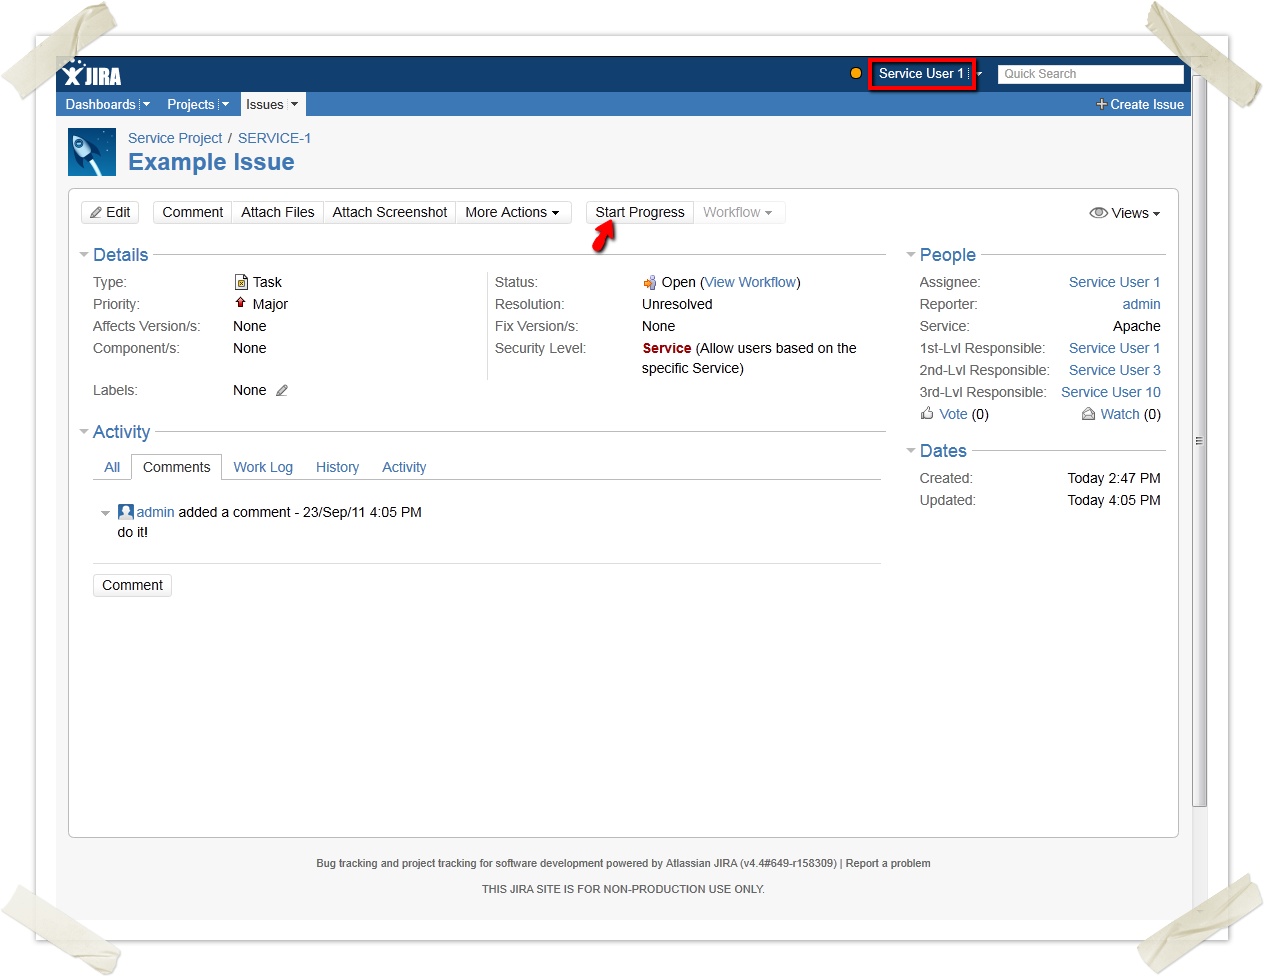
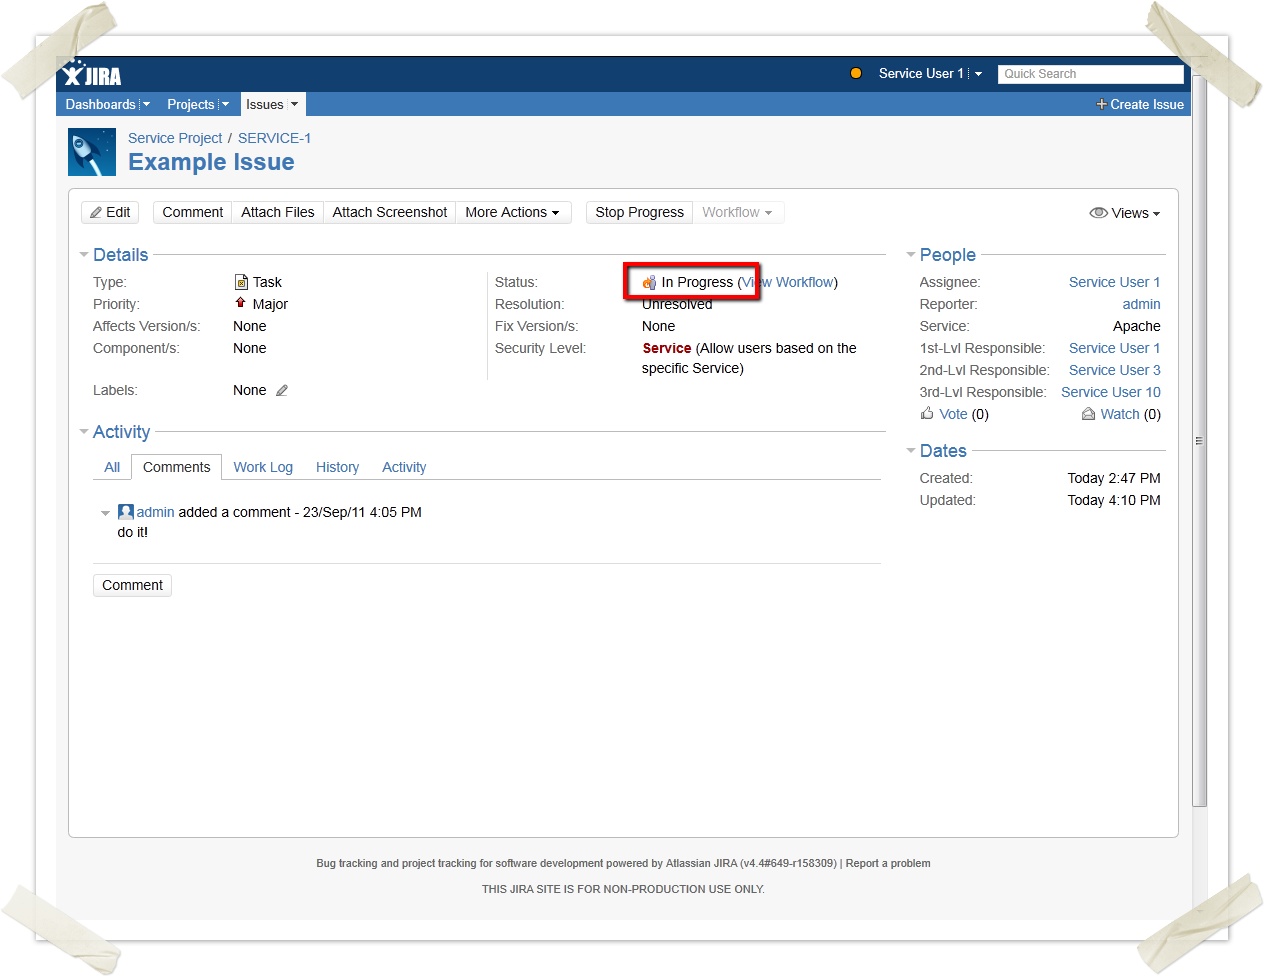
You now can use the user from the "Apache"-service and will have the option to "Start Progress"
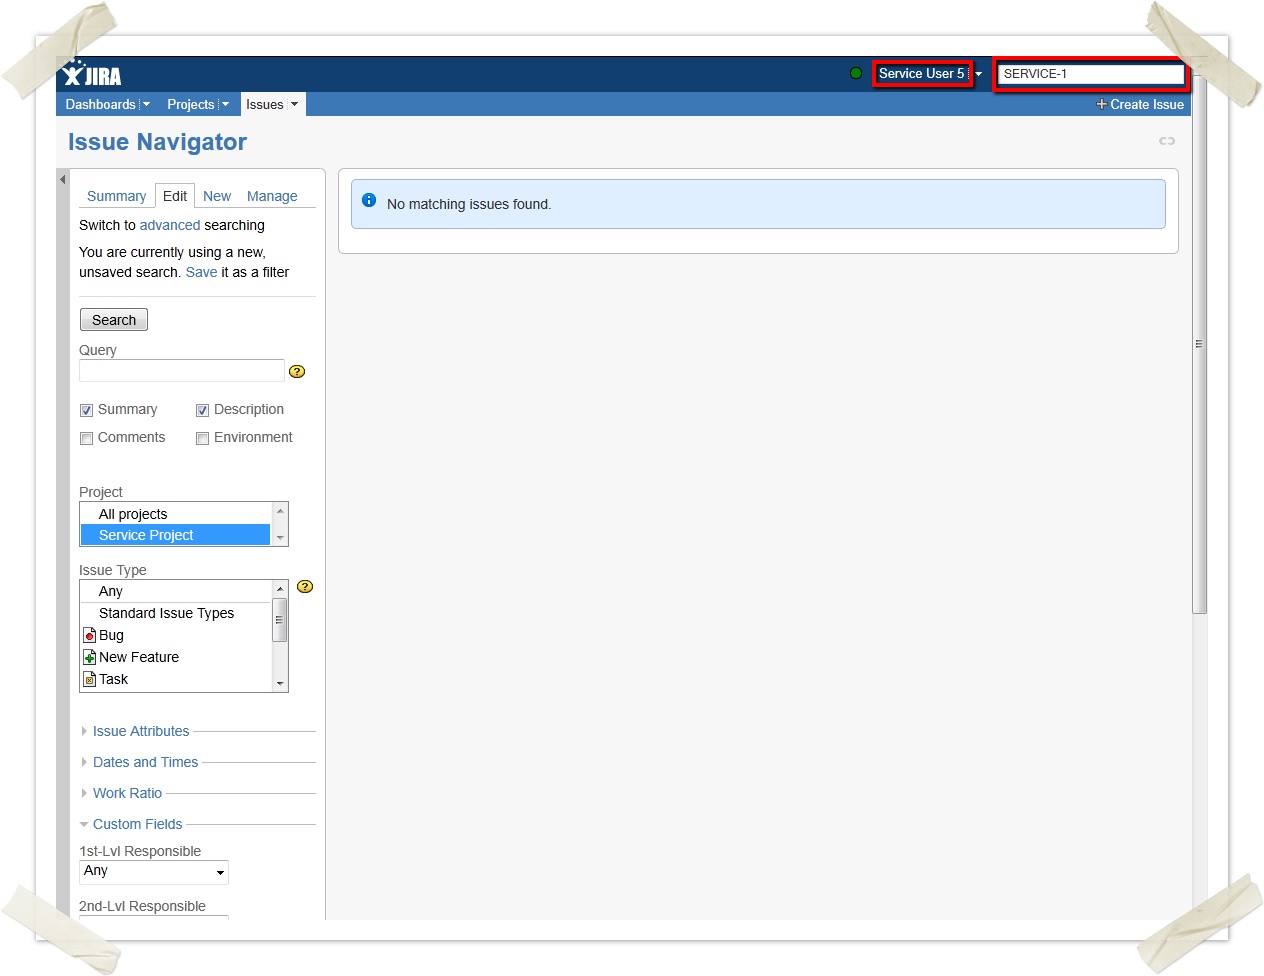
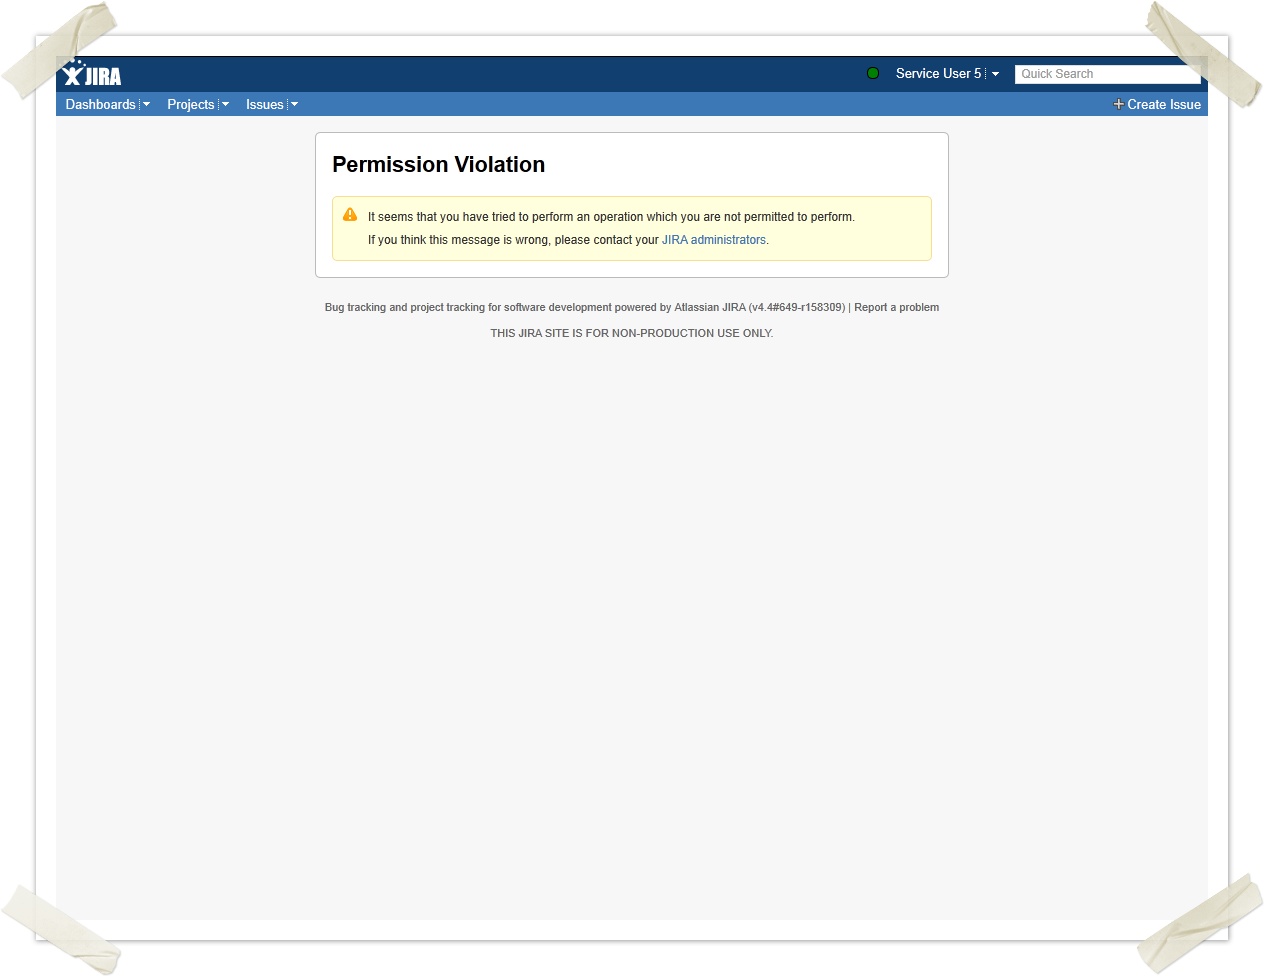
Final check: if you use a user which is neither Administrator nor user of the "Apache"-service, you cannot see the issue at all: