Manage Users and Zones
- Former user (Deleted)
Manage Users and Zones
- Log in as a JIRA Administrator.
- Go into JIRA Administration.
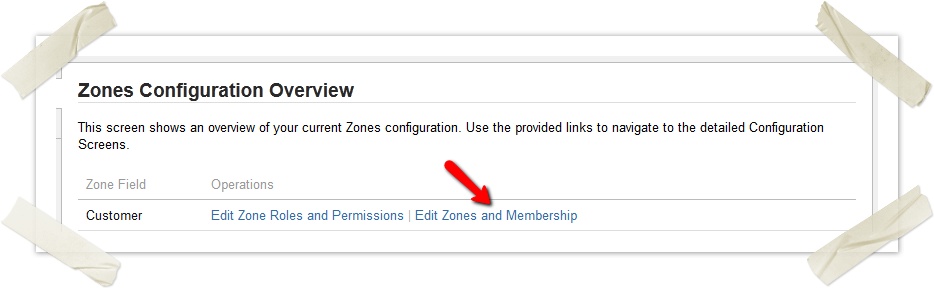
- Open the Zones Configuration page.
- Select Edit Zone and Membership of the Zone Field you like to configure.
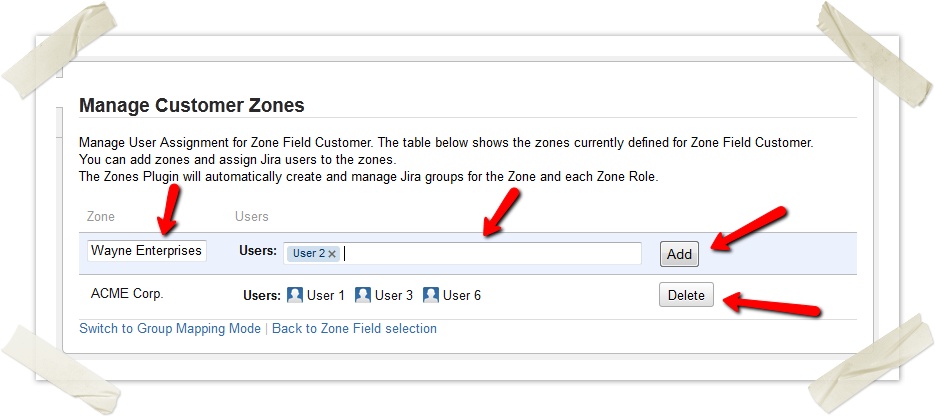
- You can now manage all Zones of this Zone Field.
- To add a Zone, fill in the Zone name on the first row on the leftmost column and click on Add. You can optionally add Users to the zone on the second column. Just start typing a part of the username and use the autocomplete dropdown to select users.
To delete a Zone, just click on the Delete button on the right.
Be careful when deleting a Zone. Restoring already deleted zones is very hard and not supported by celix!
- To change a Zone name just click on the Zone name and then save by clicking on the Update button.
- To add additional Users to a Zone just click on the Users and use autocompletion to add them. Save by clicking on the Update button
To delete existing Users from a Zone just click on the existing Users and remove them through clicking on the x on the right side of the username. Save by clicking on the Update button.
There is usually only one field to put Users in a Zone. If you have additional defined Zone Roles you will have multiple User fields. The default Zone Role is Users.
Advanced Management of Users and ZonesIt is possible to use the Group Mapping Mode for managing Users and Zones. Group Mapping Mode is not recommended to novel zones Users.
We generally do not give support in the wiki or on Atlassian Marketplace. Please use our Support JIRA instead.
The only exception to this is questions regarding the documentation. Please use the comment-system to ask questions concerning the documentation.